
Tag: Source edit |
No edit summary Tag: Source edit |
||
| (43 intermediate revisions by 10 users not shown) | |||
| Line 1: | Line 1: | ||
| − | {{Rating| |
+ | {{Rating|4}} |
{{Set header |
{{Set header |
||
|toyline=Video Games |
|toyline=Video Games |
||
| Line 44: | Line 44: | ||
!Character!!Class!!Abilities!!Image |
!Character!!Class!!Abilities!!Image |
||
|- |
|- |
||
| − | | style="text-align: center" |[[2-1B]] |
+ | | style="text-align: center" |[[Medical Droid|2-1B]] |
| style="text-align: center" |Extra |
| style="text-align: center" |Extra |
||
| |
| |
||
| + | |[[file:TSS Medical Droid.png|175px]] |
||
| − | | |
||
|- |
|- |
||
| style="text-align: center" |[[4-LOM]] |
| style="text-align: center" |[[4-LOM]] |
||
| style="text-align: center" |Bounty Hunter |
| style="text-align: center" |Bounty Hunter |
||
| |
| |
||
| + | *Rapid Fire |
||
|[[File:4-LOM (TSS).png|175px]] |
|[[File:4-LOM (TSS).png|175px]] |
||
|- |
|- |
||
| Line 57: | Line 58: | ||
| style="text-align: center" |Extra |
| style="text-align: center" |Extra |
||
| |
| |
||
| + | |[[file:8D8.png|175px]] |
||
| − | | |
||
|- |
|- |
||
| style="text-align: center" |[[AD-4M]] |
| style="text-align: center" |[[AD-4M]] |
||
| Line 68: | Line 69: | ||
| |
| |
||
*The Force |
*The Force |
||
| + | *Cut walls |
||
|[[File:LSWAaylaSecura.png|175px]] |
|[[File:LSWAaylaSecura.png|175px]] |
||
|- |
|- |
||
| Line 73: | Line 75: | ||
| style="text-align: center" |Hero |
| style="text-align: center" |Hero |
||
| |
| |
||
| + | *Access hero terminals |
||
| − | | |
||
| + | *Grapple |
||
| + | *Hit targets |
||
| + | |[[File:Admiral Ackbar (TSS).png|175px]] |
||
|- |
|- |
||
| style="text-align: center" |[[Vice Admiral Holdo|Admiral Holdo]] |
| style="text-align: center" |[[Vice Admiral Holdo|Admiral Holdo]] |
||
| style="text-align: center" | Hero |
| style="text-align: center" | Hero |
||
| |
| |
||
| + | *Access hero terminals |
||
| + | *Grapple |
||
| + | *Hit targets |
||
|[[File:LSWSHoldo.jpg|175px]] |
|[[File:LSWSHoldo.jpg|175px]] |
||
|- |
|- |
||
| − | | style="text-align: center" |Aftab Ackbar |
+ | | style="text-align: center" |[[Aftab Ackbar]] |
| style="text-align: center" |Hero |
| style="text-align: center" |Hero |
||
| |
| |
||
| + | *Access hero terminals |
||
| − | |[[File:AftabAckbarSkywalkerSaga.png|175px]] |
||
| + | *Grapple |
||
| + | *Hit targets |
||
| + | |[[File:AftabAckbarSkywalkerSaga.jpeg|175px]] |
||
|- |
|- |
||
| style="text-align: center" |[[Alcida-Auka]] |
| style="text-align: center" |[[Alcida-Auka]] |
||
| style="text-align: center" |Extra |
| style="text-align: center" |Extra |
||
| |
| |
||
| + | |[[file:Alcida-Auka.png|175px]] |
||
| − | | |
||
|- |
|- |
||
| − | | style="text-align: center" |[[Anakin Skywalker]] {{C| |
+ | | style="text-align: center" |[[Anakin Skywalker]] {{C|Episode I}} |
| − | | style="text-align: center" | |
+ | | style="text-align: center" |Extra |
| − | | |
||
| − | *Dark Rise ★ |
||
| − | *Fear the Dark Side ★ |
||
| − | *Force Crush ★ |
||
| − | * Power Push ★ |
||
| |
| |
||
| + | *Destroy silver LEGO objects |
||
| + | |[[File:LSWAnakin1.png|175px]] |
||
|- |
|- |
||
| − | | style="text-align: center" |[[Anakin Skywalker]] {{C| |
+ | | style="text-align: center" class="playable-variation"|[[Anakin Skywalker]] {{C|Podracer}} |
| − | | style="text-align: center" | |
+ | | style="text-align: center" class="playable-variation"|Extra |
| + | |class="playable-variation"| |
||
| − | | |
||
| + | *Destroy silver LEGO objects |
||
| − | *Dark Rise ★ |
||
| + | |class="playable-variation"|[[file:Anakin Skywalker (Podracer).png|175px]] |
||
| − | *Fear the Dark Side ★ |
||
| − | *Force Crush ★ |
||
| − | * Power Push ★ |
||
| − | |[[File:LSWAnakinSkywalker.png|175px]] |
||
|- |
|- |
||
| − | | style="text-align: center" |Anakin Skywalker {{C| |
+ | | style="text-align: center" class="playable-variation"|[[Anakin Skywalker]] {{C|Pilot}} |
| − | | style="text-align: center" | |
+ | | style="text-align: center" class="playable-variation"|Extra |
| + | |class="playable-variation"| |
||
| − | | |
||
| + | *Destroy silver LEGO objects |
||
| − | *The Force |
||
| − | |[[ |
+ | |class="playable-variation"|[[file:Anakin Skywalker (Pilot).png|175px]] |
|- |
|- |
||
| style="text-align: center" |[[Anakin Skywalker]] {{C|Episode II }} |
| style="text-align: center" |[[Anakin Skywalker]] {{C|Episode II }} |
||
| Line 118: | Line 123: | ||
| |
| |
||
*The Force |
*The Force |
||
| + | *Cut walls |
||
|[[File:ANAKINGREEN.PNG|175px]] |
|[[File:ANAKINGREEN.PNG|175px]] |
||
|- |
|- |
||
| − | | style="text-align: center" |[[Anakin Skywalker]] {{C|Episode |
+ | | style="text-align: center" class="playable-variation"|[[Anakin Skywalker]] {{C|Episode II - Cape}} |
| − | | style="text-align: center" |Jedi |
+ | | style="text-align: center" class="playable-variation"|Jedi |
| + | |class="playable-variation"| |
||
| − | | |
||
*The Force |
*The Force |
||
| + | *Cut walls |
||
| − | | |
||
| + | |class="playable-variation"|[[File:LSWAnakin2.png|175px]] |
||
|- |
|- |
||
| − | | style="text-align: center" |[[Anakin Skywalker]] {{C|Episode III}} |
+ | | style="text-align: center" class="playable-variation"|[[Anakin Skywalker]] {{C|Episode III - Cape}} |
| − | | style="text-align: center" |Jedi |
+ | | style="text-align: center" class="playable-variation"|Jedi |
| + | |class="playable-variation"| |
||
| − | | |
||
*The Force |
*The Force |
||
| + | *Cut walls |
||
| − | | |
||
| + | |class="playable-variation"|[[file:Anakin Skywalker (Episode III - Cape).jpeg|175px]] |
||
|- |
|- |
||
| − | | style="text-align: center" |[[Anakin Skywalker]] {{C|Episode |
+ | | style="text-align: center" class="playable-variation"|[[Anakin Skywalker]] {{C|Episode III}} |
| − | | style="text-align: center" | |
+ | | style="text-align: center" class="playable-variation"|Jedi |
| + | |class="playable-variation"| |
||
| − | | |
||
| + | *The Force |
||
| − | |[[File:LSWAnakin1.png|175px]] |
||
| + | *Cut walls |
||
| + | |class="playable-variation"|[[file:Anakin Skywalker (Episode III).png|175px]] |
||
|- |
|- |
||
| − | | style="text-align: center" |
+ | | style="text-align: center"|[[Anakin Skywalker]] {{C|Yellow Eyes}} |
| − | | style="text-align: center" | |
+ | | style="text-align: center" |Dark Side |
| − | | |
||
| |
| |
||
| + | *Dark Rise ★ |
||
| + | *Fear the Dark Side ★ |
||
| + | *Force Crush ★ |
||
| + | * Power Push ★ |
||
| + | *Cut walls |
||
| + | |[[File:LSWAnakinSkywalker.png|175px]] |
||
|- |
|- |
||
| − | | style="text-align: center" |[[Anakin Skywalker]] {{C| |
+ | | style="text-align: center" class="playable-variation"|[[Anakin Skywalker]] {{C|Charred}} |
| − | | style="text-align: center" | |
+ | | style="text-align: center" class="playable-variation"|Dark Side |
| + | |class="playable-variation"| |
||
| − | | |
||
| + | *Dark Rise ★ |
||
| − | | |
||
| + | *Fear the Dark Side ★ |
||
| + | *Force Crush ★ |
||
| + | *Power Push ★ |
||
| + | *Cut walls |
||
| + | |class="playable-variation"|[[file:Anakin Skywalker (Charred).png|175px]] |
||
|- |
|- |
||
| style="text-align: center" |[[Knights of Ren|Ap'Lek]] |
| style="text-align: center" |[[Knights of Ren|Ap'Lek]] |
||
| style="text-align: center" |Villain |
| style="text-align: center" |Villain |
||
| |
| |
||
| + | *Access villain terminals |
||
|[[File:ApLekSkywalkerSaga.png|175px]] |
|[[File:ApLekSkywalkerSaga.png|175px]] |
||
|- |
|- |
||
| Line 155: | Line 176: | ||
| style="text-align: center" |Bounty Hunter |
| style="text-align: center" |Bounty Hunter |
||
| |
| |
||
| + | *Rapid Fire |
||
| − | |[[File:AurraSingLOCKEDSkywalkerSaga.png|175px]] |
||
| + | |[[File:TSS Aurra Sing.png|175px]] |
||
|- |
|- |
||
| style="text-align: center" |[[Battle Droid|B1 Battle Droid]] |
| style="text-align: center" |[[Battle Droid|B1 Battle Droid]] |
||
| style="text-align: center" | Villain |
| style="text-align: center" | Villain |
||
| |
| |
||
| + | *Access villain terminals |
||
| + | *Hit targets |
||
|[[File:LSWB1Droid.png|175px]] |
|[[File:LSWB1Droid.png|175px]] |
||
|- |
|- |
||
| − | | style="text-align: center" |B1 Battle Droid {{C|Commander}} |
+ | | style="text-align: center" class="playable-variation"|B1 Battle Droid {{C|Commander}} |
| − | | style="text-align: center" |Villain |
+ | | style="text-align: center" class="playable-variation"|Villain |
| + | |class="playable-variation"| |
||
| − | | |
||
| + | *Access villain terminals |
||
| − | | |
||
| + | *Hit targets |
||
| + | |class="playable-variation"|[[file:B1 Battle Droid (Commander).png|175px]] |
||
|- |
|- |
||
| − | | style="text-align: center" |B1 Battle Droid {{C|Heavy Assault}} |
+ | | style="text-align: center" class="playable-variation"|B1 Battle Droid {{C|Heavy Assault}} |
| − | | style="text-align: center" |Villain |
+ | | style="text-align: center" class="playable-variation"|Villain |
| + | |class="playable-variation"| |
||
| − | | |
||
| + | *Access villain terminals |
||
| − | | |
||
| + | *Hit targets |
||
| + | |class="playable-variation"|[[file:B1 Battle Droid (Heavy Assault).png|175px]] |
||
|- |
|- |
||
| − | | style="text-align: center" |B1 Battle Droid {{C|Security}} |
+ | | style="text-align: center" class="playable-variation"|B1 Battle Droid {{C|Security}} |
| − | | style="text-align: center" |Villain |
+ | | style="text-align: center" class="playable-variation"|Villain |
| + | |class="playable-variation"| |
||
| − | | |
||
| + | *Access villain terminals |
||
| − | | |
||
| + | *Hit targets |
||
| + | |class="playable-variation"|[[file:B1 Battle Droid (Security).png|175px]] |
||
|- |
|- |
||
| − | | style="text-align: center" |B1 Battle Droid {{C|Geonosis}} |
+ | | style="text-align: center" class="playable-variation"|B1 Battle Droid {{C|Geonosis}} |
| − | | style="text-align: center" |Villain |
+ | | style="text-align: center" class="playable-variation"|Villain |
| + | |class="playable-variation"| |
||
| − | | |
||
| + | *Access villain terminals |
||
| − | |[[File:LSWBattleDroid2.PNG|175px]] |
||
| + | *Hit targets |
||
| + | |class="playable-variation"|[[File:LSWBattleDroid2.PNG|175px]] |
||
|- |
|- |
||
| − | | style="text-align: center" |B1 Battle Droid {{C|Kashyyyk}} |
+ | | style="text-align: center" class="playable-variation"|B1 Battle Droid {{C|Kashyyyk}} |
| − | | style="text-align: center" |Villain |
+ | | style="text-align: center" class="playable-variation"|Villain |
| + | |class="playable-variation"| |
||
| − | | |
||
| + | *Access villain terminals |
||
| − | | |
||
| + | *Hit targets |
||
| + | |class="playable-variation"|[[file:B1 Battle Droid (Kashyyyk).png|175px]] |
||
|- |
|- |
||
| style="text-align: center" |[[Super Battle Droid|B2 Super Battle Droid]] |
| style="text-align: center" |[[Super Battle Droid|B2 Super Battle Droid]] |
||
| style="text-align: center" |Villain |
| style="text-align: center" |Villain |
||
| |
| |
||
| + | *Access villain terminals |
||
|[[File:LSWSuperBattleDroid.PNG|175px]] |
|[[File:LSWSuperBattleDroid.PNG|175px]] |
||
|- |
|- |
||
| Line 195: | Line 230: | ||
| style="text-align: center" |Astromech Droid |
| style="text-align: center" |Astromech Droid |
||
| |
| |
||
| + | *Access astromech terminals |
||
| + | *Grapple |
||
|[[File:LSWBB-8.png|175px]] |
|[[File:LSWBB-8.png|175px]] |
||
|- |
|- |
||
| − | | style="text-align: center" |BB-8 {{C|Disguise}} |
+ | | style="text-align: center" class="playable-variation"|BB-8 {{C|Disguise}} |
| − | | style="text-align: center" |Astromech Droid |
+ | | style="text-align: center" class="playable-variation"|Astromech Droid |
| + | |class="playable-variation"| |
||
| − | | |
||
| + | *Access astromech terminals |
||
| + | *Grapple |
||
| + | |class="playable-variation"|[[File:BB-8 (Disguise).png|175px]] |
||
|- |
|- |
||
| style="text-align: center" |[[BB-9E]] |
| style="text-align: center" |[[BB-9E]] |
||
| style="text-align: center" |Astromech Droid |
| style="text-align: center" |Astromech Droid |
||
| |
| |
||
| + | *Access astromech terminals |
||
| + | *Grapple |
||
|[[File:BB9ESkywalkerSaga.png|175px]] |
|[[File:BB9ESkywalkerSaga.png|175px]] |
||
|- |
|- |
||
| − | | style="text-align: center" |Babu Frik |
+ | | style="text-align: center" |[[Babu Frik]] |
| − | | style="text-align: center" |Extra |
+ | | style="text-align: center" |Extra |
| + | | |
||
|[[File:BabuFrikSkywalkerSaga.png|175px]] |
|[[File:BabuFrikSkywalkerSaga.png|175px]] |
||
|- |
|- |
||
| Line 213: | Line 256: | ||
| style="text-align: center" |Hero |
| style="text-align: center" |Hero |
||
| |
| |
||
| − | |[[File: |
+ | |[[File:TSS Bail Organa.png|175px]] |
|- |
|- |
||
| style="text-align: center" |[[Bala-Tik]] |
| style="text-align: center" |[[Bala-Tik]] |
||
| Line 224: | Line 267: | ||
| |
| |
||
*The Force |
*The Force |
||
| − | |[[File: |
+ | |[[File:TSS Barriss Offee.png|175px]] |
|- |
|- |
||
| style="text-align: center" |[[Bazine Netal]] |
| style="text-align: center" |[[Bazine Netal]] |
||
| style="text-align: center" |Bounty Hunter |
| style="text-align: center" |Bounty Hunter |
||
| |
| |
||
| − | |[[File: |
+ | |[[File:TSS Bazine Netal.png|175px]] |
|- |
|- |
||
| − | | style="text-align: center" |Beaumont Kin |
+ | | style="text-align: center" |[[Beaumont Kin]] |
| style="text-align: center" |Hero |
| style="text-align: center" |Hero |
||
| |
| |
||
| + | |[[file:Beaumont Kin.jpeg|175px]] |
||
| − | | |
||
|- |
|- |
||
| style="text-align: center" |[[Kylo Ren|Ben Solo]] |
| style="text-align: center" |[[Kylo Ren|Ben Solo]] |
||
| style="text-align: center" |Jedi |
| style="text-align: center" |Jedi |
||
| |
| |
||
| − | |[[File: |
+ | |[[File:Ben Solo.jpeg|175px]] |
|- |
|- |
||
| style="text-align: center" |[[Bib Fortuna]] |
| style="text-align: center" |[[Bib Fortuna]] |
||
| style="text-align: center" |Extra |
| style="text-align: center" |Extra |
||
| |
| |
||
| − | |[[File: |
+ | |[[File:TSS Bib Fortuna.png|175px]] |
|- |
|- |
||
| style="text-align: center" |[[Biggs Darklighter]] |
| style="text-align: center" |[[Biggs Darklighter]] |
||
| style="text-align: center" |Hero |
| style="text-align: center" |Hero |
||
| |
| |
||
| − | |[[File:BiggsDarklighterSkywalkerSaga. |
+ | |[[File:BiggsDarklighterSkywalkerSaga.jpeg|175px]] |
|- |
|- |
||
| style="text-align: center" |[[Boba Fett]] |
| style="text-align: center" |[[Boba Fett]] |
||
| Line 257: | Line 300: | ||
|[[File:LSWBobaFett.png|175px]] |
|[[File:LSWBobaFett.png|175px]] |
||
|- |
|- |
||
| − | | style="text-align: center" |Boba Fett |
+ | | style="text-align: center" |Boba Fett {{C|Young}} |
| style="text-align: center" |Extra |
| style="text-align: center" |Extra |
||
| |
| |
||
| − | |[[File: |
+ | |[[File:TSS Young Fett.png|175px]] |
|- |
|- |
||
| style="text-align: center" |[[Bobbajo]] |
| style="text-align: center" |[[Bobbajo]] |
||
| style="text-align: center" |Extra |
| style="text-align: center" |Extra |
||
| |
| |
||
| − | |[[File: |
+ | |[[File:TSS Bobbajo.png|175px]] |
|- |
|- |
||
| style="text-align: center" |[[Boolio]] |
| style="text-align: center" |[[Boolio]] |
||
| style="text-align: center" |Hero |
| style="text-align: center" |Hero |
||
| |
| |
||
| − | |[[File: |
+ | |[[File:TSS Boolio.jpeg|175px]] |
|- |
|- |
||
| style="text-align: center" |[[Boss Nass]] |
| style="text-align: center" |[[Boss Nass]] |
||
| style="text-align: center" |Hero |
| style="text-align: center" |Hero |
||
| |
| |
||
| − | |[[File: |
+ | |[[File:TSS Boss Nass.png|175px]] |
|- |
|- |
||
| style="text-align: center" |[[Bossk]] |
| style="text-align: center" |[[Bossk]] |
||
| Line 291: | Line 334: | ||
| |
| |
||
*Language Translation |
*Language Translation |
||
| + | |[[file:C-3PO (Episode I).png|175px]] |
||
| − | | |
||
|- |
|- |
||
| − | | style="text-align: center" |[[C-3PO]] {{C|Rusted |
+ | | style="text-align: center" class="playable-variation"|[[C-3PO]] {{C|Rusted}} |
| − | | style="text-align: center" |Protocol Droid |
+ | | style="text-align: center" class="playable-variation"|Protocol Droid |
| + | |class="playable-variation"| |
||
| − | | |
||
*Language Translation |
*Language Translation |
||
| − | |[[File:LSWC3POGrey-0.PNG|175px]] |
+ | |class="playable-variation"|[[File:LSWC3POGrey-0.PNG|175px]] |
|- |
|- |
||
| − | | style="text-align: center" |C-3PO |
+ | | style="text-align: center" class="playable-variation"|C-3PO |
| − | | style="text-align: center" |Protocol Droid |
+ | | style="text-align: center" class="playable-variation"|Protocol Droid |
| + | |class="playable-variation"| |
||
| − | | |
||
*Language Translation |
*Language Translation |
||
| − | |[[File:LSWC-3PO.png|175px]] |
+ | |class="playable-variation"|[[File:LSWC-3PO.png|175px]] |
|- |
|- |
||
| − | | style="text-align: center" |C-3PO {{C|Red Arm}} |
+ | | style="text-align: center" class="playable-variation"|C-3PO {{C|Red Arm}} |
| − | | style="text-align: center" |Protocol Droid |
+ | | style="text-align: center" class="playable-variation"|Protocol Droid |
| + | |class="playable-variation"| |
||
| − | | |
||
*Language Translation |
*Language Translation |
||
| − | |[[File:LSWC3POTFA.PNG|175px]] |
+ | |class="playable-variation"|[[File:LSWC3POTFA.PNG|175px]] |
|- |
|- |
||
| − | | style="text-align: center" |C-3PO {{C|Kijimi Coat}} |
+ | | style="text-align: center" class="playable-variation"|C-3PO {{C|Kijimi Coat}} |
| − | | style="text-align: center" |Protocol Droid |
+ | | style="text-align: center" class="playable-variation"|Protocol Droid |
| + | |class="playable-variation"| |
||
| − | | |
||
*Language Translation |
*Language Translation |
||
| + | |class="playable-variation"|[[file:C-3PO (Kijimi Coat).png|175px]] |
||
|- |
|- |
||
| − | | style="text-align: center" |C-3PO {{C|Red Eyes}} |
+ | | style="text-align: center" class="playable-variation"|C-3PO {{C|Red Eyes}} |
| − | | style="text-align: center" |Protocol Droid |
+ | | style="text-align: center" class="playable-variation"|Protocol Droid |
| + | |class="playable-variation"| |
||
| − | | |
||
*Language Translation |
*Language Translation |
||
| + | |class="playable-variation"|[[file:C-3PO (Red Eyes).png|175px]] |
||
| − | | |
||
| + | |- |
||
| + | | style="text-align: center" class="playable-variation"|C-3PO {{C|Holiday Special}} |
||
| + | | style="text-align: center" class="playable-variation"|Protocol Droid |
||
| + | |class="playable-variation"| |
||
| + | *Language Translation |
||
| + | |class="playable-variation"|[[file:C-3PO (Holiday Special).png|175px]] |
||
|- |
|- |
||
| style="text-align: center" |[[Raymus Antilles|Captain Antilles]] |
| style="text-align: center" |[[Raymus Antilles|Captain Antilles]] |
||
| style="text-align: center" |Hero |
| style="text-align: center" |Hero |
||
| |
| |
||
| − | |[[File: |
+ | |[[File:TSS Captain Antilles.jpeg|175px]] |
|- |
|- |
||
| − | | style="text-align: center" |Captain Canady |
+ | | style="text-align: center" |[[Captain Canady]] |
| style="text-align: center" |Villain |
| style="text-align: center" |Villain |
||
| |
| |
||
| + | |[[file:Captain Canady.jpeg|175px]] |
||
| − | | |
||
|- |
|- |
||
| style="text-align: center" |[[Captain Panaka]] |
| style="text-align: center" |[[Captain Panaka]] |
||
| style="text-align: center" |Hero |
| style="text-align: center" |Hero |
||
| |
| |
||
| − | |[[File: |
+ | |[[File:TSS Captain Panaka.jpeg|175px]] |
|- |
|- |
||
| − | | style="text-align: center" |Captain Peavey |
+ | | style="text-align: center" |[[Captain Peavey]] |
| style="text-align: center" |Villain |
| style="text-align: center" |Villain |
||
| |
| |
||
| + | |[[file:Captain Peavey.png|175px]] |
||
| − | | |
||
|- |
|- |
||
| style="text-align: center" |[[Captain Phasma]] |
| style="text-align: center" |[[Captain Phasma]] |
||
| Line 347: | Line 397: | ||
|[[File:CaptainPhasmaSkywalkerSaga.png|175px]] |
|[[File:CaptainPhasmaSkywalkerSaga.png|175px]] |
||
|- |
|- |
||
| − | | style="text-align: center" |Captain Phasma {{C|Cracked Helmet}} |
+ | | style="text-align: center" class="playable-variation"|Captain Phasma {{C|Cracked Helmet}} |
| − | | style="text-align: center" |Villain |
+ | | style="text-align: center" class="playable-variation"|Villain |
| + | |class="playable-variation"| |
||
| − | | |
||
| − | |[[File: |
+ | |class="playable-variation"|[[File:Captain Phasma (Cracked Helmet).png|175px]] |
|- |
|- |
||
| style="text-align: center" |[[Captain Tarpals]] |
| style="text-align: center" |[[Captain Tarpals]] |
||
| Line 360: | Line 410: | ||
| style="text-align: center" | Hero |
| style="text-align: center" | Hero |
||
| |
| |
||
| − | |[[File: |
+ | |[[File:TSS Captain Typho.png|175px]] |
|- |
|- |
||
| style="text-align: center" |[[Knights of Ren|Cardo]] |
| style="text-align: center" |[[Knights of Ren|Cardo]] |
||
| Line 367: | Line 417: | ||
|[[File:CardoSkywalkerSaga.png|175px]] |
|[[File:CardoSkywalkerSaga.png|175px]] |
||
|- |
|- |
||
| − | | style="text-align: center" |Carib Diss |
+ | | style="text-align: center" |[[Carib Diss]] |
| style="text-align: center" |Bounty Hunter |
| style="text-align: center" |Bounty Hunter |
||
| |
| |
||
| − | |[[File: |
+ | |[[File:TSS Carib Diss.png|175px]] |
|- |
|- |
||
| style="text-align: center" |[[Chewbacca]] |
| style="text-align: center" |[[Chewbacca]] |
||
| Line 376: | Line 426: | ||
| |
| |
||
|[[File:LSWChewbacca.PNG|175px]] |
|[[File:LSWChewbacca.PNG|175px]] |
||
| + | |- |
||
| + | | style="text-align: center" class="playable-variation"|Chewbacca (Holiday Special) |
||
| + | | style="text-align: center" class="playable-variation"|Scoundrel |
||
| + | |class="playable-variation"| |
||
| + | |class="playable-variation"|[[File:Chewbacca (Holiday Special).png|175px]] |
||
|- |
|- |
||
| style="text-align: center" |[[Chief Chirpa]] |
| style="text-align: center" |[[Chief Chirpa]] |
||
| style="text-align: center" |Scavenger |
| style="text-align: center" |Scavenger |
||
| |
| |
||
| − | |[[File: |
+ | |[[File:TSS Chief Chirpa.png|175px]] |
|- |
|- |
||
| style="text-align: center" |[[Clone Trooper]] {{C|Phase II}} |
| style="text-align: center" |[[Clone Trooper]] {{C|Phase II}} |
||
| style="text-align: center" |Hero |
| style="text-align: center" |Hero |
||
| |
| |
||
| − | |[[File:LSWCloneTrooper.png|175px]] |
+ | ||[[File:LSWCloneTrooper.png|175px]] |
|- |
|- |
||
| − | | style="text-align: center" |[[212th Clone Trooper|Clone Trooper]] {{C|212th Attack Battalion}} |
+ | | style="text-align: center" class="playable-variation"|[[212th Clone Trooper|Clone Trooper]] {{C|212th Attack Battalion}} |
| − | | style="text-align: center" |Hero |
+ | | style="text-align: center" class="playable-variation"|Hero |
| + | |class="playable-variation"| |
||
| − | | |
||
| + | |class="playable-variation"|[[File:Clone Trooper (212th Attack Battalion).jpeg|175px]] |
||
| − | |[[File:212thSkywalkerSaga.png|175px]] |
||
|- |
|- |
||
| − | | style="text-align: center" |Clone Trooper {{C|Kashyyyk}} |
+ | | style="text-align: center" class="playable-variation"|Clone Trooper {{C|Kashyyyk}} |
| − | | style="text-align: center" |Hero |
+ | | style="text-align: center" class="playable-variation"|Hero |
| + | |class="playable-variation"| |
||
| − | | |
||
| + | |class="playable-variation"|[[file:Clone Trooper (Kashyyyk).jpeg|175px]] |
||
| − | | |
||
|- |
|- |
||
| − | | style="text-align: center" |Clone Trooper {{C|Coruscant Guard}} |
+ | | style="text-align: center" class="playable-variation"|Clone Trooper {{C|Coruscant Guard}} |
| − | | style="text-align: center" |Hero |
+ | | style="text-align: center" class="playable-variation"|Hero |
| + | |class="playable-variation"| |
||
| − | | |
||
| + | |class="playable-variation"|[[file:Clone Trooper (Coruscant Guard).jpeg|175px]] |
||
| − | | |
||
|- |
|- |
||
| − | | style="text-align: center" |[[501st Legion Clone Trooper|Clone Trooper]] {{C|501st Legion}} |
+ | | style="text-align: center" class="playable-variation"|[[501st Legion Clone Trooper|Clone Trooper]] {{C|501st Legion}} |
| − | | style="text-align: center" |Hero |
+ | | style="text-align: center" class="playable-variation"|Hero |
| + | |class="playable-variation"| |
||
| − | | |
||
| + | |class="playable-variation"|[[file:Clone Trooper (501st Legion).png|175px]] |
||
| − | | |
||
|- |
|- |
||
| − | | style="text-align: center" |[[Clone Trooper]] {{C|Phase I}} |
+ | | style="text-align: center" class="playable-variation"|[[Clone Trooper]] {{C|Phase I}} |
| − | | style="text-align: center" |Hero |
+ | | style="text-align: center" class="playable-variation"|Hero |
| + | |class="playable-variation"| |
||
| − | | |
||
| + | |class="playable-variation"|[[file:Clone Trooper (Phase I).jpeg|175px]] |
||
| − | | |
||
|- |
|- |
||
| − | | style="text-align: center" |[[Clone Trooper Sergeant|Clone Trooper]] {{C|Sergeant}} |
+ | | style="text-align: center" class="playable-variation"|[[Clone Trooper Sergeant|Clone Trooper]] {{C|Sergeant}} |
| − | | style="text-align: center" |Hero |
+ | | style="text-align: center" class="playable-variation"|Hero |
| + | |class="playable-variation"| |
||
| − | | |
||
| + | |class="playable-variation"|[[file:Clone Trooper (Sergeant).jpeg|175px]] |
||
| − | | |
||
|- |
|- |
||
| − | | style="text-align: center" |[[Clone Trooper Lieutenant|Clone Trooper]] {{C|Lieutenant}} |
+ | | style="text-align: center" class="playable-variation"|[[Clone Trooper Lieutenant|Clone Trooper]] {{C|Lieutenant}} |
| − | | style="text-align: center" |Hero |
+ | | style="text-align: center" class="playable-variation"|Hero |
| + | |class="playable-variation"| |
||
| − | | |
||
| + | |class="playable-variation"|[[file:Clone Trooper (Lieutenant).jpeg|175px]] |
||
| − | | |
||
|- |
|- |
||
| − | | style="text-align: center" |[[Clone Trooper Captain|Clone Trooper]] {{C|Captain}} |
+ | | style="text-align: center" class="playable-variation"|[[Clone Trooper Captain|Clone Trooper]] {{C|Captain}} |
| − | | style="text-align: center" |Hero |
+ | | style="text-align: center" class="playable-variation"|Hero |
| + | |class="playable-variation"| |
||
| − | | |
||
| + | |class="playable-variation"|[[file:Clone Trooper (Captain).jpeg|175px]] |
||
| − | | |
||
|- |
|- |
||
| − | | style="text-align: center" |[[Clone Trooper Commander|Clone Trooper]] {{C|Commander}} |
+ | | style="text-align: center" class="playable-variation"|[[Clone Trooper Commander|Clone Trooper]] {{C|Commander}} |
| − | | style="text-align: center" |Hero |
+ | | style="text-align: center" class="playable-variation"|Hero |
| + | |class="playable-variation"| |
||
| − | | |
||
| + | |class="playable-variation"|[[file:Clone Trooper (Commander).jpeg|175px]] |
||
| − | | |
||
|- |
|- |
||
| style="text-align: center" |[[Commander Cody]] |
| style="text-align: center" |[[Commander Cody]] |
||
| Line 437: | Line 492: | ||
|[[File:Cody LSWSS.png|175px]] |
|[[File:Cody LSWSS.png|175px]] |
||
|- |
|- |
||
| − | | style="text-align: center" |Commander D'acy |
+ | | style="text-align: center" |[[Commander D'acy]] |
| style="text-align: center" |Hero |
| style="text-align: center" |Hero |
||
| |
| |
||
| − | |[[File: |
+ | |[[File:Commander D'acy Lego.png|175px]] |
|- |
|- |
||
| style="text-align: center" |[[Commander Gree]] |
| style="text-align: center" |[[Commander Gree]] |
||
| style="text-align: center" | Hero |
| style="text-align: center" | Hero |
||
| |
| |
||
| + | |[[File:Commander Gree (TSS).png|175px]] |
||
| − | | |
||
|- |
|- |
||
| − | | style="text-align: center" |Commander Jir |
+ | | style="text-align: center" |[[Commander Jir]] |
| style="text-align: center" |Villain |
| style="text-align: center" |Villain |
||
| |
| |
||
| + | |[[file:Commander Jir.png|175px]] |
||
| − | | |
||
|- |
|- |
||
| style="text-align: center" |[[Count Dooku]] |
| style="text-align: center" |[[Count Dooku]] |
||
| Line 464: | Line 519: | ||
| style="text-align: center" |Extra |
| style="text-align: center" |Extra |
||
| |
| |
||
| − | |[[File: |
+ | |[[File:TSS D-O.png|175px]] |
| + | |- |
||
| + | | style="text-align: center" class="playable-variation"|[[D-O]] (Holiday Special) |
||
| + | | style="text-align: center" class="playable-variation"|Extra |
||
| + | |class="playable-variation"| |
||
| + | |class="playable-variation"|[[file:D-O (Holiday Special).png|175px]] |
||
|- |
|- |
||
| style="text-align: center" |[[DJ (Star Wars)|DJ]] |
| style="text-align: center" |[[DJ (Star Wars)|DJ]] |
||
| style="text-align: center" |Scoundrel |
| style="text-align: center" |Scoundrel |
||
| |
| |
||
| − | |[[File: |
+ | |[[File:TSS DJ.png|175px]] |
|- |
|- |
||
| − | | style="text-align: center" |[[DJ (Star Wars)|DJ]] {{C|First Order}} |
+ | | style="text-align: center" class="playable-variation"|[[DJ (Star Wars)|DJ]] {{C|First Order}} |
| − | | style="text-align: center" |Villain |
+ | | style="text-align: center" class="playable-variation"|Villain |
| + | |class="playable-variation"| |
||
| − | | |
||
| − | |[[File:DJFirstOrderSkywalkerSaga.png|175px]] |
+ | |class="playable-variation"|[[File:DJFirstOrderSkywalkerSaga.png|175px]] |
|- |
|- |
||
| style="text-align: center" |[[Darth Maul]] |
| style="text-align: center" |[[Darth Maul]] |
||
| Line 485: | Line 545: | ||
|[[File:LSWDarthMaul.png|175px]] |
|[[File:LSWDarthMaul.png|175px]] |
||
|- |
|- |
||
| − | | style="text-align: center" |[[Darth Maul]] {{C|No Cape}} |
+ | | style="text-align: center" class="playable-variation"|[[Darth Maul]] {{C|No Cape}} |
| − | | style="text-align: center" |Dark Side |
+ | | style="text-align: center" class="playable-variation"|Dark Side |
| + | |class="playable-variation"| |
||
| − | | |
||
*Dark Rise ★ |
*Dark Rise ★ |
||
*Fear the Dark Side ★ |
*Fear the Dark Side ★ |
||
*Force Crush ★ |
*Force Crush ★ |
||
*Power Push ★ |
*Power Push ★ |
||
| + | |class="playable-variation"|[[file:Darth Maul (No Cape).png|175px]] |
||
| − | | |
||
|- |
|- |
||
| style="text-align: center" |[[Darth Vader]] |
| style="text-align: center" |[[Darth Vader]] |
||
| Line 503: | Line 563: | ||
|[[File:LSWDarthVader.png|175px]] |
|[[File:LSWDarthVader.png|175px]] |
||
|- |
|- |
||
| − | | style="text-align: center" |Darth Vader (Holiday Special) |
+ | | style="text-align: center" class="playable-variation"|Darth Vader (Holiday Special) |
| − | | style="text-align: center" |Dark Side |
+ | | style="text-align: center" class="playable-variation"|Dark Side |
| + | |class="playable-variation"| |
||
| − | | |
||
*Dark Rise ★ |
*Dark Rise ★ |
||
*Fear the Dark Side ★ |
*Fear the Dark Side ★ |
||
| − | * |
+ | *Force Crush ★ |
*Power Push ★ |
*Power Push ★ |
||
| + | |class="playable-variation"|[[file:Darth Vader (Holiday Special).png|175px]] |
||
| − | | |
||
|- |
|- |
||
| − | | style="text-align: center" |Darth Vader (No Helmet) |
+ | | style="text-align: center" class="playable-variation"|Darth Vader (No Helmet) |
| − | | style="text-align: center" |Dark Side |
+ | | style="text-align: center" class="playable-variation"|Dark Side |
| + | |class="playable-variation"| |
||
| − | | |
||
*Dark Rise ★ |
*Dark Rise ★ |
||
*Fear the Dark Side ★ |
*Fear the Dark Side ★ |
||
| − | * |
+ | *Force Crush ★ |
*Power Push ★ |
*Power Push ★ |
||
| + | |class="playable-variation"|[[file:Darth Vader (No Helmet).png|175px]] |
||
| − | | |
||
|- |
|- |
||
| − | | style="text-align: center" |Dellso Prin |
+ | | style="text-align: center" |[[Dellso Prin]] |
| style="text-align: center" |Extra |
| style="text-align: center" |Extra |
||
| |
| |
||
| Line 534: | Line 594: | ||
| style="text-align: center" |Extra |
| style="text-align: center" |Extra |
||
| |
| |
||
| − | |[[File:Dexter Jettster.jpg| |
+ | |[[File:Dexter Jettster.jpg|175px]] |
|- |
|- |
||
| − | | style="text-align: center" |Doctor Evazan |
+ | | style="text-align: center" |[[Cornelius Evazan|Doctor Evazan]] |
| style="text-align: center" |Scoundrel |
| style="text-align: center" |Scoundrel |
||
| |
| |
||
| + | |[[file:TSS Doctor Evazan.png|175px]] |
||
| − | | |
||
|- |
|- |
||
| style="text-align: center" |[[Droideka]] |
| style="text-align: center" |[[Droideka]] |
||
| style="text-align: center" |Extra |
| style="text-align: center" |Extra |
||
| |
| |
||
| + | |[[file:TSS Droideka.png|175px]] |
||
| − | | |
||
|- |
|- |
||
| − | | style="text-align: center" |E-3PO |
+ | | style="text-align: center" |[[E-3PO]] |
| style="text-align: center" |Protocol Droid |
| style="text-align: center" |Protocol Droid |
||
| |
| |
||
| + | |[[file:E-3PO.png|175px]] |
||
| − | | |
||
|- |
|- |
||
| − | | style="text-align: center" |EV-9D9 Supervisor Droid |
+ | | style="text-align: center" |[[EV-9D9|EV-9D9 Supervisor Droid]] |
| style="text-align: center" |Extra |
| style="text-align: center" |Extra |
||
| |
| |
||
| + | |[[file:TSS EV-9D9.png|175px]] |
||
| − | | |
||
|- |
|- |
||
| style="text-align: center" |[[Ello Asty]] |
| style="text-align: center" |[[Ello Asty]] |
||
| style="text-align: center" |Hero |
| style="text-align: center" |Hero |
||
| |
| |
||
| + | |[[File:Ello Asty (TSS).png|175px]] |
||
| − | | |
||
|- |
|- |
||
| − | | style="text-align: center" |Emperor's Royal Guard |
+ | | style="text-align: center" |[[Royal Guard (Star Wars)|Emperor's Royal Guard]] |
| style="text-align: center" |Villain |
| style="text-align: center" |Villain |
||
| |
| |
||
| + | |[[file:TSS Royal Guard.png|175px]] |
||
| − | | |
||
|- |
|- |
||
| − | | style="text-align: center" |Empire Captain |
+ | | style="text-align: center" |Empire Captain |
| style="text-align: center" |Villain |
| style="text-align: center" |Villain |
||
| |
| |
||
| + | |[[file:Empire Captain.png|175px]] |
||
| − | | |
||
|- |
|- |
||
| style="text-align: center" |[[FN-2199]] |
| style="text-align: center" |[[FN-2199]] |
||
| style="text-align: center" |Villain |
| style="text-align: center" |Villain |
||
| |
| |
||
| + | |[[file:TSS FN-2199.png|175px]] |
||
| − | | |
||
|- |
|- |
||
| − | | style="text-align: center" | Figrin D'an |
+ | | style="text-align: center" | [[Figrin D'an]] |
| style="text-align: center" | Extra |
| style="text-align: center" | Extra |
||
| |
| |
||
| Line 584: | Line 644: | ||
| style="text-align: center" |Hero |
| style="text-align: center" |Hero |
||
| |
| |
||
| − | |[[File: |
+ | |[[File:Finn (Episode VII).png|175px]] |
|- |
|- |
||
| − | | style="text-align: center" |[[Finn]] {{C|Bacta Suit}} |
+ | | style="text-align: center" class="playable-variation"|[[Finn]] {{C|Bacta Suit}} |
| − | | style="text-align: center" |Hero |
+ | | style="text-align: center" class="playable-variation"|Hero |
| + | |class="playable-variation"| |
||
| − | | |
||
| + | |class="playable-variation"|[[file:Finn (Bacta Suit).jpeg|175px]] |
||
| − | | |
||
|- |
|- |
||
| − | | style="text-align: center" |[[Finn]] {{C|Jacket - White Shirt}} |
+ | | style="text-align: center" class="playable-variation"|[[Finn]] {{C|Jacket - White Shirt}} |
| − | | style="text-align: center" |Hero |
+ | | style="text-align: center" class="playable-variation"|Hero |
| + | |class="playable-variation"| |
||
| − | | |
||
| + | |class="playable-variation"|[[file:Finn (Jacket - White Shirt).png|175px]] |
||
| − | | |
||
|- |
|- |
||
| − | | style="text-align: center" | Finn {{C|Crait}} |
+ | | style="text-align: center" class="playable-variation"| Finn {{C|Crait}} |
| − | | style="text-align: center" | Hero |
+ | | style="text-align: center" class="playable-variation"| Hero |
| + | |class="playable-variation"| |
||
| − | | |
||
| + | |class="playable-variation"|[[file:Finn (Crait).jpeg|175px]] |
||
| − | | |
||
|- |
|- |
||
| − | | style="text-align: center" | Finn {{C|Episode IX}} |
+ | | style="text-align: center" class="playable-variation"| Finn {{C|Episode IX}} |
| − | | style="text-align: center" | Hero |
+ | | style="text-align: center" class="playable-variation"| Hero |
| + | |class="playable-variation"| |
||
| − | | |
||
| − | |[[File:LSWFinnIX.jpg|175px]] |
+ | |class="playable-variation"|[[File:LSWFinnIX.jpg|175px]] |
|- |
|- |
||
| − | | style="text-align: center" | Finn {{C|Kijimi Coat}} |
+ | | style="text-align: center" class="playable-variation"| Finn {{C|Kijimi Coat}} |
| − | | style="text-align: center" | Hero |
+ | | style="text-align: center" class="playable-variation"| Hero |
| + | |class="playable-variation"| |
||
| − | | |
||
| + | |class="playable-variation"|[[File:Finn (Kijimi Coat - TSS).png|175px]] |
||
| − | | |
||
|- |
|- |
||
| style="text-align: center" | Finn {{C|FN-2187}} |
| style="text-align: center" | Finn {{C|FN-2187}} |
||
| style="text-align: center" | Villain |
| style="text-align: center" | Villain |
||
| |
| |
||
| + | |[[file:Finn (FN-2187).png|175px]] |
||
| − | | |
||
|- |
|- |
||
| − | | style="text-align: center" | Finn {{C|FN-2187 - No Helmet}} |
+ | | style="text-align: center" class="playable-variation"| Finn {{C|FN-2187 - No Helmet}} |
| − | | style="text-align: center" | Villain |
+ | | style="text-align: center" class="playable-variation"| Villain |
| + | |class="playable-variation"| |
||
| − | | |
||
| + | |class="playable-variation"|[[file:Finn (FN-2187 - No Helmet).png|175px]] |
||
| − | | |
||
|- |
|- |
||
| − | | style="text-align: center" | Finn {{C|First Order}} |
+ | | style="text-align: center" class="playable-variation"| Finn {{C|First Order}} |
| − | | style="text-align: center" | Villain |
+ | | style="text-align: center" class="playable-variation"| Villain |
| + | |class="playable-variation"| |
||
| − | | |
||
| + | |class="playable-variation"|[[file:Finn (First Order).png|175px]] |
||
| − | | |
||
|- |
|- |
||
| − | | style="text-align: center" | Finn {{C|Episode VIII - Supremacy}} |
+ | | style="text-align: center" class="playable-variation"| Finn {{C|Episode VIII - Supremacy}} |
| − | | style="text-align: center" | Villain |
+ | | style="text-align: center" class="playable-variation"| Villain |
| + | |class="playable-variation"| |
||
| − | | |
||
| − | |[[File:LSWFinnOfficer.PNG|175px]] |
+ | |class="playable-variation"|[[File:LSWFinnOfficer.PNG|175px]] |
|- |
|- |
||
| style="text-align: center" |[[First Order Flametrooper]] |
| style="text-align: center" |[[First Order Flametrooper]] |
||
| style="text-align: center" |Villain |
| style="text-align: center" |Villain |
||
| |
| |
||
| + | |[[file:First Order Flametrooper.png|175px]] |
||
| − | | |
||
|- |
|- |
||
| style="text-align: center" |[[First Order Jet Trooper]] |
| style="text-align: center" |[[First Order Jet Trooper]] |
||
| style="text-align: center" |Villain |
| style="text-align: center" |Villain |
||
| |
| |
||
| + | |[[file:TSS First Order Jet Trooper.png|175px]] |
||
| − | | |
||
|- |
|- |
||
| style="text-align: center" |[[First Order Officer]] |
| style="text-align: center" |[[First Order Officer]] |
||
| style="text-align: center" |Villain |
| style="text-align: center" |Villain |
||
| |
| |
||
| + | |[[file:TSS First Order Officer.png|175px]] |
||
| − | | |
||
|- |
|- |
||
| style="text-align: center" |[[First Order Officer]] {{C|Kijimi}} |
| style="text-align: center" |[[First Order Officer]] {{C|Kijimi}} |
||
| style="text-align: center" |Villain |
| style="text-align: center" |Villain |
||
| |
| |
||
| + | |[[file:First Order Officer (Kijimi).png|175px]] |
||
| − | | |
||
|- |
|- |
||
| style="text-align: center" |[[First Order Snowtrooper]] |
| style="text-align: center" |[[First Order Snowtrooper]] |
||
| style="text-align: center" |Villain |
| style="text-align: center" |Villain |
||
| |
| |
||
| + | |[[file:TSS First Order Snowtrooper.png|175px]] |
||
| − | | |
||
|- |
|- |
||
| style="text-align: center" |First Order Cold Weather Assault Trooper |
| style="text-align: center" |First Order Cold Weather Assault Trooper |
||
| style="text-align: center" |Villain |
| style="text-align: center" |Villain |
||
| |
| |
||
| + | |[[file:First Order Cold Weather Assault Trooper.png|175px]] |
||
| − | | |
||
|- |
|- |
||
| style="text-align: center" |First Order Special Forces Fighter Pilot |
| style="text-align: center" |First Order Special Forces Fighter Pilot |
||
| style="text-align: center" |Villain |
| style="text-align: center" |Villain |
||
| |
| |
||
| + | |[[file:First Order Special Forces Fighter Pilot.png|175px]] |
||
| − | | |
||
|- |
|- |
||
| style="text-align: center" |[[First Order TIE Pilot|First Order TIE Fighter Pilot]] |
| style="text-align: center" |[[First Order TIE Pilot|First Order TIE Fighter Pilot]] |
||
| style="text-align: center" |Villain |
| style="text-align: center" |Villain |
||
| |
| |
||
| + | |[[file:TSS First Order TIE Fighter Pilot.png|175px]] |
||
| − | | |
||
|- |
|- |
||
| style="text-align: center" | [[Fodesinbeed Annodue|Fode and Beed]] |
| style="text-align: center" | [[Fodesinbeed Annodue|Fode and Beed]] |
||
| style="text-align: center" | Extra |
| style="text-align: center" | Extra |
||
| |
| |
||
| + | |[[file:TSS Fode and Beed.png|175px]] |
||
| − | | |
||
|- |
|- |
||
| − | | style="text-align: center" | G8-R3 |
+ | | style="text-align: center" | [[G8-R3]] |
| style="text-align: center" | Astromech Droid |
| style="text-align: center" | Astromech Droid |
||
| |
| |
||
| + | |[[File:G8-R3.png|175px]] |
||
| − | | |
||
|- |
|- |
||
| − | | style="text-align: center" | Garven Dreis |
+ | | style="text-align: center" | [[Garven Dreis]] {{C|Red Leader}} |
| style="text-align: center" | Hero |
| style="text-align: center" | Hero |
||
| |
| |
||
| + | |[[file:Garven Dreis (Red Leader).jpeg|175px]] |
||
| − | | |
||
|- |
|- |
||
| − | | style="text-align: center" | Gasgano |
+ | | style="text-align: center" | [[Gasgano]] |
| style="text-align: center" | Extra |
| style="text-align: center" | Extra |
||
| |
| |
||
| Line 696: | Line 756: | ||
|[[File:LSWGrievous.png|175px]] |
|[[File:LSWGrievous.png|175px]] |
||
|- |
|- |
||
| − | | style="text-align: center" | General Hux |
+ | | style="text-align: center" | [[General Hux]] |
| style="text-align: center" | Villain |
| style="text-align: center" | Villain |
||
| |
| |
||
| + | |[[File:TSS Hux.png|175px]] |
||
| − | | |
||
|- |
|- |
||
| style="text-align: center" | General Leia Organa |
| style="text-align: center" | General Leia Organa |
||
| Line 706: | Line 766: | ||
|[[File:LSWLeiaSequels.png|175px]] |
|[[File:LSWLeiaSequels.png|175px]] |
||
|- |
|- |
||
| − | | style="text-align: center" | General Leia Organa {{C|Silver/Grey Robes}} |
+ | | style="text-align: center" class="playable-variation"| General Leia Organa {{C|Silver/Grey Robes}} |
| − | | style="text-align: center" | Hero |
+ | | style="text-align: center" class="playable-variation"| Hero |
| + | |class="playable-variation"| |
||
| − | | |
||
| + | |class="playable-variation"|[[file:General Leia Organa (Silver-Grey Robes).jpeg|175px]] |
||
| − | | |
||
|- |
|- |
||
| − | | style="text-align: center" | General Leia Organa {{C|Bandaged}} |
+ | | style="text-align: center" class="playable-variation"| General Leia Organa {{C|Bandaged}} |
| − | | style="text-align: center" | Hero |
+ | | style="text-align: center" class="playable-variation"| Hero |
| + | |class="playable-variation"| |
||
| − | | |
||
| + | |class="playable-variation"|[[file:General Leia Organa (Bandaged).jpeg|175px]] |
||
| − | | |
||
|- |
|- |
||
| − | | style="text-align: center" | General Leia Organa {{C|Black Robes}} |
+ | | style="text-align: center" class="playable-variation"| General Leia Organa {{C|Black Robes}} |
| − | | style="text-align: center" | Hero |
+ | | style="text-align: center" class="playable-variation"| Hero |
| + | |class="playable-variation"| |
||
| − | | |
||
| + | |class="playable-variation"|[[file:General Leia Organa (Black Robes).jpeg|175px]] |
||
| − | | |
||
|- |
|- |
||
| − | | style="text-align: center" | General Leia Organa {{C|Episode IX}} |
+ | | style="text-align: center" class="playable-variation"| General Leia Organa {{C|Episode IX}} |
| − | | style="text-align: center" | Hero |
+ | | style="text-align: center" class="playable-variation"| Hero |
| + | |class="playable-variation"| |
||
| − | | |
||
| + | |class="playable-variation"|[[file:General Leia Organa (Episode IX).jpeg|175px]] |
||
| − | | |
||
|- |
|- |
||
| − | | style="text-align: center" | General Rieekan |
+ | | style="text-align: center" | [[General Rieekan]] |
| style="text-align: center" | Hero |
| style="text-align: center" | Hero |
||
| |
| |
||
| + | |[[file:TSS General Rieekan.png|175px]] |
||
| − | | |
||
|- |
|- |
||
| − | | style="text-align: center" | General Rieekan {{C|Hoth - Hood}} |
+ | | style="text-align: center" class="playable-variation"| General Rieekan {{C|Hoth - Hood}} |
| − | | style="text-align: center" | Hero |
+ | | style="text-align: center" class="playable-variation"| Hero |
| + | |class="playable-variation"| |
||
| − | | |
||
| + | |class="playable-variation"|[[file:General Rieekan (Hoth - Hood).jpeg|175px]] |
||
| − | | |
||
|- |
|- |
||
| style="text-align: center" |[[Gonk Droid]] |
| style="text-align: center" |[[Gonk Droid]] |
||
| Line 740: | Line 800: | ||
| |
| |
||
|[[File:GNKDroidSkywalkerSaga.png|175px]] |
|[[File:GNKDroidSkywalkerSaga.png|175px]] |
||
| + | |- |
||
| + | | style="text-align: center" class="playable-variation"|[[Gonk Droid]] (Holiday Speacial) |
||
| + | | style="text-align: center" class="playable-variation"|Extra |
||
| + | |class="playable-variation"| |
||
| + | |class="playable-variation"|[[File:Gonk Droid (Holiday Special).png|175px]] |
||
|- |
|- |
||
| style="text-align: center" |Gonkatine |
| style="text-align: center" |Gonkatine |
||
| style="text-align: center" |Extra |
| style="text-align: center" |Extra |
||
| |
| |
||
| + | |[[file:Gonkatine.png|175px]] |
||
| − | | |
||
|- |
|- |
||
| − | | style="text-align: center" |Grakchawwaa |
+ | | style="text-align: center" |[[Grakchawwaa]] |
| style="text-align: center" |Hero |
| style="text-align: center" |Hero |
||
| |
| |
||
| + | |[[file:Grakchawwaa.jpeg|175px]] |
||
| − | | |
||
|- |
|- |
||
| − | | style="text-align: center" |Grebe-Korora |
+ | | style="text-align: center" |[[Grebe-Korora]] |
| style="text-align: center" |Extra |
| style="text-align: center" |Extra |
||
| |
| |
||
| + | |[[file:Grebe-Korora.png|175px]] |
||
| − | | |
||
|- |
|- |
||
| style="text-align: center" |[[Greeata Jendowanian]] |
| style="text-align: center" |[[Greeata Jendowanian]] |
||
| Line 766: | Line 831: | ||
|[[File:LSWGreedo.png|175px]] |
|[[File:LSWGreedo.png|175px]] |
||
|- |
|- |
||
| − | | style="text-align: center" |Grummgar |
+ | | style="text-align: center" |[[Grummgar]] |
| style="text-align: center" |Extra |
| style="text-align: center" |Extra |
||
| |
| |
||
|[[File:Grummgar (TSS).jpg|175px]] |
|[[File:Grummgar (TSS).jpg|175px]] |
||
|- |
|- |
||
| − | | style="text-align: center" |Gungan Warrior |
+ | | style="text-align: center" |[[Gungan Warrior]] |
| style="text-align: center" |Hero |
| style="text-align: center" |Hero |
||
| |
| |
||
| + | |[[file:TSS Gungan Warrior.png|175px]] |
||
| − | | |
||
|- |
|- |
||
| − | | style="text-align: center" |H1-NT |
+ | | style="text-align: center" |[[H1-NT]] |
| style="text-align: center" |Protocol Droid |
| style="text-align: center" |Protocol Droid |
||
| |
| |
||
| + | |[[File:H1-NT.png|175px]] |
||
| − | | |
||
|- |
|- |
||
| style="text-align: center" |[[Han Solo]] {{C|Episode IV}} |
| style="text-align: center" |[[Han Solo]] {{C|Episode IV}} |
||
| Line 786: | Line 851: | ||
|[[File:LSWHanSolo.PNG|175px]] |
|[[File:LSWHanSolo.PNG|175px]] |
||
|- |
|- |
||
| − | | style="text-align: center" |Han Solo {{C|Hoth - Hood}} |
+ | | style="text-align: center" class="playable-variation"|Han Solo {{C|Hoth - Hood}} |
| − | | style="text-align: center" |Scoundrel |
+ | | style="text-align: center" class="playable-variation"|Scoundrel |
| + | |class="playable-variation"| |
||
| − | | |
||
| + | |class="playable-variation"|[[file:Han Solo (Hoth - Hood).png|175px]] |
||
| − | | |
||
|- |
|- |
||
| − | | style="text-align: center" |Han Solo {{C|Hoth}} |
+ | | style="text-align: center" class="playable-variation"|Han Solo {{C|Hoth}} |
| − | | style="text-align: center" |Scoundrel |
+ | | style="text-align: center" class="playable-variation"|Scoundrel |
| + | |class="playable-variation"| |
||
| − | | |
||
| − | |[[File:LSWHanHoth-0.PNG|175px]] |
+ | |class="playable-variation"|[[File:LSWHanHoth-0.PNG|175px]] |
|- |
|- |
||
| − | | style="text-align: center" |Han Solo {{C|Episode V}} |
+ | | style="text-align: center" class="playable-variation"|Han Solo {{C|Episode V}} |
| − | | style="text-align: center" |Scoundrel |
+ | | style="text-align: center" class="playable-variation"|Scoundrel |
| + | |class="playable-variation"| |
||
| − | | |
||
| − | |[[File: |
+ | |class="playable-variation"|[[File:Han Solo (Episode V).png|175px]] |
|- |
|- |
||
| − | | style="text-align: center" |Han Solo {{C|Carbonite - Shirt}} |
+ | | style="text-align: center" class="playable-variation"|Han Solo {{C|Carbonite - Shirt}} |
| − | | style="text-align: center" |Scoundrel |
+ | | style="text-align: center" class="playable-variation"|Scoundrel |
| + | |class="playable-variation"| |
||
| − | | |
||
| + | |class="playable-variation"|[[file:Han Solo (Carbonite - Shirt).png|175px]] |
||
| − | | |
||
|- |
|- |
||
| − | | style="text-align: center" |Han Solo {{C|Endor}} |
+ | | style="text-align: center" class="playable-variation"|Han Solo {{C|Endor}} |
| − | | style="text-align: center" |Scoundrel |
+ | | style="text-align: center" class="playable-variation"|Scoundrel |
| + | |class="playable-variation"| |
||
| − | | |
||
| − | |[[File: |
+ | |class="playable-variation"|[[File:Han Solo (Endor).png|175px]] |
|- |
|- |
||
| style="text-align: center" |Han Solo {{C|Carbonite}} |
| style="text-align: center" |Han Solo {{C|Carbonite}} |
||
| style="text-align: center" |Extra |
| style="text-align: center" |Extra |
||
| |
| |
||
| + | |[[file:TSS Han Solo (Carbonite).png|175px]] |
||
| − | | |
||
|- |
|- |
||
| style="text-align: center" |Han Solo (Episode VII) |
| style="text-align: center" |Han Solo (Episode VII) |
||
| style="text-align: center" |Scoundrel |
| style="text-align: center" |Scoundrel |
||
| |
| |
||
| + | |[[file:Han Solo (Episode VII).png|175px]] |
||
| − | | |
||
|- |
|- |
||
| style="text-align: center" |Han Solo {{C|Stormtrooper - No Helmet}} |
| style="text-align: center" |Han Solo {{C|Stormtrooper - No Helmet}} |
||
| style="text-align: center" |Villain |
| style="text-align: center" |Villain |
||
| |
| |
||
| + | |[[file:Han Solo (Stormtrooper - No Helmet).png|175px]] |
||
| − | | |
||
|- |
|- |
||
| − | | style="text-align: center" |Han Solo {{C|Stormtrooper}} |
+ | | style="text-align: center" class="playable-variation"|Han Solo {{C|Stormtrooper}} |
| − | | style="text-align: center" |Villain |
+ | | style="text-align: center" class="playable-variation"|Villain |
| + | |class="playable-variation"| |
||
| − | | |
||
| + | |class="playable-variation"|[[file:Han Solo (Stormtrooper).png|175px]] |
||
| − | | |
||
|- |
|- |
||
| − | | style="text-align: center" |IG0101 MagnaGuard Droid |
+ | | style="text-align: center" |[[MagnaGuard|IG0101 MagnaGuard Droid]] |
| style="text-align: center" |Extra |
| style="text-align: center" |Extra |
||
| |
| |
||
|[[File:IG0101 MagnaGuard Droid (TSS).png|175px]] |
|[[File:IG0101 MagnaGuard Droid (TSS).png|175px]] |
||
| − | |- |
||
| − | | style="text-align: center" |[[IG-11]] |
||
| − | | style="text-align: center" |Bounty Hunter |
||
| − | | |
||
| − | |[[File:IG88SkywalkerSaga.png|175px]] |
||
|- |
|- |
||
| style="text-align: center" |[[IG-88]] |
| style="text-align: center" |[[IG-88]] |
||
| Line 846: | Line 906: | ||
|[[File:IG88SkywalkerSaga.png|175px]] |
|[[File:IG88SkywalkerSaga.png|175px]] |
||
|- |
|- |
||
| − | | style="text-align: center" |Imperial |
+ | | style="text-align: center" |[[Imperial Trooper]] |
| style="text-align: center" |Villain |
| style="text-align: center" |Villain |
||
| |
| |
||
| + | |[[file:TSS Imperial Trooper.png|175px]] |
||
| − | | |
||
|- |
|- |
||
| style="text-align: center" |Imperial Gunnery Technician |
| style="text-align: center" |Imperial Gunnery Technician |
||
| style="text-align: center" |Villain |
| style="text-align: center" |Villain |
||
| |
| |
||
| + | |[[file:Imperial Gunnery Technician.png|175px]] |
||
| − | | |
||
|- |
|- |
||
| − | | style="text-align: center" |Imperial Probe Droid |
+ | | style="text-align: center" |[[Imperial Probe Droid]] |
| style="text-align: center" |Extra |
| style="text-align: center" |Extra |
||
| |
| |
||
| + | |[[file:Imperial Probe Droid.png|175px]] |
||
| − | | |
||
|- |
|- |
||
| style="text-align: center" |[[Jabba the Hutt]] |
| style="text-align: center" |[[Jabba the Hutt]] |
||
| Line 871: | Line 931: | ||
|[[File:LSWJangoFett.png|175px]] |
|[[File:LSWJangoFett.png|175px]] |
||
|- |
|- |
||
| − | | style="text-align: center" |[[Jango Fett]] {{C|Casual}} |
+ | | style="text-align: center" class="playable-variation"|[[Jango Fett]] {{C|Casual}} |
| − | | style="text-align: center" |Bounty Hunter |
+ | | style="text-align: center" class="playable-variation"|Bounty Hunter |
| + | |class="playable-variation"| |
||
| − | | |
||
| + | |class="playable-variation"|[[file:Jango Fett (Casual).png|175px]] |
||
| − | | |
||
|- |
|- |
||
| style="text-align: center" |[[Jango Fett]] {{C|Clone}} |
| style="text-align: center" |[[Jango Fett]] {{C|Clone}} |
||
| style="text-align: center" |Extra |
| style="text-align: center" |Extra |
||
| |
| |
||
| + | |[[file:Jango Fett (Clone).png|175px]] |
||
| − | | |
||
|- |
|- |
||
| style="text-align: center" |[[Jannah]] |
| style="text-align: center" |[[Jannah]] |
||
| Line 891: | Line 951: | ||
|[[File:JarJarSkywalkerSaga.png|175px]] |
|[[File:JarJarSkywalkerSaga.png|175px]] |
||
|- |
|- |
||
| − | | style="text-align: center" |[[Jar Jar Binks|Jar Jar]] {{C|Senator}} |
+ | | style="text-align: center" class="playable-variation"|[[Jar Jar Binks|Jar Jar]] {{C|Senator}} |
| − | | style="text-align: center" |Hero |
+ | | style="text-align: center" class="playable-variation"|Hero |
| + | |class="playable-variation"| |
||
| − | | |
||
| + | |class="playable-variation"|[[file:Senator Jar Jar.png|175px]] |
||
| − | | |
||
|- |
|- |
||
| style="text-align: center" |[[Jawa]] |
| style="text-align: center" |[[Jawa]] |
||
| Line 904: | Line 964: | ||
| style="text-align: center" |Hero |
| style="text-align: center" |Hero |
||
| |
| |
||
| + | |[[file:TSS Jek Porkins.jpeg|175px]] |
||
| − | | |
||
|- |
|- |
||
| style="text-align: center" |[[Jessika Pava|Jess Pava]] |
| style="text-align: center" |[[Jessika Pava|Jess Pava]] |
||
| style="text-align: center" |Hero |
| style="text-align: center" |Hero |
||
| |
| |
||
| + | |[[file:TSS Jess Pava.jpeg|175px]] |
||
| − | | |
||
|- |
|- |
||
| − | | style="text-align: center" |Jocasta Nu |
+ | | style="text-align: center" |[[Jocasta Nu]] |
| style="text-align: center" |Jedi |
| style="text-align: center" |Jedi |
||
| |
| |
||
| + | |[[file:Jocasta Nu.png|175px]] |
||
| − | | |
||
|- |
|- |
||
| − | | style="text-align: center" |Jubnuk |
+ | | style="text-align: center" |[[Gamorrean Guard|Jubnuk]] |
| style="text-align: center" |Extra |
| style="text-align: center" |Extra |
||
| |
| |
||
| + | |[[file:Jubnuk.png|175px]] |
||
| − | | |
||
|- |
|- |
||
| style="text-align: center" |[[K-3PO]] |
| style="text-align: center" |[[K-3PO]] |
||
| style="text-align: center" |Protocol Droid |
| style="text-align: center" |Protocol Droid |
||
| |
| |
||
| + | |[[File:TSS K-3PO.png|175px]] |
||
| − | | |
||
|- |
|- |
||
| − | | style="text-align: center" |K3-R1 |
+ | | style="text-align: center" |[[K3-R1]] |
| style="text-align: center" |Astromech Droid |
| style="text-align: center" |Astromech Droid |
||
| |
| |
||
| + | |[[File:TSS_K3-R1.png|175px]] |
||
| − | | |
||
|- |
|- |
||
| style="text-align: center" |[[Kaydel Ko Connix|Kaydel Connix]] |
| style="text-align: center" |[[Kaydel Ko Connix|Kaydel Connix]] |
||
| Line 936: | Line 996: | ||
|[[File:LSWTSSKaydelConnixEp8.jpg|175px]] |
|[[File:LSWTSSKaydelConnixEp8.jpg|175px]] |
||
|- |
|- |
||
| − | | style="text-align: center" |[[Kaydel Ko Connix|Kaydel Connix]] {{C|Episode IX}} |
+ | | style="text-align: center" class="playable-variation"|[[Kaydel Ko Connix|Kaydel Connix]] {{C|Episode IX}} |
| − | | style="text-align: center" |Hero |
+ | | style="text-align: center" class="playable-variation"|Hero |
| + | |class="playable-variation"| |
||
| − | | |
||
| − | |[[File:LSWTSSKaydelConnixEp9.jpg|175px]] |
+ | |class="playable-variation"|[[File:LSWTSSKaydelConnixEp9.jpg|175px]] |
|- |
|- |
||
| style="text-align: center" |[[Ki-Adi-Mundi]] |
| style="text-align: center" |[[Ki-Adi-Mundi]] |
||
| Line 961: | Line 1,021: | ||
| style="text-align: center" |Villain |
| style="text-align: center" |Villain |
||
| |
| |
||
| + | |[[file:TSS Kuruk.png|175px]] |
||
| − | | |
||
|- |
|- |
||
| style="text-align: center" |[[Kylo Ren]] |
| style="text-align: center" |[[Kylo Ren]] |
||
| Line 970: | Line 1,030: | ||
*Force Crush ★ |
*Force Crush ★ |
||
*Power Push ★ |
*Power Push ★ |
||
| + | |[[file:TSS Kylo Ren.png|175px]] |
||
| − | | |
||
|- |
|- |
||
| style="text-align: center" |Kylo Ren {{C|No Helmet}} |
| style="text-align: center" |Kylo Ren {{C|No Helmet}} |
||
| Line 988: | Line 1,048: | ||
* Force Crush ★ |
* Force Crush ★ |
||
*Power Push ★ |
*Power Push ★ |
||
| + | |[[file:Kylo Ren (Topless).png|175px]] |
||
| − | | |
||
|- |
|- |
||
| style="text-align: center" |Kylo Ren {{C|Episode IX}} |
| style="text-align: center" |Kylo Ren {{C|Episode IX}} |
||
| Line 997: | Line 1,057: | ||
* Force Crush ★ |
* Force Crush ★ |
||
*Power Push ★ |
*Power Push ★ |
||
| + | |[[file:Kylo Ren (Episode IX).png|175px]] |
||
| − | | |
||
|- |
|- |
||
| style="text-align: center" |Kylo Ren {{C|No Helmet - Scar}} |
| style="text-align: center" |Kylo Ren {{C|No Helmet - Scar}} |
||
| Line 1,007: | Line 1,067: | ||
*Power Push ★ |
*Power Push ★ |
||
|[[File:LSWKyloRenVIII.png|175px]] |
|[[File:LSWKyloRenVIII.png|175px]] |
||
| − | |- |
||
| − | | style="text-align: center" |LC-24 |
||
| − | | style="text-align: center" |Extra |
||
| − | | |
||
| − | | |
||
|- |
|- |
||
| style="text-align: center" |[[Lama Su]] |
| style="text-align: center" |[[Lama Su]] |
||
| Line 1,021: | Line 1,076: | ||
| style="text-align: center" |Scoundrel |
| style="text-align: center" |Scoundrel |
||
| |
| |
||
| + | |[[file:Lando Calrissian (Hermit).png|175px]] |
||
| − | | |
||
|- |
|- |
||
| style="text-align: center" |[[Lando Calrissian]] {{C|Episode V}} |
| style="text-align: center" |[[Lando Calrissian]] {{C|Episode V}} |
||
| Line 1,036: | Line 1,091: | ||
| style="text-align: center" |Scoundrel |
| style="text-align: center" |Scoundrel |
||
| |
| |
||
| + | |[[file:Lando Calrissian (Episode VI - General).png|175px]] |
||
| − | | |
||
|- |
|- |
||
| style="text-align: center" |[[Lando Calrissian]] {{C|Episode IX}} |
| style="text-align: center" |[[Lando Calrissian]] {{C|Episode IX}} |
||
| Line 1,046: | Line 1,101: | ||
| style="text-align: center" |Scoundrel |
| style="text-align: center" |Scoundrel |
||
| |
| |
||
| + | |[[file:Lando Calrissian (Han Solo's Clothes).png|175px]] |
||
| − | | |
||
|- |
|- |
||
| style="text-align: center" |[[LC-24]] |
| style="text-align: center" |[[LC-24]] |
||
| Line 1,056: | Line 1,111: | ||
| style="text-align: center" |Bounty Hunter |
| style="text-align: center" |Bounty Hunter |
||
| |
| |
||
| + | |[[file:Leia (Boushh Disguise).png|175px]] |
||
| − | | |
||
| − | |- |
||
|- |
|- |
||
| style="text-align: center" |[[Leia Organa Solo|Leia]] {{C|Episode IV}} |
| style="text-align: center" |[[Leia Organa Solo|Leia]] {{C|Episode IV}} |
||
| Line 1,063: | Line 1,117: | ||
| |
| |
||
|[[File:LSWPrincessLeia.png|175px]] |
|[[File:LSWPrincessLeia.png|175px]] |
||
| − | |- |
||
|- |
|- |
||
| style="text-align: center" |[[Leia Organa Solo|Leia]] {{C|Hoth}} |
| style="text-align: center" |[[Leia Organa Solo|Leia]] {{C|Hoth}} |
||
| style="text-align: center" |Hero |
| style="text-align: center" |Hero |
||
| |
| |
||
| − | |[[File: |
+ | |[[File:Leia (Hoth).png|175px]] |
|- |
|- |
||
| style="text-align: center" |[[Leia Organa Solo|Leia]] {{C|Jabba's Palace}} |
| style="text-align: center" |[[Leia Organa Solo|Leia]] {{C|Jabba's Palace}} |
||
| Line 1,076: | Line 1,129: | ||
|- |
|- |
||
| style="text-align: center" |[[Leia Organa Solo|Leia]] {{C|Endor - Hat}} |
| style="text-align: center" |[[Leia Organa Solo|Leia]] {{C|Endor - Hat}} |
||
| − | | style="text-align: center" | |
+ | | style="text-align: center" |hero |
| − | | |
||
| |
| |
||
| + | |[[file:Leia (Endor - Hat).png|175px]] |
||
|- |
|- |
||
| style="text-align: center" |[[Leia Organa Solo|Leia]] {{C|Episode V}} |
| style="text-align: center" |[[Leia Organa Solo|Leia]] {{C|Episode V}} |
||
| − | | style="text-align: center" | |
+ | | style="text-align: center" |Hero |
| − | | |
||
| |
| |
||
| + | |[[file:Leia (Episode V).jpeg|175px]] |
||
|- |
|- |
||
| style="text-align: center" |[[Leia Organa Solo|Leia]] {{C|Ewok Village}} |
| style="text-align: center" |[[Leia Organa Solo|Leia]] {{C|Ewok Village}} |
||
| − | | style="text-align: center" | |
+ | | style="text-align: center" |Hero |
| − | | |
||
| |
| |
||
| + | |[[file:Leia (Ewok Village).jpeg|175px]] |
||
|- |
|- |
||
| style="text-align: center" |[[Leia Organa Solo|Leia]] {{C|Cloud City}} |
| style="text-align: center" |[[Leia Organa Solo|Leia]] {{C|Cloud City}} |
||
| − | | style="text-align: center" | |
+ | | style="text-align: center" |Hero |
| − | | |
||
| |
| |
||
| + | |[[file:Leia (Cloud City).jpeg|175px]] |
||
|- |
|- |
||
| style="text-align: center" |[[Leia Organa Solo|Leia]] {{C|Endor}} |
| style="text-align: center" |[[Leia Organa Solo|Leia]] {{C|Endor}} |
||
| Line 1,103: | Line 1,156: | ||
| style="text-align: center" |Jedi |
| style="text-align: center" |Jedi |
||
| |
| |
||
| + | |[[file:Leia (Training Flashback).png|175px]] |
||
| − | | |
||
|- |
|- |
||
| − | | style="text-align: center" |Lobot |
+ | | style="text-align: center" |[[Lobot]] |
| style="text-align: center" |Extra |
| style="text-align: center" |Extra |
||
| |
| |
||
| + | |[[file:TSS Lobot.png|175px]] |
||
| − | | |
||
|- |
|- |
||
| − | | style="text-align: center" |Logray |
+ | | style="text-align: center" |[[Logray]] |
| style="text-align: center" |Scavenger |
| style="text-align: center" |Scavenger |
||
| |
| |
||
| + | |[[file:TSS Logray.png|175px]] |
||
| − | | |
||
|- |
|- |
||
| style="text-align: center" |[[Luke Skywalker]] {{C|Episode IV}} |
| style="text-align: center" |[[Luke Skywalker]] {{C|Episode IV}} |
||
| Line 1,149: | Line 1,202: | ||
| style="text-align: center" | Jedi |
| style="text-align: center" | Jedi |
||
| |
| |
||
| + | |[[file:Luke Skywalker (Jabba's Palace).png|175px]] |
||
| − | | |
||
|- |
|- |
||
| style="text-align: center" | Luke Skywalker {{C|Episode V - No Jacket}} |
| style="text-align: center" | Luke Skywalker {{C|Episode V - No Jacket}} |
||
| Line 1,164: | Line 1,217: | ||
| style="text-align: center" | Jedi |
| style="text-align: center" | Jedi |
||
| |
| |
||
| + | |[[file:Luke Skywalker (Yoda Backpack).png|175px]] |
||
| − | | |
||
|- |
|- |
||
| style="text-align: center" |Luke Skywalker {{C|Training Flashback}} |
| style="text-align: center" |Luke Skywalker {{C|Training Flashback}} |
||
| style="text-align: center" | Jedi |
| style="text-align: center" | Jedi |
||
| |
| |
||
| + | |[[file:Luke Skywalker (Training Flashback).png|175px]] |
||
| − | | |
||
|- |
|- |
||
| style="text-align: center" |Luke Skywalker {{C|Old - Flashback}} |
| style="text-align: center" |Luke Skywalker {{C|Old - Flashback}} |
||
| style="text-align: center" | Jedi |
| style="text-align: center" | Jedi |
||
| |
| |
||
| + | |[[file:Luke Skywalker (Old - Flashback).png|175px]] |
||
| − | | |
||
|- |
|- |
||
| style="text-align: center" |Luke Skywalker {{C|Old - Crait}} |
| style="text-align: center" |Luke Skywalker {{C|Old - Crait}} |
||
| style="text-align: center" | Jedi |
| style="text-align: center" | Jedi |
||
| |
| |
||
| + | |[[file:Luke Skywalker (Old - Crait).png|175px]] |
||
| − | | |
||
|- |
|- |
||
| style="text-align: center" |Luke Skywalker {{C|Old - Ahch-To}} |
| style="text-align: center" |Luke Skywalker {{C|Old - Ahch-To}} |
||
| Line 1,194: | Line 1,247: | ||
| style="text-align: center" |Villain |
| style="text-align: center" |Villain |
||
| |
| |
||
| + | |[[file:Luke Skywalker (Stormtrooper).png|175px]] |
||
| − | | |
||
|- |
|- |
||
| style="text-align: center" |Luke Skywalker {{C|Stormtrooper}} |
| style="text-align: center" |Luke Skywalker {{C|Stormtrooper}} |
||
| style="text-align: center" |Villain |
| style="text-align: center" |Villain |
||
| |
| |
||
| + | |[[file:Luke Skywalker (Stormtrooper - No Helmet).png|175px]] |
||
| − | | |
||
|- |
|- |
||
| style="text-align: center" |[[Luminara Unduli]] |
| style="text-align: center" |[[Luminara Unduli]] |
||
| Line 1,214: | Line 1,267: | ||
| style="text-align: center" |Jedi |
| style="text-align: center" |Jedi |
||
| |
| |
||
| + | |[[file:Mace Windu (Cape).png|175px]] |
||
| − | | |
||
|- |
|- |
||
| style="text-align: center" |[[Malakili]] |
| style="text-align: center" |[[Malakili]] |
||
| Line 1,221: | Line 1,274: | ||
|[[File:Malakili (TSS).jpg|175px]] |
|[[File:Malakili (TSS).jpg|175px]] |
||
|- |
|- |
||
| − | | style="text-align: center" |Mama the Hutt |
+ | | style="text-align: center" |[[Mama the Hutt]] |
| style="text-align: center" |Extra |
| style="text-align: center" |Extra |
||
| |
| |
||
|[[File:Q3Wkkgfp.png|175px]] |
|[[File:Q3Wkkgfp.png|175px]] |
||
|- |
|- |
||
| − | | style="text-align: center" |Mas Amedda |
+ | | style="text-align: center" |[[Mas Amedda]] |
| style="text-align: center" |Extra |
| style="text-align: center" |Extra |
||
| |
| |
||
| + | |[[file:Mas Amedda.png|175px]] |
||
| − | | |
||
|- |
|- |
||
| − | | style="text-align: center" |Master Codebreaker |
+ | | style="text-align: center" |[[Master Codebreaker]] |
| style="text-align: center" |Extra |
| style="text-align: center" |Extra |
||
| |
| |
||
| + | |[[file:Master Codebreaker.png|175px]] |
||
| − | | |
||
|- |
|- |
||
| style="text-align: center" |[[Mawhonic]] |
| style="text-align: center" |[[Mawhonic]] |
||
| style="text-align: center" |Extra |
| style="text-align: center" |Extra |
||
| |
| |
||
| − | |[[File:Mawhonic (TSS).png |
+ | |[[File:Mawhonic (TSS).png|175px]] |
|- |
|- |
||
| style="text-align: center" |[[Max Rebo]] |
| style="text-align: center" |[[Max Rebo]] |
||
| Line 1,249: | Line 1,302: | ||
| style="text-align: center" |Scoundrel |
| style="text-align: center" |Scoundrel |
||
| |
| |
||
| − | |[[File: |
+ | |[[File:TSS Maz.png|175px]] |
|- |
|- |
||
| − | | style="text-align: center" | |
+ | | style="text-align: center" |[[ME-8D9]] |
| + | | style="text-align: center" |Protocol Droid |
||
| + | | |
||
| + | |[[file:TSS ME-8D9.png|175px]] |
||
| + | |- |
||
| + | | style="text-align: center" |[[Mister Bones]] |
||
| style="text-align: center" |Extra |
| style="text-align: center" |Extra |
||
| |
| |
||
| + | |[[file:Mister Bones.png|175px]] |
||
| − | | |
||
|- |
|- |
||
| style="text-align: center" |[[Mon Mothma]] |
| style="text-align: center" |[[Mon Mothma]] |
||
| style="text-align: center" |Hero |
| style="text-align: center" |Hero |
||
| |
| |
||
| + | |[[file:TSS Mon Mothma.jpeg|175px]] |
||
| − | | |
||
|- |
|- |
||
| style="text-align: center" |[[MSE-6 Droid|Mouse Droid]] |
| style="text-align: center" |[[MSE-6 Droid|Mouse Droid]] |
||
| style="text-align: center" |Extra |
| style="text-align: center" |Extra |
||
| |
| |
||
| + | |[[file:TSS Mouse Droid.png|175px]] |
||
| − | | |
||
|- |
|- |
||
| − | | style="text-align: center" |Mustafarian |
+ | | style="text-align: center" |[[Mustafarian]] |
| style="text-align: center" |Extra |
| style="text-align: center" |Extra |
||
| |
| |
||
| + | |[[file:Mustafarian.png|175px]] |
||
| − | | |
||
|- |
|- |
||
| − | | style="text-align: center" |Nambi Ghima |
+ | | style="text-align: center" |[[Nambi Ghima]] |
| style="text-align: center" |Extra |
| style="text-align: center" |Extra |
||
| |
| |
||
| + | |[[file:Nambi Ghima.png|175px]] |
||
| − | | |
||
|- |
|- |
||
| style="text-align: center" |[[Nien Nunb]] |
| style="text-align: center" |[[Nien Nunb]] |
||
| style="text-align: center" |Hero |
| style="text-align: center" |Hero |
||
| |
| |
||
| + | |[[file:TSS Nien Nunb.jpeg|175px]] |
||
| − | | |
||
|- |
|- |
||
| style="text-align: center" |[[Nute Gunray]] |
| style="text-align: center" |[[Nute Gunray]] |
||
| Line 1,286: | Line 1,344: | ||
|[[File:Nute Gunray (TSS).png|175px]] |
|[[File:Nute Gunray (TSS).png|175px]] |
||
|- |
|- |
||
| − | | style="text-align: center" |OOM-9 |
+ | | style="text-align: center" |[[OOM-9]] |
| style="text-align: center" |Villain |
| style="text-align: center" |Villain |
||
| |
| |
||
| + | |[[file:OOM-9.png|175px]] |
||
| − | | |
||
|- |
|- |
||
| style="text-align: center" |[[Obi-Wan Kenobi]] {{C|Episode I}} |
| style="text-align: center" |[[Obi-Wan Kenobi]] {{C|Episode I}} |
||
| style="text-align: center" |Jedi |
| style="text-align: center" |Jedi |
||
| |
| |
||
| + | |[[file:Obi-Wan Kenobi (Episode I).png|175px]] |
||
| − | | |
||
|- |
|- |
||
| style="text-align: center" |[[Obi-Wan Kenobi]] {{C|Episode I - No Cape}} |
| style="text-align: center" |[[Obi-Wan Kenobi]] {{C|Episode I - No Cape}} |
||
| Line 1,306: | Line 1,364: | ||
| style="text-align: center" |Jedi |
| style="text-align: center" |Jedi |
||
| |
| |
||
| + | |[[file:Obi-Wan Kenobi (Episode II).png|175px]] |
||
| − | | |
||
|- |
|- |
||
| style="text-align: center" |[[Obi-Wan Kenobi]] {{C|Episode II - Robe}} |
| style="text-align: center" |[[Obi-Wan Kenobi]] {{C|Episode II - Robe}} |
||
| Line 1,316: | Line 1,374: | ||
| style="text-align: center" |Jedi |
| style="text-align: center" |Jedi |
||
| |
| |
||
| + | |[[file:Obi-Wan Kenobi (Episode III).png|175px]] |
||
| − | | |
||
|- |
|- |
||
| style="text-align: center" |[[Obi-Wan Kenobi]] {{C|Episode III - Cape}} |
| style="text-align: center" |[[Obi-Wan Kenobi]] {{C|Episode III - Cape}} |
||
| Line 1,323: | Line 1,381: | ||
|[[File:LSWObiWan3.png|175px]] |
|[[File:LSWObiWan3.png|175px]] |
||
|- |
|- |
||
| − | | style="text-align: center" |Ody Mandrell |
+ | | style="text-align: center" |[[Ody Mandrell]] |
| style="text-align: center" |Extra |
| style="text-align: center" |Extra |
||
| |
| |
||
| + | |[[file:Ody Mandrell.png|175px]] |
||
| − | | |
||
|- |
|- |
||
| style="text-align: center" |[[Obi-Wan Kenobi|Old Ben Kenobi]] {{C|Tatooine}} |
| style="text-align: center" |[[Obi-Wan Kenobi|Old Ben Kenobi]] {{C|Tatooine}} |
||
| Line 1,346: | Line 1,404: | ||
| style="text-align: center" |Hero |
| style="text-align: center" |Hero |
||
| |
| |
||
| + | |[[file:Padmé (Handmaiden - Orange).jpeg|175px]] |
||
| − | | |
||
|- |
|- |
||
| − | | style="text-align: center" |Padmé {{C|Ship}} |
+ | | style="text-align: center" class="playable-variation"|Padmé {{C|Ship}} |
| − | | style="text-align: center" |Hero |
+ | | style="text-align: center" class="playable-variation"|Hero |
| + | |class="playable-variation"| |
||
| − | | |
||
| − | |[[File: |
+ | |class="playable-variation"|[[File:Padmé (Ship).png|175px]] |
|- |
|- |
||
| − | | style="text-align: center" |Padmé {{C|Tatooine Disguise}} |
+ | | style="text-align: center" class="playable-variation"|Padmé {{C|Tatooine Disguise}} |
| − | | style="text-align: center" |Hero |
+ | | style="text-align: center" class="playable-variation"|Hero |
| + | |class="playable-variation"| |
||
| − | | |
||
| + | |class="playable-variation"|[[file:Padmé (Tatooine Disguise).jpeg|175px]] |
||
| − | | |
||
|- |
|- |
||
| − | | style="text-align: center" |Padmé {{C|Clawed}} |
+ | | style="text-align: center" class="playable-variation"|Padmé {{C|Clawed}} |
| − | | style="text-align: center" |Hero |
+ | | style="text-align: center" class="playable-variation"|Hero |
| + | |class="playable-variation"| |
||
| − | | |
||
| + | |class="playable-variation"|[[file:Padmé (Clawed).jpeg|175px]] |
||
| − | | |
||
|- |
|- |
||
| − | | style="text-align: center" |Padmé {{C|Battle of Naboo}} |
+ | | style="text-align: center" class="playable-variation"|Padmé {{C|Battle of Naboo}} |
| − | | style="text-align: center" |Hero |
+ | | style="text-align: center" class="playable-variation"|Hero |
| + | |class="playable-variation"| |
||
| − | | |
||
| − | |[[File: |
+ | |class="playable-variation"|[[File:Padmé (Battle of Naboo).png|175px]] |
|- |
|- |
||
| − | | style="text-align: center" |Padmé {{C|Silver Cape}} |
+ | | style="text-align: center" class="playable-variation"|Padmé {{C|Silver Cape}} |
| − | | style="text-align: center" |Hero |
+ | | style="text-align: center" class="playable-variation"|Hero |
| + | |class="playable-variation"| |
||
| − | | |
||
| + | |class="playable-variation"|[[file:Padmé (Silver Cape).png|175px]] |
||
| − | | |
||
|- |
|- |
||
| − | | style="text-align: center" |Padmé {{C|Pilot}} |
+ | | style="text-align: center" class="playable-variation"|Padmé {{C|Pilot}} |
| − | | style="text-align: center" |Hero |
+ | | style="text-align: center" class="playable-variation"|Hero |
| + | |class="playable-variation"| |
||
| − | | |
||
| + | |class="playable-variation"|[[file:Padmé (Pilot).jpeg|175px]] |
||
| − | | |
||
|- |
|- |
||
| − | | style="text-align: center" |Padmé {{C|Pregnant}} |
+ | | style="text-align: center" class="playable-variation"|Padmé {{C|Pregnant}} |
| − | | style="text-align: center" |Hero |
+ | | style="text-align: center" class="playable-variation"|Hero |
| + | |class="playable-variation"| |
||
| − | | |
||
| + | |class="playable-variation"|[[file:Padmé (Pregnant).jpeg|175px]] |
||
| − | | |
||
|- |
|- |
||
| − | | style="text-align: center" |Padmé {{C|Pilot - Helmet}} |
+ | | style="text-align: center" class="playable-variation"|Padmé {{C|Pilot - Helmet}} |
| − | | style="text-align: center" |Hero |
+ | | style="text-align: center" class="playable-variation"|Hero |
| + | |class="playable-variation"| |
||
| − | | |
||
| + | |class="playable-variation"|[[file:Padmé (Pilot - Helmet).jpeg|175px]] |
||
| − | | |
||
|- |
|- |
||
| style="text-align: center" |[[Palpatine]] {{C|Senator}} |
| style="text-align: center" |[[Palpatine]] {{C|Senator}} |
||
| style="text-align: center" |Dark Side |
| style="text-align: center" |Dark Side |
||
| |
| |
||
| + | |[[file:Palpatine (Senator).png|175px]] |
||
| − | | |
||
|- |
|- |
||
| − | | style="text-align: center" |Palpatine {{C|Chancellor - Grey}} |
+ | | style="text-align: center" class="playable-variation"|Palpatine {{C|Chancellor - Grey}} |
| − | | style="text-align: center" |Dark Side |
+ | | style="text-align: center" class="playable-variation"|Dark Side |
| + | |class="playable-variation"| |
||
| − | | |
||
| + | |class="playable-variation"|[[file:Palpatine (Chancellor Grey).png|175px]] |
||
| − | | |
||
|- |
|- |
||
| − | | style="text-align: center" |Palpatine {{C|Chancellor - Red}} |
+ | | style="text-align: center" class="playable-variation"|Palpatine {{C|Chancellor - Red}} |
| − | | style="text-align: center" |Dark Side |
+ | | style="text-align: center" class="playable-variation"|Dark Side |
| + | |class="playable-variation"| |
||
| − | | |
||
| + | |class="playable-variation"|[[file:Palpatine (Chancellor - Red).png|175px]] |
||
| − | | |
||
|- |
|- |
||
| − | | style="text-align: center" |Palpatine {{C|Scarred}} |
+ | | style="text-align: center" class="playable-variation"|Palpatine {{C|Scarred}} |
| − | | style="text-align: center" |Dark Side |
+ | | style="text-align: center" class="playable-variation"|Dark Side |
| + | |class="playable-variation"| |
||
| − | | |
||
| + | |class="playable-variation"|[[file:Palpatine (Scarred).png|175px]] |
||
| − | | |
||
|- |
|- |
||
| style="text-align: center" |[[Paploo]] |
| style="text-align: center" |[[Paploo]] |
||
| style="text-align: center" |Scavenger |
| style="text-align: center" |Scavenger |
||
| |
| |
||
| + | |[[file:TSS Paploo.png|175px]] |
||
| − | | |
||
|- |
|- |
||
| style="text-align: center" |[[Pit Droid]] |
| style="text-align: center" |[[Pit Droid]] |
||
| style="text-align: center" |Extra |
| style="text-align: center" |Extra |
||
| |
| |
||
| − | |[[File: |
+ | |[[File:TSS Pit Droid.png|175px]] |
|- |
|- |
||
| style="text-align: center" |[[Plo Koon]] |
| style="text-align: center" |[[Plo Koon]] |
||
| Line 1,427: | Line 1,485: | ||
| style="text-align: center" |Hero |
| style="text-align: center" |Hero |
||
| |
| |
||
| + | |[[file:Poe Dameron (Jacket).jpeg|175px]] |
||
| − | | |
||
|- |
|- |
||
| − | | style="text-align: center" |Poe Dameron {{C|Pilot - Helmet}} |
+ | | style="text-align: center" class="playable-variation"|Poe Dameron {{C|Pilot - Helmet}} |
| − | | style="text-align: center" |Hero |
+ | | style="text-align: center" class="playable-variation"|Hero |
| + | |class="playable-variation"| |
||
| − | | |
||
| + | |class="playable-variation"|[[file:Poe Dameron (Pilot - Helmet).jpeg|175px]] |
||
| − | | |
||
|- |
|- |
||
| − | | style="text-align: center" |Poe Dameron {{C|Pilot}} |
+ | | style="text-align: center" class="playable-variation"|Poe Dameron {{C|Pilot}} |
| − | | style="text-align: center" |Hero |
+ | | style="text-align: center" class="playable-variation"|Hero |
| + | |class="playable-variation"| |
||
| − | | |
||
| + | |class="playable-variation"|[[file:Poe Dameron (Pilot).jpeg|175px]] |
||
| − | | |
||
|- |
|- |
||
| − | | style="text-align: center" |Poe Dameron {{C|Black Resistance Jacket}} |
+ | | style="text-align: center" class="playable-variation"|Poe Dameron {{C|Black Resistance Jacket}} |
| − | | style="text-align: center" |Hero |
+ | | style="text-align: center" class="playable-variation"|Hero |
| + | |class="playable-variation"| |
||
| − | | |
||
| − | |[[File:LSWPoeCaptain.PNG|175px]] |
+ | |class="playable-variation"|[[File:LSWPoeCaptain.PNG|175px]] |
|- |
|- |
||
| − | | style="text-align: center" |Poe Dameron {{C|Episode IX}} |
+ | | style="text-align: center" class="playable-variation"|Poe Dameron {{C|Episode IX}} |
| − | | style="text-align: center" |Hero |
+ | | style="text-align: center" class="playable-variation"|Hero |
| + | |class="playable-variation"| |
||
| − | | |
||
| − | |[[File: |
+ | |class="playable-variation"|[[File:Poe Dameron (Episode IX).jpeg|175px]] |
|- |
|- |
||
| − | | style="text-align: center" |Poe Dameron {{C|Kijimi Coat}} |
+ | | style="text-align: center" class="playable-variation"|Poe Dameron {{C|Kijimi Coat}} |
| − | | style="text-align: center" |Hero |
+ | | style="text-align: center" class="playable-variation"|Hero |
| + | |class="playable-variation"| |
||
| − | | |
||
| + | |class="playable-variation"|[[file:Poe Dameron (Kijimi Coat).jpeg|175px]] |
||
| − | | |
||
| + | |- |
||
| + | | style="text-align: center" class="playable-variation"|Poe Dameron {{C|Holiday Special}} |
||
| + | | style="text-align: center" class="playable-variation"|Hero |
||
| + | |class="playable-variation"| |
||
| + | |class="playable-variation"|[[file:Poe Dameron (Holiday Special).jpeg|175px]] |
||
|- |
|- |
||
| style="text-align: center" |[[Poggle the Lesser]] |
| style="text-align: center" |[[Poggle the Lesser]] |
||
| Line 1,462: | Line 1,525: | ||
| style="text-align: center" |Scoundrel |
| style="text-align: center" |Scoundrel |
||
| |
| |
||
| + | |[[file:TSS Ponda Baba.png|175px]] |
||
| − | | |
||
|- |
|- |
||
| style="text-align: center" |[[Praetorian Guard]] {{C|Eighth Guard}} |
| style="text-align: center" |[[Praetorian Guard]] {{C|Eighth Guard}} |
||
| style="text-align: center" |Villain |
| style="text-align: center" |Villain |
||
| |
| |
||
| + | |[[file:Praetorian Guard (Eighth Guard).png|175px]] |
||
| − | | |
||
|- |
|- |
||
| style="text-align: center" |[[Praetorian Guard]] {{C|First Guard}} |
| style="text-align: center" |[[Praetorian Guard]] {{C|First Guard}} |
||
| style="text-align: center" |Villain |
| style="text-align: center" |Villain |
||
| |
| |
||
| + | |[[file:Praetorian Guard (First Guard).png|175px]] |
||
| − | | |
||
|- |
|- |
||
| style="text-align: center" |[[Praetorian Guard]] {{C|Seventh Guard}} |
| style="text-align: center" |[[Praetorian Guard]] {{C|Seventh Guard}} |
||
| style="text-align: center" |Villain |
| style="text-align: center" |Villain |
||
| |
| |
||
| + | |[[file:Praetorian Guard (Seventh Guard).png|175px]] |
||
|- |
|- |
||
| style="text-align: center" |[[Praetorian Guard]] {{C|Third Guard}} |
| style="text-align: center" |[[Praetorian Guard]] {{C|Third Guard}} |
||
| style="text-align: center" |Villain |
| style="text-align: center" |Villain |
||
| |
| |
||
| + | |[[file:Praetorian Guard (Third Guard).png|175px]] |
||
| − | | |
||
|- |
|- |
||
| style="text-align: center" |[[General Pryde|Pryde]] |
| style="text-align: center" |[[General Pryde|Pryde]] |
||
| style="text-align: center" |Villain |
| style="text-align: center" |Villain |
||
| |
| |
||
| + | |[[File:TSS Pryde.png|175px]] |
||
| − | | |
||
|- |
|- |
||
| style="text-align: center" |[[Queen Amidala]] |
| style="text-align: center" |[[Queen Amidala]] |
||
| Line 1,496: | Line 1,560: | ||
| style="text-align: center" |Jedi |
| style="text-align: center" |Jedi |
||
| |
| |
||
| + | |[[file:Qui-Gon Jinn (Cape).png|175px]] |
||
| − | | |
||
|- |
|- |
||
| style="text-align: center" |[[Qui-Gon Jinn]] |
| style="text-align: center" |[[Qui-Gon Jinn]] |
||
| Line 1,510: | Line 1,574: | ||
|[[File:LSWQuiGonTatooine.PNG|175px]] |
|[[File:LSWQuiGonTatooine.PNG|175px]] |
||
|- |
|- |
||
| − | | style="text-align: center" | |
+ | | style="text-align: center" |[[R-3PO]] |
| style="text-align: center" | Protocol Droid |
| style="text-align: center" | Protocol Droid |
||
| |
| |
||
| + | |[[file:TSS R-3PO.png|175px]] |
||
| − | | |
||
|- |
|- |
||
| − | | style="text-align: center" |[R2-A6 |
+ | | style="text-align: center" |[[R2-A6]] |
| style="text-align: center" | Astromech Droid |
| style="text-align: center" | Astromech Droid |
||
| |
| |
||
| + | |[[File:R2-A6.png|175px]] |
||
| − | | |
||
|- |
|- |
||
| − | | style="text-align: center" |[R2-B1 |
+ | | style="text-align: center" |[[R2-B1]] |
| style="text-align: center" | Astromech Droid |
| style="text-align: center" | Astromech Droid |
||
| |
| |
||
| + | |[[File:R2-B1.png|175px]] |
||
| − | | |
||
|- |
|- |
||
| style="text-align: center" |[[R2-D2]] |
| style="text-align: center" |[[R2-D2]] |
||
| Line 1,533: | Line 1,597: | ||
| style="text-align: center" | Astromech Droid |
| style="text-align: center" | Astromech Droid |
||
| |
| |
||
| + | |[[File:R2-D2 (Swamp).png|175px]] |
||
| − | | |
||
|- |
|- |
||
| style="text-align: center" |R2-D2 {{C|Waiter}} |
| style="text-align: center" |R2-D2 {{C|Waiter}} |
||
| style="text-align: center" | Astromech Droid |
| style="text-align: center" | Astromech Droid |
||
| |
| |
||
| + | |[[File:R2-D2 (Waiter).png|175px]] |
||
| − | | |
||
|- |
|- |
||
| style="text-align: center" |[[R2-KT]] |
| style="text-align: center" |[[R2-KT]] |
||
| style="text-align: center" | Astromech Droid |
| style="text-align: center" | Astromech Droid |
||
| |
| |
||
| + | |[[File:TSS_R2-KT.png|175px]] |
||
| − | | |
||
|- |
|- |
||
| − | | style="text-align: center" |R2-N3 |
+ | | style="text-align: center" |[[R2-N3]] |
| style="text-align: center" | Astromech Droid |
| style="text-align: center" | Astromech Droid |
||
| |
| |
||
| + | |[[File:R2-N3.png|175px]] |
||
| − | | |
||
|- |
|- |
||
| style="text-align: center" |[[R2-Q5]] |
| style="text-align: center" |[[R2-Q5]] |
||
| style="text-align: center" | Astromech Droid |
| style="text-align: center" | Astromech Droid |
||
| |
| |
||
| + | |[[File:TSS_R2-Q5.png|175px]] |
||
| − | | |
||
|- |
|- |
||
| − | | style="text-align: center" |R2-R9 |
+ | | style="text-align: center" |[[R2-R9]] |
| style="text-align: center" | Astromech Droid |
| style="text-align: center" | Astromech Droid |
||
| |
| |
||
| + | |[[File:R2-R9.png|175px]] |
||
| − | | |
||
|- |
|- |
||
| − | | style="text-align: center" |R4-M9 |
+ | | style="text-align: center" |[[R4-M9]] |
| style="text-align: center" | Astromech Droid |
| style="text-align: center" | Astromech Droid |
||
| |
| |
||
| + | |[[File:R4-M9.png|175px]] |
||
| − | | |
||
|- |
|- |
||
| style="text-align: center" |[[R4-P17]] |
| style="text-align: center" |[[R4-P17]] |
||
| style="text-align: center" | Astromech Droid |
| style="text-align: center" | Astromech Droid |
||
| |
| |
||
| + | |[[File:TSS_R4-P17.png|175px]] |
||
| − | | |
||
|- |
|- |
||
| − | | style="text-align: center" |R5-2JE |
+ | | style="text-align: center" |[[R5-2JE]] |
| style="text-align: center" | Astromech Droid |
| style="text-align: center" | Astromech Droid |
||
| |
| |
||
| + | |[[File:R5-2JE.png|175px]] |
||
| − | | |
||
|- |
|- |
||
| style="text-align: center" |[[R5-D4]] |
| style="text-align: center" |[[R5-D4]] |
||
| style="text-align: center" | Astromech Droid |
| style="text-align: center" | Astromech Droid |
||
| |
| |
||
| + | |[[File:TSS_R5-D4.png|175px]] |
||
| − | | |
||
|- |
|- |
||
| − | | style="text-align: center" |R5-M2 |
+ | | style="text-align: center" |[[R5-M2]] |
| style="text-align: center" | Astromech Droid |
| style="text-align: center" | Astromech Droid |
||
| |
| |
||
| + | |[[File:R5-M2.png|175px]] |
||
| − | | |
||
|- |
|- |
||
| style="text-align: center" |[[RA-7 Protocol Droid|RA-7]] |
| style="text-align: center" |[[RA-7 Protocol Droid|RA-7]] |
||
| style="text-align: center" | ProtocolDroid |
| style="text-align: center" | ProtocolDroid |
||
| |
| |
||
| + | |[[File:TSS RA-7.png|175px]] |
||
| − | | |
||
|- |
|- |
||
| style="text-align: center" |[[Rancor]] |
| style="text-align: center" |[[Rancor]] |
||
| style="text-align: center" |Extra |
| style="text-align: center" |Extra |
||
| |
| |
||
| + | |[[file:TSS Rancor.png|175px]] |
||
| − | | |
||
|- |
|- |
||
| − | | style="text-align: center" |Ratts Tyerell |
+ | | style="text-align: center" |[[Ratts Tyerell]] |
| style="text-align: center" |Extra |
| style="text-align: center" |Extra |
||
| |
| |
||
| − | ||[[File: |
+ | ||[[File:Ratts Tyerell-.jpeg|175px]] |
|- |
|- |
||
| style="text-align: center" |[[Rebel Friend]] |
| style="text-align: center" |[[Rebel Friend]] |
||
| style="text-align: center" |Hero |
| style="text-align: center" |Hero |
||
| |
| |
||
| + | |[[file:TSS Rebel Friend.png|175px]] |
||
| − | | |
||
|- |
|- |
||
| style="text-align: center" |[[Ree-Yees]] |
| style="text-align: center" |[[Ree-Yees]] |
||
| Line 1,614: | Line 1,678: | ||
| |
| |
||
*The Force |
*The Force |
||
| + | |[[File:LSWReyResistance.PNG|175px]] |
||
| − | | |
||
|- |
|- |
||
| style="text-align: center" |[[Rey]] {{C|Grey Jedi Wrap}} |
| style="text-align: center" |[[Rey]] {{C|Grey Jedi Wrap}} |
||
| Line 1,620: | Line 1,684: | ||
| |
| |
||
*The Force |
*The Force |
||
| − | + | |[[File:LSWRey8.png|175px]] |
|
|- |
|- |
||
| style="text-align: center" |[[Rey]] {{C|Episode IX}} |
| style="text-align: center" |[[Rey]] {{C|Episode IX}} |
||
| Line 1,632: | Line 1,696: | ||
| |
| |
||
*The Force |
*The Force |
||
| + | |[[file:Rey (Kijimi Coat).png|175px]] |
||
| − | | |
||
|- |
|- |
||
| style="text-align: center" |Rey Skywalker |
| style="text-align: center" |Rey Skywalker |
||
| Line 1,638: | Line 1,702: | ||
| |
| |
||
*The Force |
*The Force |
||
| + | |[[file:Rey Skywalker.png|175px]] |
||
| − | | |
||
|- |
|- |
||
| style="text-align: center" |Rey {{C|Episode VII}} |
| style="text-align: center" |Rey {{C|Episode VII}} |
||
| style="text-align: center" |Scavenger |
| style="text-align: center" |Scavenger |
||
| |
| |
||
| + | |[[File:Rey (Episode VII).png|175px]] |
||
| − | | |
||
|- |
|- |
||
| style="text-align: center" |[[Rey]] {{C|Episode VII - Starkiller Base}} |
| style="text-align: center" |[[Rey]] {{C|Episode VII - Starkiller Base}} |
||
| Line 1,650: | Line 1,714: | ||
*The Force |
*The Force |
||
|[[File:LSWRey.png|175px]] |
|[[File:LSWRey.png|175px]] |
||
| − | |- |
||
| − | | style="text-align: center" |Rey {{C|Scavenger Grey Vest}} |
||
| − | | style="text-align: center" |Jedi |
||
| − | | |
||
| − | *The Force |
||
| − | |[[File:LSWReyResistance.PNG|175px]] |
||
|- |
|- |
||
| style="text-align: center" |Rey {{C|Sith}} |
| style="text-align: center" |Rey {{C|Sith}} |
||
| Line 1,664: | Line 1,722: | ||
*Force Crush ★ |
*Force Crush ★ |
||
*Power Push ★ |
*Power Push ★ |
||
| + | |[[file:Rey (Sith).png|175px]] |
||
| − | | |
||
|- |
|- |
||
| − | | style="text-align: center" |Ric Olié |
+ | | style="text-align: center" |[[Ric Olié]] |
| style="text-align: center" |Hero |
| style="text-align: center" |Hero |
||
| |
| |
||
| + | |[[file:Ric Olié.jpeg|175px]] |
||
| − | | |
||
|- |
|- |
||
| style="text-align: center" |[[R0-GR|Roger]] |
| style="text-align: center" |[[R0-GR|Roger]] |
||
| style="text-align: center" |Extra |
| style="text-align: center" |Extra |
||
| |
| |
||
| + | |[[file:TSS R0-GR.png|175px]] |
||
| − | | |
||
|- |
|- |
||
| style="text-align: center" |[[Rose Tico]] |
| style="text-align: center" |[[Rose Tico]] |
||
| style="text-align: center" |Hero |
| style="text-align: center" |Hero |
||
| |
| |
||
| − | |[[File: |
+ | |[[File:TSS Rose Tico.png|175px]] |
|- |
|- |
||
| style="text-align: center" |[[Rose Tico]] {{C|Crait}} |
| style="text-align: center" |[[Rose Tico]] {{C|Crait}} |
||
| style="text-align: center" |Hero |
| style="text-align: center" |Hero |
||
| |
| |
||
| + | |[[file:Rose Tico (Crait).jpeg|175px]] |
||
| − | | |
||
|- |
|- |
||
| style="text-align: center" |[[Rose Tico]] {{C|Episode IX}} |
| style="text-align: center" |[[Rose Tico]] {{C|Episode IX}} |
||
| style="text-align: center" |Hero |
| style="text-align: center" |Hero |
||
| |
| |
||
| + | |[[file:Rose Tico (Episode IX).jpeg|175px]] |
||
| − | | |
||
|- |
|- |
||
| style="text-align: center" |[[Rose Tico]] {{C|First Order}} |
| style="text-align: center" |[[Rose Tico]] {{C|First Order}} |
||
| style="text-align: center" |Villain |
| style="text-align: center" |Villain |
||
| |
| |
||
| + | |[[file:Rose Tico (First Order).png|175px]] |
||
| − | | |
||
|- |
|- |
||
| style="text-align: center" |Rose Tico {{C|Episode VIII - Supremacy}} |
| style="text-align: center" |Rose Tico {{C|Episode VIII - Supremacy}} |
||
| Line 1,701: | Line 1,759: | ||
|[[File:LSWRose8.png|175px]] |
|[[File:LSWRose8.png|175px]] |
||
|- |
|- |
||
| − | | style="text-align: center" |Rothgar Deng |
+ | | style="text-align: center" |[[Rothgar Deng]] |
| style="text-align: center" |Bounty Hunter |
| style="text-align: center" |Bounty Hunter |
||
| |
| |
||
| + | |[[file:Rothgar Deng.png|175px]] |
||
| − | | |
||
|- |
|- |
||
| − | | style="text-align: center" |Rune Haako |
+ | | style="text-align: center" |[[Rune Haako]] |
| style="text-align: center" |Extra |
| style="text-align: center" |Extra |
||
| |
| |
||
| + | |[[file:TSS Rune Haako.png|175px]] |
||
| − | | |
||
|- |
|- |
||
| style="text-align: center" |[[Salacious B. Crumb]] |
| style="text-align: center" |[[Salacious B. Crumb]] |
||
| Line 1,719: | Line 1,777: | ||
| style="text-align: center" |Villain |
| style="text-align: center" |Villain |
||
| |
| |
||
| + | |[[file:TSS Sandtrooper.png|175px]] |
||
| − | | |
||
|- |
|- |
||
| style="text-align: center" |Sandtrooper {{C|Commander}} |
| style="text-align: center" |Sandtrooper {{C|Commander}} |
||
| style="text-align: center" |Villain |
| style="text-align: center" |Villain |
||
| |
| |
||
| + | |[[file:Sandtrooper (Commander).png|175px]] |
||
| − | | |
||
|- |
|- |
||
| style="text-align: center" |Sandtrooper {{C|Sergeant}} |
| style="text-align: center" |Sandtrooper {{C|Sergeant}} |
||
| style="text-align: center" |Villain |
| style="text-align: center" |Villain |
||
| |
| |
||
| + | |[[file:Sandtrooper (Sergeant).png|175px]] |
||
| − | | |
||
|- |
|- |
||
| style="text-align: center" |[[Scout Trooper]] |
| style="text-align: center" |[[Scout Trooper]] |
||
| Line 1,739: | Line 1,797: | ||
| style="text-align: center" |Villain |
| style="text-align: center" |Villain |
||
| |
| |
||
| + | |[[file:Scout Trooper (Kashyyyk).png|175px]] |
||
| − | | |
||
|- |
|- |
||
| style="text-align: center" |[[Sebulba]] |
| style="text-align: center" |[[Sebulba]] |
||
| style="text-align: center" |Extra |
| style="text-align: center" |Extra |
||
| |
| |
||
| + | |[[file:TSS Sebulba.png|175px]] |
||
| − | | |
||
|- |
|- |
||
| − | | style="text-align: center" |Senate Guard |
+ | | style="text-align: center" |[[Senate Guard]] |
| style="text-align: center" |Extra |
| style="text-align: center" |Extra |
||
| |
| |
||
| + | |[[file:Senate Guard.png|175px]] |
||
| − | | |
||
|- |
|- |
||
| style="text-align: center" |[[Shaak Ti]] |
| style="text-align: center" |[[Shaak Ti]] |
||
| Line 1,755: | Line 1,813: | ||
| |
| |
||
*The Force |
*The Force |
||
| − | |[[File: |
+ | |[[File:TSS Shaak Ti.png|175px]] |
|- |
|- |
||
| style="text-align: center" |[[Shmi Skywalker]] |
| style="text-align: center" |[[Shmi Skywalker]] |
||
| style="text-align: center" |Extra |
| style="text-align: center" |Extra |
||
| |
| |
||
| + | |[[file:TSS Shmi.png|175px]] |
||
| − | | |
||
|- |
|- |
||
| style="text-align: center" |[[Sidon Ithano]] |
| style="text-align: center" |[[Sidon Ithano]] |
||
| style="text-align: center" |Scoundrel |
| style="text-align: center" |Scoundrel |
||
| |
| |
||
| + | |[[file:TSS Sidon Ithano.png|175px]] |
||
| − | | |
||
|- |
|- |
||
| − | | style="text-align: center" |Sith Acolyte |
+ | | style="text-align: center" |[[Sith Acolyte]] |
| style="text-align: center" |Extra |
| style="text-align: center" |Extra |
||
| |
| |
||
| + | |[[file:Sith Acolyte.png|175px]] |
||
| − | | |
||
|- |
|- |
||
| style="text-align: center" |[[Sith Jet Trooper]] |
| style="text-align: center" |[[Sith Jet Trooper]] |
||
| style="text-align: center" |Villain |
| style="text-align: center" |Villain |
||
| |
| |
||
| + | |[[file:TSS Sith Jet Trooper.png|175px]] |
||
| − | | |
||
|- |
|- |
||
| style="text-align: center" |[[Sith Probe Droid]] |
| style="text-align: center" |[[Sith Probe Droid]] |
||
| style="text-align: center" |Villain |
| style="text-align: center" |Villain |
||
| |
| |
||
| + | |[[file:TSS Sith Probe Droid.png|175px]] |
||
| − | | |
||
|- |
|- |
||
| style="text-align: center" |[[Sith Trooper (Sith Eternal)|Sith Trooper]] |
| style="text-align: center" |[[Sith Trooper (Sith Eternal)|Sith Trooper]] |
||
| style="text-align: center" |Villain |
| style="text-align: center" |Villain |
||
| |
| |
||
| + | |[[file:TSS Sith Trooper.png|175px]] |
||
| − | | |
||
|- |
|- |
||
| style="text-align: center" |[[Supreme Leader Snoke|Snoke]] |
| style="text-align: center" |[[Supreme Leader Snoke|Snoke]] |
||
| Line 1,794: | Line 1,852: | ||
*Force Crush ★ |
*Force Crush ★ |
||
*Power Push ★ |
*Power Push ★ |
||
| + | |[[file:TSS Snoke.png|175px]] |
||
| − | | |
||
| − | |||
|- |
|- |
||
| style="text-align: center" |[[Snowtrooper]] |
| style="text-align: center" |[[Snowtrooper]] |
||
| style="text-align: center" |Villain |
| style="text-align: center" |Villain |
||
| |
| |
||
| + | |[[file:TSS Snowtrooper.png|175px]] |
||
| − | | |
||
|- |
|- |
||
| style="text-align: center" |Sovereign Protector |
| style="text-align: center" |Sovereign Protector |
||
| style="text-align: center" |Villain |
| style="text-align: center" |Villain |
||
| |
| |
||
| + | |[[file:Sovereign Protector.jpeg|175px]] |
||
| − | | |
||
|- |
|- |
||
| style="text-align: center" |[[Stormtrooper]] |
| style="text-align: center" |[[Stormtrooper]] |
||
| style="text-align: center" |Villain |
| style="text-align: center" |Villain |
||
| |
| |
||
| − | |[[File: |
+ | |[[File:TSS Stormtrooper.png|175px]] |
|- |
|- |
||
| style="text-align: center" |Stormtrooper {{C|Empire Sergeant}} |
| style="text-align: center" |Stormtrooper {{C|Empire Sergeant}} |
||
| style="text-align: center" |Villain |
| style="text-align: center" |Villain |
||
| |
| |
||
| + | |[[file:Stormtrooper (Empire Sergeant).png|175px]] |
||
| − | | |
||
|- |
|- |
||
| style="text-align: center" |Stormtrooper {{C|Empire Commander}} |
| style="text-align: center" |Stormtrooper {{C|Empire Commander}} |
||
| style="text-align: center" |Villain |
| style="text-align: center" |Villain |
||
| |
| |
||
| + | |[[file:Stormtrooper (Empire Commander).png|175px]] |
||
| − | | |
||
|- |
|- |
||
| style="text-align: center" |Stormtrooper {{C|First Order}} |
| style="text-align: center" |Stormtrooper {{C|First Order}} |
||
| style="text-align: center" |Villain |
| style="text-align: center" |Villain |
||
| |
| |
||
| + | |[[File:Stormtrooper (First Order).png|175px]] |
||
| − | | |
||
|- |
|- |
||
| style="text-align: center" |Stormtrooper {{C|First Order Driver}} |
| style="text-align: center" |Stormtrooper {{C|First Order Driver}} |
||
| style="text-align: center" |Villain |
| style="text-align: center" |Villain |
||
| |
| |
||
| + | |[[File:Stormtrooper (First Order Driver).png|175px]] |
||
| − | | |
||
|- |
|- |
||
| style="text-align: center" |Stormtrooper {{C|First Order Officer}} |
| style="text-align: center" |Stormtrooper {{C|First Order Officer}} |
||
| style="text-align: center" |Villain |
| style="text-align: center" |Villain |
||
| |
| |
||
| + | |[[File:Stormtrooper (First Order Officer).png|175px]] |
||
| − | | |
||
|- |
|- |
||
| style="text-align: center" |Stormtrooper {{C|First Order Heavy Assault}} |
| style="text-align: center" |Stormtrooper {{C|First Order Heavy Assault}} |
||
| style="text-align: center" |Villain |
| style="text-align: center" |Villain |
||
| |
| |
||
| + | |[[File:Stormtrooper (First Order Heavy Assault).png|175px]] |
||
| − | | |
||
|- |
|- |
||
| style="text-align: center" |Stormtrooper {{C|First Order Squad Leader}} |
| style="text-align: center" |Stormtrooper {{C|First Order Squad Leader}} |
||
| style="text-align: center" |Villain |
| style="text-align: center" |Villain |
||
| |
| |
||
| + | |[[File:Stormtrooper (First Order Squad Leader).png|175px]] |
||
| − | | |
||
|- |
|- |
||
| style="text-align: center" |Stormtrooper {{C|First Order Sergeant}} |
| style="text-align: center" |Stormtrooper {{C|First Order Sergeant}} |
||
| style="text-align: center" |Villain |
| style="text-align: center" |Villain |
||
| |
| |
||
| + | |[[file:Stormtrooper (First Order Officer).png|175px]] |
||
| − | | |
||
|- |
|- |
||
| style="text-align: center" |[[Sy Snootles]] |
| style="text-align: center" |[[Sy Snootles]] |
||
| Line 1,857: | Line 1,914: | ||
|[[File:SySnootlesSkywalkerSaga.png|175px]] |
|[[File:SySnootlesSkywalkerSaga.png|175px]] |
||
|- |
|- |
||
| − | | style="text-align: center" |TC-14 |
+ | | style="text-align: center" |[[TC-14]] |
| style="text-align: center" |Protocol Droid |
| style="text-align: center" |Protocol Droid |
||
| |
| |
||
| + | |[[File:TSS TC-14.png|175px]] |
||
| − | | |
||
|- |
|- |
||
| − | | style="text-align: center" |TIE Fighter Pilot |
+ | | style="text-align: center" |[[TIE Pilot|TIE Fighter Pilot]] |
| style="text-align: center" |Villain |
| style="text-align: center" |Villain |
||
| |
| |
||
| + | |[[File:TSS TIE Fighter Pilot.png|175px]] |
||
| − | | |
||
|- |
|- |
||
| − | | style="text-align: center" |Tallie Lintra |
+ | | style="text-align: center" |[[Tallie Lintra]] |
| style="text-align: center" |Hero |
| style="text-align: center" |Hero |
||
| |
| |
||
| + | |[[File:Tallie Lintra (TSS).png|175px]] |
||
| − | | |
||
|- |
|- |
||
| style="text-align: center" |[[Tarfful]] |
| style="text-align: center" |[[Tarfful]] |
||
| style="text-align: center" |Hero |
| style="text-align: center" |Hero |
||
| |
| |
||
| + | |[[file:TSS Tarfful.jpeg|175px]] |
||
| − | | |
||
|- |
|- |
||
| style="text-align: center" |[[Grand Moff Tarkin|Tarkin]] |
| style="text-align: center" |[[Grand Moff Tarkin|Tarkin]] |
||
| style="text-align: center" |Villain |
| style="text-align: center" |Villain |
||
| |
| |
||
| + | |[[File:TSS Tarkin.png|175px]] |
||
| − | | |
||
|- |
|- |
||
| style="text-align: center" |[[Tasu Leech]] |
| style="text-align: center" |[[Tasu Leech]] |
||
| style="text-align: center" |Scoundrel |
| style="text-align: center" |Scoundrel |
||
| |
| |
||
| + | |[[file:TSS Tasu Leech.png|175px]] |
||
| − | | |
||
|- |
|- |
||
| style="text-align: center" |[[Teebo]] |
| style="text-align: center" |[[Teebo]] |
||
| style="text-align: center" |Scavenger |
| style="text-align: center" |Scavenger |
||
| |
| |
||
| + | |[[file:TSS Teebo.png|175px]] |
||
| − | | |
||
|- |
|- |
||
| style="text-align: center" |[[Teedo]] |
| style="text-align: center" |[[Teedo]] |
||
| style="text-align: center" |Scavenger |
| style="text-align: center" |Scavenger |
||
| |
| |
||
| + | |[[file:TSS Teedo.png|175px]] |
||
| − | | |
||
|- |
|- |
||
| − | | style="text-align: center" |Temiri Blagg |
+ | | style="text-align: center" |[[Temiri Blagg]] |
| style="text-align: center" |Extra |
| style="text-align: center" |Extra |
||
| |
| |
||
| Line 1,905: | Line 1,962: | ||
| style="text-align: center" |Hero |
| style="text-align: center" |Hero |
||
| |
| |
||
| + | |[[file:TSS Temmin Wexley.jpeg|175px]] |
||
| − | | |
||
|- |
|- |
||
| − | | style="text-align: center" | |
+ | | style="text-align: center" |[[The Emperor|Palpatine]] |
| − | | style="text-align: center" |Dark Side |
||
| − | | |
||
| − | *Dark Rise ★ |
||
| − | *Fear the Dark Side ★ |
||
| − | *Force Crush ★ |
||
| − | *Power Push ★ |
||
| − | |[[File:LSWSheevPalpatine.png|175px]] |
||
| − | |||
| − | |||
| − | |- |
||
| − | | style="text-align: center" | The Emperor |
||
| style="text-align: center" |Dark Side |
| style="text-align: center" |Dark Side |
||
| |
| |
||
| Line 1,934: | Line 1,980: | ||
*Force Crush ★ |
*Force Crush ★ |
||
*Power Push ★ |
*Power Push ★ |
||
| + | |[[file:The Emperor (Clone).png|175px]] |
||
| − | | |
||
|- |
|- |
||
| style="text-align: center" |[[Theron Nett]] |
| style="text-align: center" |[[Theron Nett]] |
||
| style="text-align: center" |Hero |
| style="text-align: center" |Hero |
||
| |
| |
||
| + | |[[file:TSS Theron Nett.jpeg|175px]] |
||
| − | | |
||
|- |
|- |
||
| style="text-align: center" |[[Tion Medon]] |
| style="text-align: center" |[[Tion Medon]] |
||
| style="text-align: center" |Extra |
| style="text-align: center" |Extra |
||
| |
| |
||
| + | |[[file:Tion Medon.png|175px]] |
||
| − | | |
||
|- |
|- |
||
| style="text-align: center" |[[Knights of Ren|Trudgen]] |
| style="text-align: center" |[[Knights of Ren|Trudgen]] |
||
| style="text-align: center" |Villain |
| style="text-align: center" |Villain |
||
| |
| |
||
| + | |[[file:TSS Trudgen.png|175px]] |
||
| − | | |
||
|- |
|- |
||
| style="text-align: center" |[[Tusken Raider]] |
| style="text-align: center" |[[Tusken Raider]] |
||
| style="text-align: center" |Scavenger |
| style="text-align: center" |Scavenger |
||
| |
| |
||
| + | |[[file:TSS Tusken Raider.png|175px]] |
||
| − | | |
||
|- |
|- |
||
| − | | style="text-align: center" |Ubbla Mollbro |
+ | | style="text-align: center" |[[Ubbla Mollbro]] |
| style="text-align: center" |Extra |
| style="text-align: center" |Extra |
||
| |
| |
||
| Line 1,964: | Line 2,010: | ||
| style="text-align: center" |Extra |
| style="text-align: center" |Extra |
||
| |
| |
||
| + | |[[file:TSS Ugnaught.png|175px]] |
||
| − | | |
||
|- |
|- |
||
| style="text-align: center" |[[Unkar Plutt]] |
| style="text-align: center" |[[Unkar Plutt]] |
||
| style="text-align: center" |Extra |
| style="text-align: center" |Extra |
||
| |
| |
||
| − | |[[File:Unkar plutt.jpg| |
+ | |[[File:Unkar plutt.jpg|175px]] |
|- |
|- |
||
| style="text-align: center" |[[Knights of Ren|Ushar]] |
| style="text-align: center" |[[Knights of Ren|Ushar]] |
||
| style="text-align: center" |Villain |
| style="text-align: center" |Villain |
||
| |
| |
||
| + | |[[file:TSS Ushar.png|175px]] |
||
| − | | |
||
|- |
|- |
||
| style="text-align: center" |[[Knights of Ren|Vicrul]] |
| style="text-align: center" |[[Knights of Ren|Vicrul]] |
||
| style="text-align: center" |Villain |
| style="text-align: center" |Villain |
||
| |
| |
||
| + | |[[file:TSS Vicrul.png|175px]] |
||
| − | | |
||
|- |
|- |
||
| style="text-align: center" |[[Wampa]] |
| style="text-align: center" |[[Wampa]] |
||
| style="text-align: center" |Extra |
| style="text-align: center" |Extra |
||
| |
| |
||
| + | |[[file:TSS Wampa.png|175px]] |
||
| − | | |
||
|- |
|- |
||
| − | | style="text-align: center" |Wandering Wookiee |
+ | | style="text-align: center" |[[Wandering Wookiee]] |
| style="text-align: center" |Scoundrel |
| style="text-align: center" |Scoundrel |
||
| |
| |
||
| + | |[[file:Wandering Wookiee.png|175px]] |
||
| − | | |
||
|- |
|- |
||
| style="text-align: center" |[[Watto]] |
| style="text-align: center" |[[Watto]] |
||
| style="text-align: center" |Extra |
| style="text-align: center" |Extra |
||
| |
| |
||
| + | |[[File:TSS Watto.png|175px]] |
||
| − | | |
||
|- |
|- |
||
| style="text-align: center" |[[Wedge Antilles]] |
| style="text-align: center" |[[Wedge Antilles]] |
||
| style="text-align: center" |Hero |
| style="text-align: center" |Hero |
||
| |
| |
||
| + | |[[file:TSS Wedge Antilles.jpeg|175px]]. |
||
| − | | |
||
|- |
|- |
||
| style="text-align: center" |[[Weequay]] |
| style="text-align: center" |[[Weequay]] |
||
| Line 2,011: | Line 2,057: | ||
|[[File:LSWWicket.png|175px]] |
|[[File:LSWWicket.png|175px]] |
||
|- |
|- |
||
| − | | style="text-align: center" |Willrow Hood |
+ | | style="text-align: center" |[[Willrow Hood]] |
| style="text-align: center" |Extra |
| style="text-align: center" |Extra |
||
| |
| |
||
| + | |[[file:Willrow Hood.png|175px]] |
||
| − | | |
||
|- |
|- |
||
| − | | style="text-align: center" |Wrobie Tyce |
+ | | style="text-align: center" |[[Wrobie Tyce]] |
| style="text-align: center" |Hero |
| style="text-align: center" |Hero |
||
| |
| |
||
| + | |[[file:Wrobie Tyce.jpeg|175px]] |
||
| − | | |
||
|- |
|- |
||
| style="text-align: center" |[[Yaddle]] |
| style="text-align: center" |[[Yaddle]] |
||
| Line 2,029: | Line 2,075: | ||
| style="text-align: center" |Jedi |
| style="text-align: center" |Jedi |
||
| |
| |
||
| + | |[[file:TSS Yarael Poof.png|175px]] |
||
| − | | |
||
|- |
|- |
||
| style="text-align: center" |[[Yoda]] |
| style="text-align: center" |[[Yoda]] |
||
| Line 2,051: | Line 2,097: | ||
| style="text-align: center" |Hero |
| style="text-align: center" |Hero |
||
| |
| |
||
| + | |[[file:Zev Senesca (Rogue 2).jpeg|175px]] |
||
| − | | |
||
|- |
|- |
||
| style="text-align: center" |[[Zorii Bliss]] |
| style="text-align: center" |[[Zorii Bliss]] |
||
| style="text-align: center" |Scoundrel |
| style="text-align: center" |Scoundrel |
||
| |
| |
||
| − | |[[File: |
+ | |[[File:TSS Zorii Bliss.png|175px]] |
|- |
|- |
||
| style="text-align: center" |[[Zuckuss]] |
| style="text-align: center" |[[Zuckuss]] |
||
| Line 2,072: | Line 2,118: | ||
| style="text-align: center" |Jedi |
| style="text-align: center" |Jedi |
||
| |
| |
||
| + | |[[file:TSS Ahsoka Tano.png|175px]] |
||
| − | | |
||
|- |
|- |
||
| style="text-align: center" |[[Baze Malbus]] |
| style="text-align: center" |[[Baze Malbus]] |
||
| style="text-align: center" |Hero |
| style="text-align: center" |Hero |
||
| |
| |
||
| + | |[[File:TSS Baze Malbus.png|175px]] |
||
| − | | |
||
|- |
|- |
||
| style="text-align: center" |[[Bo-Katan Kryze]] |
| style="text-align: center" |[[Bo-Katan Kryze]] |
||
| style="text-align: center" |Hero |
| style="text-align: center" |Hero |
||
| |
| |
||
| + | |[[file:TSS Bo-Katan Kryze.png|175px]] |
||
| − | | |
||
|- |
|- |
||
| style="text-align: center" |[[Boba Fett|Boba Fett (Scion of Jango)]] |
| style="text-align: center" |[[Boba Fett|Boba Fett (Scion of Jango)]] |
||
| style="text-align: center" |Bounty Hunter |
| style="text-align: center" |Bounty Hunter |
||
| |
| |
||
| + | |[[file:Boba Fett (Scion of Jango).png|175px]] |
||
| − | | |
||
|- |
|- |
||
| style="text-align: center" |[[Bodhi Rook]] |
| style="text-align: center" |[[Bodhi Rook]] |
||
| − | | style="text-align: center" | |
+ | | style="text-align: center" |Hero |
| − | | |
||
| |
| |
||
| + | |[[file:TSS Bodhi Rook.png|175px]] |
||
|- |
|- |
||
| style="text-align: center" |[[Cara Dune]] |
| style="text-align: center" |[[Cara Dune]] |
||
| Line 2,102: | Line 2,148: | ||
| style="text-align: center" | Hero |
| style="text-align: center" | Hero |
||
| |
| |
||
| + | |[[File:TSS Cassian Andor.png|175px]] |
||
| − | | |
||
|- |
|- |
||
| style="text-align: center" |[[Chewbacca|Chewbacca (Vandor)]] |
| style="text-align: center" |[[Chewbacca|Chewbacca (Vandor)]] |
||
| style="text-align: center" |Scoundrel |
| style="text-align: center" |Scoundrel |
||
| |
| |
||
| + | |[[file:TSS Lando Calrissian (Young).png|175px]] |
||
| − | | |
||
|- |
|- |
||
| style="text-align: center" |[[Chirrut Îmwe]] |
| style="text-align: center" |[[Chirrut Îmwe]] |
||
| style="text-align: center" | Hero |
| style="text-align: center" | Hero |
||
| |
| |
||
| + | |[[File:TSS Chirrut Îmwe.png|175px]] |
||
| − | | |
||
|- |
|- |
||
| style="text-align: center" |[[Crosshair]] |
| style="text-align: center" |[[Crosshair]] |
||
| style="text-align: center" |Villain |
| style="text-align: center" |Villain |
||
| |
| |
||
| + | |[[File:Crosshair (TSS).png|175px]] |
||
| − | | |
||
|- |
|- |
||
| style="text-align: center" |[[Darth Vader|Darth Vader (Classic)]] |
| style="text-align: center" |[[Darth Vader|Darth Vader (Classic)]] |
||
| Line 2,126: | Line 2,172: | ||
*Force Crush ★ |
*Force Crush ★ |
||
*Power Push ★ |
*Power Push ★ |
||
| + | |[[File:Darth Vader (Classic).png|175px]] |
||
| − | | |
||
|- |
|- |
||
| style="text-align: center" |[[The Mandalorian|Din Djarin]] |
| style="text-align: center" |[[The Mandalorian|Din Djarin]] |
||
| Line 2,136: | Line 2,182: | ||
| style="text-align: center" |Villain |
| style="text-align: center" |Villain |
||
| |
| |
||
| + | |[[file:TSS Orson Krennic.png|175px]] |
||
| − | | |
||
|- |
|- |
||
| style="text-align: center" |[[Echo (Star Wars)|Echo]] |
| style="text-align: center" |[[Echo (Star Wars)|Echo]] |
||
| style="text-align: center" |Hero |
| style="text-align: center" |Hero |
||
| |
| |
||
| + | |[[file:TSS Echo.png|175px]] |
||
| − | | |
||
|- |
|- |
||
| style="text-align: center" |[[Enfys Nest]] |
| style="text-align: center" |[[Enfys Nest]] |
||
| style="text-align: center" |Hero |
| style="text-align: center" |Hero |
||
| |
| |
||
| + | |[[File:TSS Enfys Nest.png|175px]] |
||
| − | | |
||
|- |
|- |
||
| style="text-align: center" |[[Fennec Shand]] |
| style="text-align: center" |[[Fennec Shand]] |
||
| style="text-align: center" |Bounty Hunter |
| style="text-align: center" |Bounty Hunter |
||
| |
| |
||
| + | |[[File:Fennec Shand (TSS).png|175px]] |
||
| − | | |
||
|- |
|- |
||
| style="text-align: center" |[[Greef Karga]] |
| style="text-align: center" |[[Greef Karga]] |
||
| style="text-align: center" |Bounty Hunter |
| style="text-align: center" |Bounty Hunter |
||
| |
| |
||
| + | |[[file:TSS Greef Karga.png|175px]] |
||
| − | | |
||
|- |
|- |
||
| style="text-align: center" |[[Grogu]] {{C|Companion}} |
| style="text-align: center" |[[Grogu]] {{C|Companion}} |
||
| Line 2,166: | Line 2,212: | ||
| style="text-align: center" |Scoundrel |
| style="text-align: center" |Scoundrel |
||
| |
| |
||
| + | |[[File:Han Solo (Classic).png|175px]] |
||
| − | | |
||
|- |
|- |
||
| style="text-align: center" |[[Han Solo|Han Solo (Young)]] |
| style="text-align: center" |[[Han Solo|Han Solo (Young)]] |
||
| style="text-align: center" |Scoundrel |
| style="text-align: center" |Scoundrel |
||
| |
| |
||
| + | |[[File:TSS Young Han.png|175px]] |
||
| − | | |
||
|- |
|- |
||
| style="text-align: center" |[[Hunter]] |
| style="text-align: center" |[[Hunter]] |
||
| Line 2,191: | Line 2,237: | ||
| style="text-align: center" |Villain |
| style="text-align: center" |Villain |
||
| |
| |
||
| + | |[[File:Shoretrooper.png|175px]] |
||
| − | | |
||
|- |
|- |
||
| style="text-align: center" |[[Incinerator Stormtrooper]] |
| style="text-align: center" |[[Incinerator Stormtrooper]] |
||
| style="text-align: center" |Villain |
| style="text-align: center" |Villain |
||
| |
| |
||
| + | |[[File:Incinerator_Stormtrooper.png|175px]] |
||
| − | | |
||
|- |
|- |
||
| style="text-align: center" |[[Jyn Erso]] |
| style="text-align: center" |[[Jyn Erso]] |
||
| Line 2,206: | Line 2,252: | ||
| style="text-align: center" |Extra |
| style="text-align: center" |Extra |
||
| |
| |
||
| + | |[[file:TSS K-2SO.png|175px]] |
||
| − | | |
||
|- |
|- |
||
| style="text-align: center" |[[Kuiil]] |
| style="text-align: center" |[[Kuiil]] |
||
| Line 2,221: | Line 2,267: | ||
| style="text-align: center" |Scoundrel |
| style="text-align: center" |Scoundrel |
||
| |
| |
||
| + | |[[File:TSS Young Chewbacca.png|175px]] |
||
| − | | |
||
|- |
|- |
||
| style="text-align: center" |[[Luke Skywalker|Luke Skywalker (Classic)]] |
| style="text-align: center" |[[Luke Skywalker|Luke Skywalker (Classic)]] |
||
| style="text-align: center" |Jedi |
| style="text-align: center" |Jedi |
||
| |
| |
||
| + | |[[File:Luke Skywalker (Classic).png|175px]] |
||
| − | | |
||
|- |
|- |
||
| style="text-align: center" |[[Mimban Stormtrooper]] |
| style="text-align: center" |[[Mimban Stormtrooper]] |
||
| style="text-align: center" |Villain |
| style="text-align: center" |Villain |
||
| |
| |
||
| + | |[[File:TSS Mimban Stormtrooper.png|175px]] |
||
| − | | |
||
|- |
|- |
||
| style="text-align: center" |[[Moff Gideon]] |
| style="text-align: center" |[[Moff Gideon]] |
||
| style="text-align: center" | Villain |
| style="text-align: center" | Villain |
||
| |
| |
||
| + | |[[File:Moff Gideon (TSS).png|175px]] |
||
| − | | |
||
|- |
|- |
||
| style="text-align: center" |[[Obi-Wan Kenobi|Obi-Wan Kenobi (Classic)]] |
| style="text-align: center" |[[Obi-Wan Kenobi|Obi-Wan Kenobi (Classic)]] |
||
| Line 2,247: | Line 2,293: | ||
| style="text-align: center" |Hero |
| style="text-align: center" |Hero |
||
| |
| |
||
| + | |[[File:Princess Leia (Classic).png|175px]] |
||
| − | | |
||
|- |
|- |
||
| style="text-align: center" |[[Qi'ra]] |
| style="text-align: center" |[[Qi'ra]] |
||
| style="text-align: center" |Scoundrel |
| style="text-align: center" |Scoundrel |
||
| |
| |
||
| + | |[[File:TSS Qi'ra.png|175px]] |
||
| − | | |
||
|- |
|- |
||
| style="text-align: center" |[[Imperial Range Trooper|Range Trooper]] |
| style="text-align: center" |[[Imperial Range Trooper|Range Trooper]] |
||
| style="text-align: center" |Villain |
| style="text-align: center" |Villain |
||
| |
| |
||
| + | |[[File:TSS IRT.png|175px]] |
||
| − | | |
||
|- |
|- |
||
| style="text-align: center" |[[Tech]] |
| style="text-align: center" |[[Tech]] |
||
| style="text-align: center" |Hero |
| style="text-align: center" |Hero |
||
| |
| |
||
| + | |[[file:TSS Tech.png|175px]] |
||
| − | | |
||
|- |
|- |
||
| style="text-align: center" |[[Tobias Beckett]] |
| style="text-align: center" |[[Tobias Beckett]] |
||
| style="text-align: center" |Scoundrel |
| style="text-align: center" |Scoundrel |
||
| |
| |
||
| + | |[[File:TSS Tobias Beckett.png|175px]] |
||
| − | | |
||
|- |
|- |
||
| style="text-align: center" |[[Wrecker]] |
| style="text-align: center" |[[Wrecker]] |
||
| style="text-align: center" |Hero |
| style="text-align: center" |Hero |
||
| |
| |
||
| + | |[[File:Wrecker (TSS).png|175px]] |
||
| − | | |
||
|} |
|} |
||
★ Indicates an ability is tied to Class Upgrades |
★ Indicates an ability is tied to Class Upgrades |
||
| Line 2,647: | Line 2,693: | ||
|- |
|- |
||
|Executor |
|Executor |
||
| + | |Capital Ship |
||
| + | | |
||
| + | | |
||
| + | |- |
||
| + | |Fulminatrix |
||
| + | |Capital Ship |
||
| + | | |
||
| + | | |
||
| + | |- |
||
| + | |Home One |
||
| + | |Capital Ship |
||
| + | | |
||
| + | | |
||
| + | |- |
||
| + | |Invisible Hand |
||
|Capital Ship |
|Capital Ship |
||
| |
| |
||
| Line 2,653: | Line 2,714: | ||
|Steadfast |
|Steadfast |
||
| Capital Ship |
| Capital Ship |
||
| + | | |
||
| + | | |
||
| + | |- |
||
| + | |Venator |
||
| + | |Capital Ship |
||
| |
| |
||
| |
| |
||
| Line 2,994: | Line 3,060: | ||
*B1 Battle Droids |
*B1 Battle Droids |
||
| |
| |
||
| − | *Darth Maul |
+ | *Darth Maul (No Cape) |
|- |
|- |
||
|Level 4: [[starwars:Battle_of_Naboo#Battle_in_the_Great_Grass_Plains|Outmanned But Not Out-Gungan-ed]] |
|Level 4: [[starwars:Battle_of_Naboo#Battle_in_the_Great_Grass_Plains|Outmanned But Not Out-Gungan-ed]] |
||
| Line 3,053: | Line 3,119: | ||
*Geonosis |
*Geonosis |
||
**[[starwars:Geonosian droid factories|Droid Factory]] |
**[[starwars:Geonosian droid factories|Droid Factory]] |
||
| + | | |
||
| − | |B1 Battle Droid |
||
| + | * B1 Battle Droid |
||
| − | Geonosian Warrior |
||
| + | * Geonosian Warrior |
||
| |
| |
||
|- |
|- |
||
| Line 3,068: | Line 3,135: | ||
*Geonosis |
*Geonosis |
||
**[[starwars:Petranaki Arena|Petranaki Arena]] |
**[[starwars:Petranaki Arena|Petranaki Arena]] |
||
| + | | |
||
| − | |B1 Battle Droid |
||
| − | + | * B1 Battle Droid (Geonosis) |
|
| + | * B2 Super Battle Droid |
||
| |
| |
||
*Acklay |
*Acklay |
||
| Line 3,086: | Line 3,154: | ||
**[[starwars:Dooku's hangar|Dooku's Hanger]] |
**[[starwars:Dooku's hangar|Dooku's Hanger]] |
||
| |
| |
||
| + | * B1 Battle Droid |
||
| + | * Geonosian Warrior |
||
| |
| |
||
*Count Dooku |
*Count Dooku |
||
| Line 3,098: | Line 3,168: | ||
| |
| |
||
*''[[starwars:Invisible Hand|Invisible Hand]]'' |
*''[[starwars:Invisible Hand|Invisible Hand]]'' |
||
| + | | |
||
| − | |B1 Battle Droid |
||
| − | + | * B1 Battle Droid |
|
| + | * B2 Super Battle Droid |
||
| − | |||
| − | Droideka |
+ | * Droideka |
| |
| |
||
*Count Dooku |
*Count Dooku |
||
| Line 3,114: | Line 3,184: | ||
**Pau City |
**Pau City |
||
| |
| |
||
| + | * B1 Battle Droid |
||
| |
| |
||
*General Grievous |
*General Grievous |
||
| Line 3,120: | Line 3,191: | ||
| |
| |
||
*Chewbaca |
*Chewbaca |
||
| + | *Tarfful |
||
*Yoda |
*Yoda |
||
| |
| |
||
| Line 3,126: | Line 3,198: | ||
**Kachirho |
**Kachirho |
||
| |
| |
||
| + | * B1 Battle Droid (Kashyyyk) |
||
| + | * Clone Trooper (Kashyyyk) |
||
| |
| |
||
|- |
|- |
||
| Line 3,150: | Line 3,224: | ||
**[[starwars:Klegger Corp Mining Facility|Klegger Corp Mining Facility]] |
**[[starwars:Klegger Corp Mining Facility|Klegger Corp Mining Facility]] |
||
| |
| |
||
| + | * Mustafarian |
||
| |
| |
||
*Anakin Skywalker {{C|Yellow Eyes}} |
*Anakin Skywalker {{C|Yellow Eyes}} |
||
| Line 3,190: | Line 3,265: | ||
**Trash Compactor |
**Trash Compactor |
||
| |
| |
||
| + | * Stormtroopers |
||
| |
| |
||
*Dianoga |
*Dianoga |
||
| Line 3,203: | Line 3,279: | ||
*[[starwars:DS-1 Death Star Mobile Battle Station|Death Star]] |
*[[starwars:DS-1 Death Star Mobile Battle Station|Death Star]] |
||
| |
| |
||
| + | * Stormtroopers |
||
| |
| |
||
|- |
|- |
||
| Line 3,248: | Line 3,325: | ||
|Level 4: [[starwars:Escape_from_Cloud_City|Hibernation Station]] |
|Level 4: [[starwars:Escape_from_Cloud_City|Hibernation Station]] |
||
| |
| |
||
| + | *C-3PO |
||
*Chewbacca |
*Chewbacca |
||
* Lando Calrissian {{C|Episode V}} |
* Lando Calrissian {{C|Episode V}} |
||
| Line 3,256: | Line 3,334: | ||
**Cloud City |
**Cloud City |
||
| |
| |
||
| + | * Stormtroopers |
||
| |
| |
||
*Boba Fett's Starship |
*Boba Fett's Starship |
||
| Line 3,268: | Line 3,347: | ||
**Carbonite Chamber |
**Carbonite Chamber |
||
| |
| |
||
| + | * Stormtroopers |
||
| |
| |
||
*Darth Vader |
*Darth Vader |
||
| Line 3,279: | Line 3,359: | ||
*Chewbacca |
*Chewbacca |
||
*Jubnuk |
*Jubnuk |
||
| + | *Luke Skywalker (Episode VI) |
||
*Luke Skywalker {{C|Jabba's Palace}} |
*Luke Skywalker {{C|Jabba's Palace}} |
||
*Leia {{C|Boushh Disguise}} |
*Leia {{C|Boushh Disguise}} |
||
| Line 3,293: | Line 3,374: | ||
| |
| |
||
*C-3PO |
*C-3PO |
||
| − | *Han Solo {{C|Carbonite - Shirt}} |
||
*Lando Calrissian {{C|Jabba's Palace}} |
*Lando Calrissian {{C|Jabba's Palace}} |
||
| − | *Luke Skywalker {{C| |
+ | *Luke Skywalker {{C|Episode VI}} |
*Leia {{C|Jabba's Palace}} |
*Leia {{C|Jabba's Palace}} |
||
*R2-D2 {{C|Waiter}} |
*R2-D2 {{C|Waiter}} |
||
| Line 3,308: | Line 3,388: | ||
|- |
|- |
||
|Level 3: Endor the Line |
|Level 3: Endor the Line |
||
| + | | |
||
| − | |Luke Skywalker (Endor) |
||
| − | Leia (Endor) |
+ | * Leia (Endor) |
| + | * Luke Skywalker (Endor) |
||
| |
| |
||
| |
| |
||
| Line 3,320: | Line 3,401: | ||
| |
| |
||
*Chewbacca |
*Chewbacca |
||
| − | *Han Solo {{C|Endor}} |
||
*Wicket |
*Wicket |
||
| |
| |
||
| Line 3,338: | Line 3,418: | ||
**Emperor's Throne Room |
**Emperor's Throne Room |
||
| |
| |
||
| + | * Emperor's Royal Guard |
||
| |
| |
||
* Darth Vader |
* Darth Vader |
||
*Emperor Palpatine |
*Emperor Palpatine |
||
| − | *Death Star II Reactor Core |
||
|- |
|- |
||
| colspan="6" style="background:#FEE12B" |<span style="color:#FFFFFF;"><div align="center">'''''Episode VII: The Force Awakens'''''</div></span> |
| colspan="6" style="background:#FEE12B" |<span style="color:#FFFFFF;"><div align="center">'''''Episode VII: The Force Awakens'''''</div></span> |
||
| Line 3,354: | Line 3,434: | ||
| |
| |
||
| |
| |
||
| − | *''Finalizer'' |
||
|- |
|- |
||
|Level 2: [[starwars:Escape_from_Jakku|Low Flying Garbage]] |
|Level 2: [[starwars:Escape_from_Jakku|Low Flying Garbage]] |
||
| Line 3,379: | Line 3,458: | ||
|Level 4: [[starwars:Battle_of_Starkiller_Base#The_ground_assault|Starkiller Queen]] |
|Level 4: [[starwars:Battle_of_Starkiller_Base#The_ground_assault|Starkiller Queen]] |
||
| |
| |
||
| + | *Chewbacca |
||
| − | *Rey {{C|Episode VII - Starkiller Base}} |
||
| + | *Finn |
||
| + | *Han Solo {{C|Episode VII}} |
||
| |
| |
||
| |
| |
||
| Line 3,448: | Line 3,529: | ||
|- |
|- |
||
|Level 5: [[starwars:Battle_of_Crait|Ground A-Salt]] |
|Level 5: [[starwars:Battle_of_Crait|Ground A-Salt]] |
||
| + | | |
||
| − | |Luke Skywalker {{C|Old - Crait}} |
||
| + | * General Leia Organa (Black Robes) |
||
| + | * Luke Skywalker {{C|Old - Crait}} |
||
| + | * Rey (Grey Jedi Wrap) |
||
| |
| |
||
| |
| |
||
| Line 3,454: | Line 3,538: | ||
**Crait Outpost |
**Crait Outpost |
||
| |
| |
||
| + | | |
||
| − | |Kylo Ren {{C|No Helmet - Scar}} |
||
| + | * Kylo Ren {{C|No Helmet - Scar}} |
||
|- |
|- |
||
| colspan="6" style="background:#1261A0" |<span style="color:#FFFFFF;"><div align="center">'''''Episode IX: The Rise of Skywalker'''''</div></span> |
| colspan="6" style="background:#1261A0" |<span style="color:#FFFFFF;"><div align="center">'''''Episode IX: The Rise of Skywalker'''''</div></span> |
||
| Line 3,512: | Line 3,597: | ||
*Ben Solo |
*Ben Solo |
||
*Finn (Episode IX) |
*Finn (Episode IX) |
||
| + | *Jannah |
||
*Rey {{C|Episode IX}} |
*Rey {{C|Episode IX}} |
||
| |
| |
||
| Line 3,742: | Line 3,828: | ||
*This is the first Lego game since [[LEGO Harry Potter: Years 5-7]] to lack voice acting, albeit as an optional mode. |
*This is the first Lego game since [[LEGO Harry Potter: Years 5-7]] to lack voice acting, albeit as an optional mode. |
||
*According to former TT Games employees, the NTT engine was controversial within the development team, with some demanding they use Unreal Engine 4 instead, due to its difficulty to use, with some animations taking hours more than they did with the old engine. In addition, the game suffered through crunch, leading to some employees to quit TT Games altogether. <ref>https://www.polygon.com/features/22891555/lego-star-wars-the-skywalker-saga-has-led-to-extensive-crunch-at-tt-games</ref> |
*According to former TT Games employees, the NTT engine was controversial within the development team, with some demanding they use Unreal Engine 4 instead, due to its difficulty to use, with some animations taking hours more than they did with the old engine. In addition, the game suffered through crunch, leading to some employees to quit TT Games altogether. <ref>https://www.polygon.com/features/22891555/lego-star-wars-the-skywalker-saga-has-led-to-extensive-crunch-at-tt-games</ref> |
||
| − | *According to unused strings in the game's files, the game |
+ | *According to unused strings in the game's files, the game has leftover code from The Complete Saga on PS3.<ref>https://tcrf.net/LEGO_Star_Wars:_The_Skywalker_Saga#PS3_Strings</ref> |
==Gallery== |
==Gallery== |
||
Revision as of 10:17, 22 June 2022
| LEGO → Video Games → Star Wars |
| LEGO Star Wars: The Skywalker Saga | |
|---|---|
 |
|
| LEGO Theme: | |
| Developer(s): | |
| Publisher(s): | |
| Date Released: | |
| Genre: |
Action, adventure |
| Mode(s): |
Single player, simultaneous two player |
| Platforms: |
Nintendo Switch, Xbox One, Xbox Series X, PlayStation 4, PlayStation 5, PC, Mac |
| ' | |
LEGO Star Wars: The Skywalker Saga is the next installment in the LEGO Star Wars video game series. It was released on April 5, 2022 on the Nintendo Switch, Xbox One, Xbox Series X, PlayStation 4, PlayStation 5, PC, and Mac.
Official Description
|
Play Through Favorite Moments from All Nine Star Wars™ Saga Films Like Never Before in a Brand-New LEGO® Video Game Friends and family can dive right into their favorite saga film and play through memorable Star Wars moments, reimagined with LEGO fun and humor. Players can start at the beginning with Star Wars™: The Phantom Menace, begin the original trilogy with Star Wars™: A New Hope, or begin the sequel trilogy with Star Wars™: The Force Awakens . From the desert of Geonosis, to the swamps of Dagobah, to the snowfields of Starkiller Base – players will have the power to revisit any planet, at any time, in any order they wish. The entire galaxy is available to discover and play in. LEGO Star Wars: The Skywalker Saga features the biggest roster of playable characters in the LEGO Star Wars series including the greatest legends from every era of the Skywalker saga. Players can fight against the forces of evil as favorite characters such as Luke Skywalker, Rey, Obi-Wan Kenobi, Finn, BB-8 and a legion of other heroes, or turn to the dark side as Darth Vader, Emperor Palpatine, Kylo Ren, and more. The greatest vehicles from across the galaxy are also available to command. Players can jump to lightspeed in the Millennium Falcon to outrun Imperial starships, battle First Order TIE fighters in Resistance X-wings, or podrace on Tatooine. |
Characters
Playable Characters
| Character | Class | Abilities | Image |
|---|---|---|---|
| 2-1B | Extra | 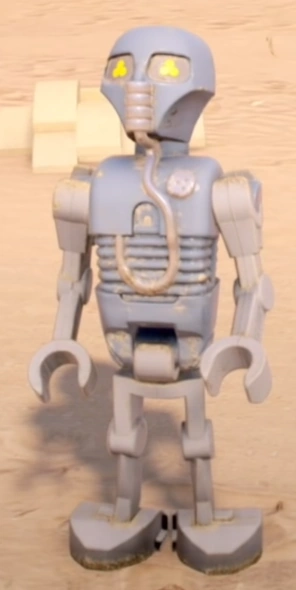
| |
| 4-LOM | Bounty Hunter |
|
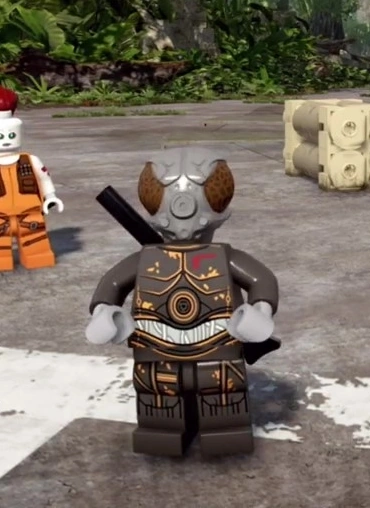
|
| 8D8 | Extra | 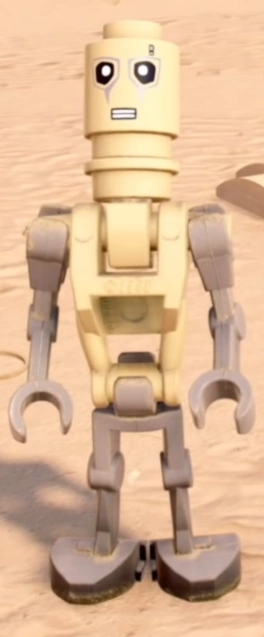
| |
| AD-4M | Extra | 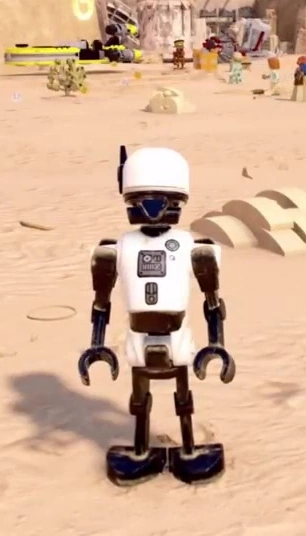
| |
| Aayla Secura | Jedi |
|
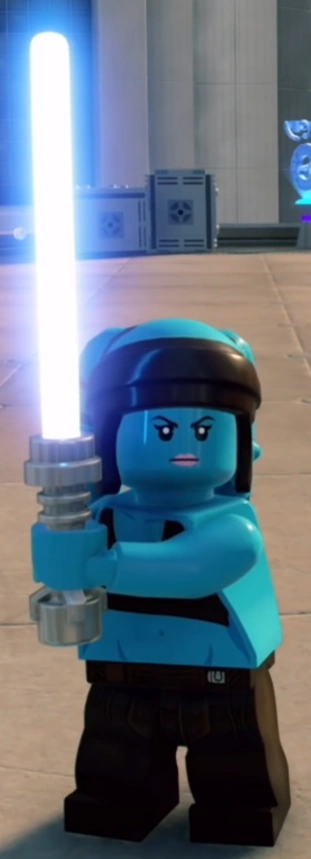
|
| Admiral Ackbar | Hero |
|
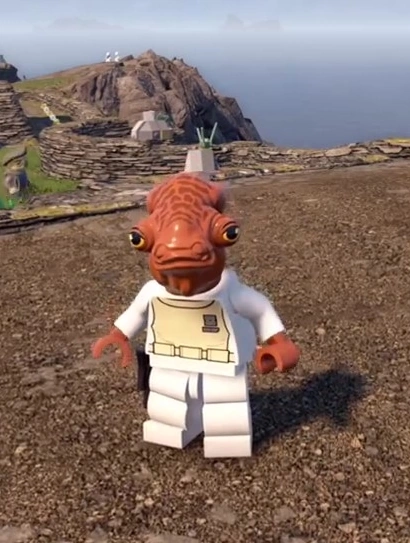
|
| Admiral Holdo | Hero |
|
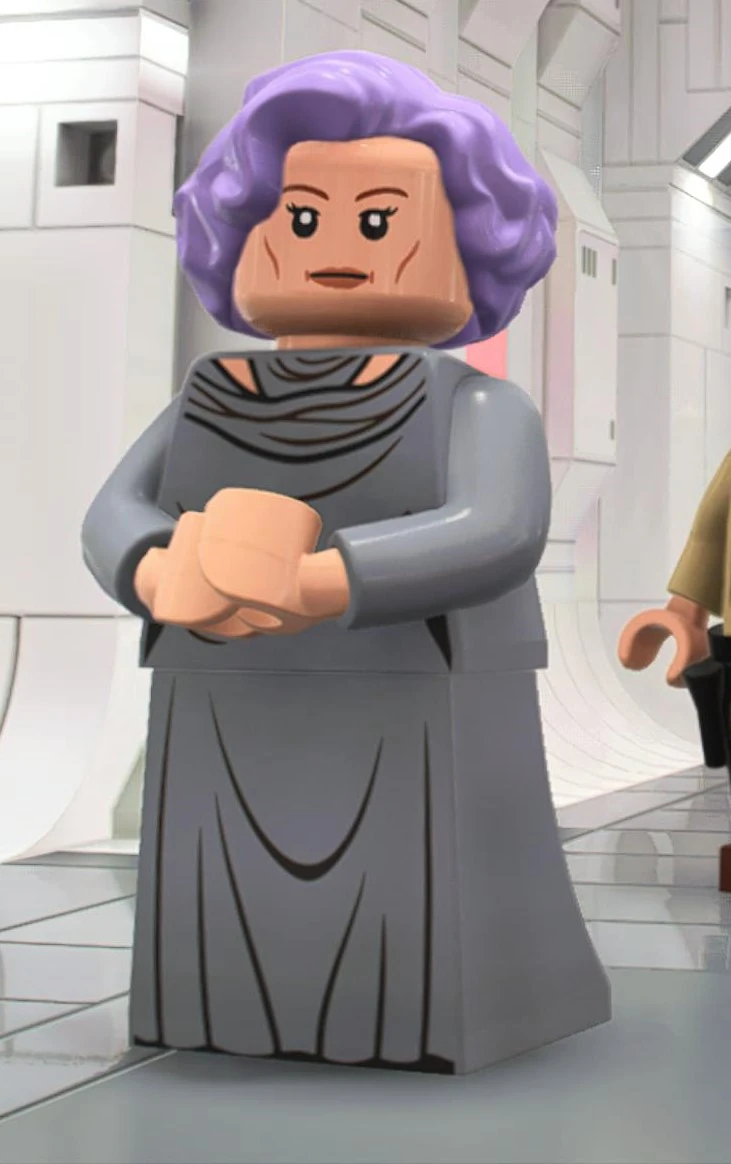
|
| Aftab Ackbar | Hero |
|

|
| Alcida-Auka | Extra | 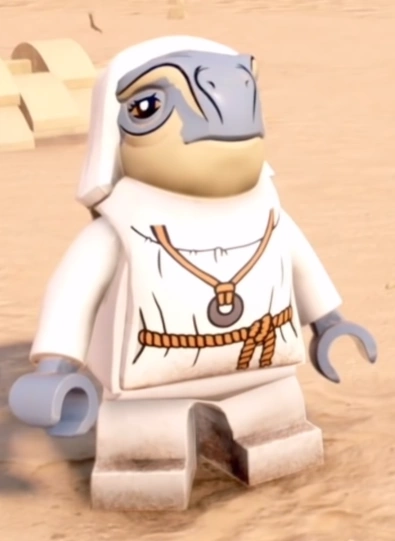
| |
| Anakin Skywalker (Episode I) | Extra |
|
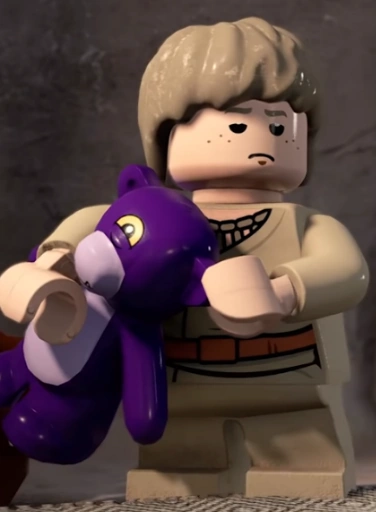
|
| Anakin Skywalker (Podracer) | Extra |
|

|
| Anakin Skywalker (Pilot) | Extra |
|
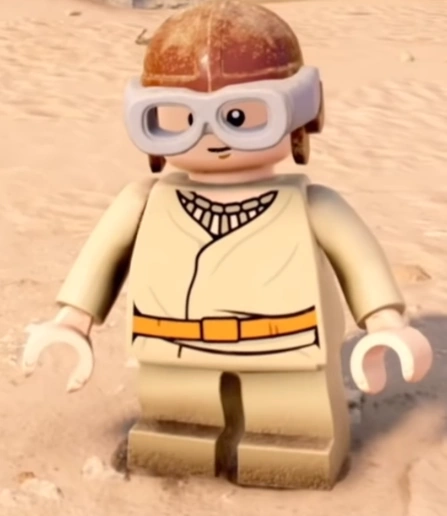
|
| Anakin Skywalker (Episode II ) | Jedi |
|
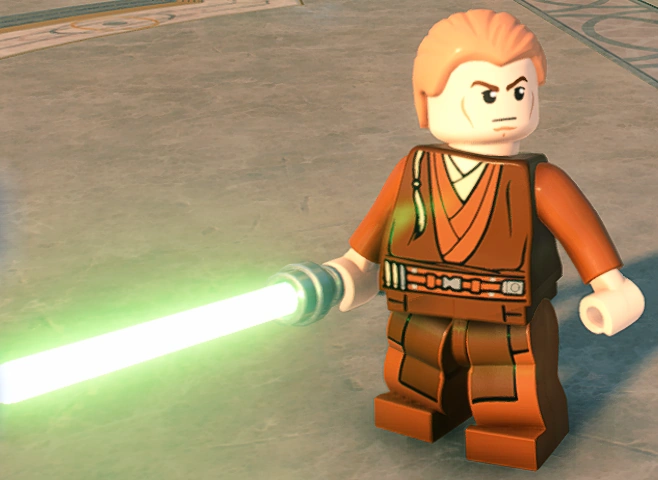
|
| Anakin Skywalker (Episode II - Cape) | Jedi |
|
|
| Anakin Skywalker (Episode III - Cape) | Jedi |
|
|
| Anakin Skywalker (Episode III) | Jedi |
|
|
| Anakin Skywalker (Yellow Eyes) | Dark Side |
|
|
| Anakin Skywalker (Charred) | Dark Side |
|

|
| Ap'Lek | Villain |
|
|
| Aurra Sing | Bounty Hunter |
|
|
| B1 Battle Droid | Villain |
|
|
| B1 Battle Droid (Commander) | Villain |
|
|
| B1 Battle Droid (Heavy Assault) | Villain |
|
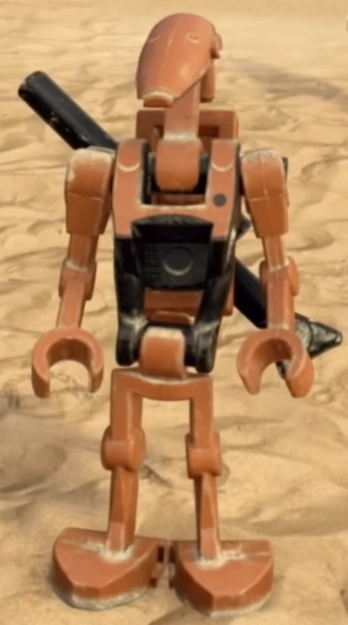
|
| B1 Battle Droid (Security) | Villain |
|
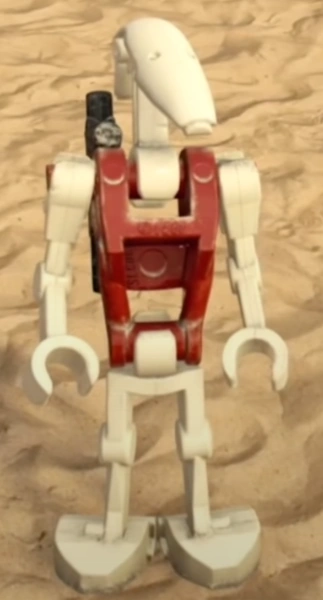
|
| B1 Battle Droid (Geonosis) | Villain |
|
|
| B1 Battle Droid (Kashyyyk) | Villain |
|
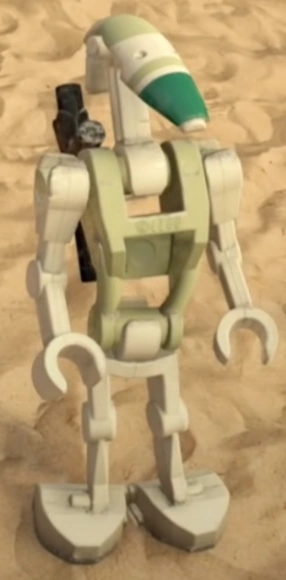
|
| B2 Super Battle Droid | Villain |
|
|
| BB-8 | Astromech Droid |
|
|
| BB-8 (Disguise) | Astromech Droid |
|
|
| BB-9E | Astromech Droid |
|
|
| Babu Frik | Extra | 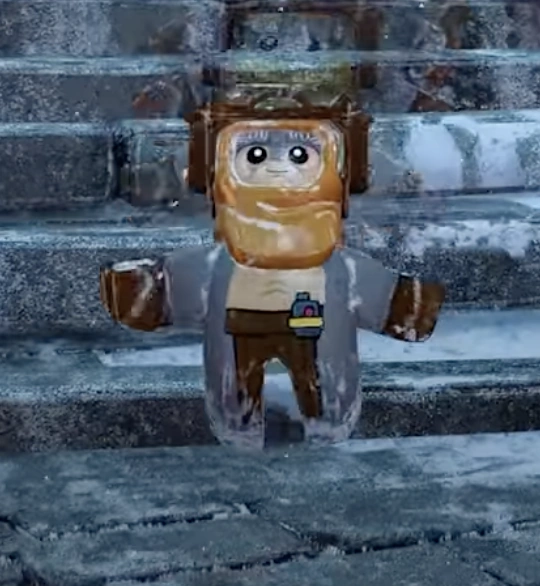
| |
| Bail Organa | Hero | 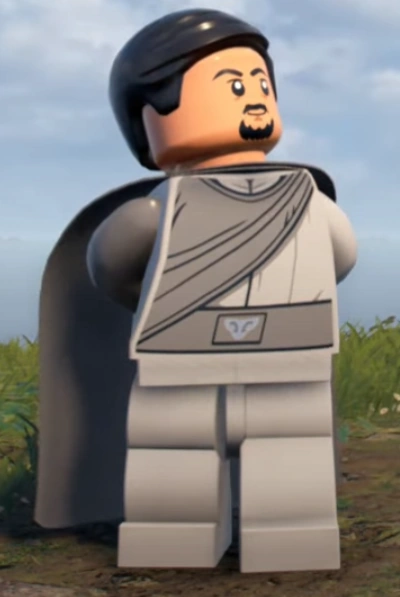
| |
| Bala-Tik | Scoundrel | 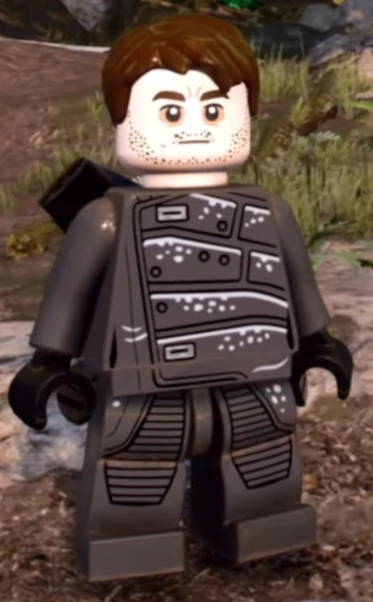
| |
| Barriss Offee | Jedi |
|

|
| Bazine Netal | Bounty Hunter | 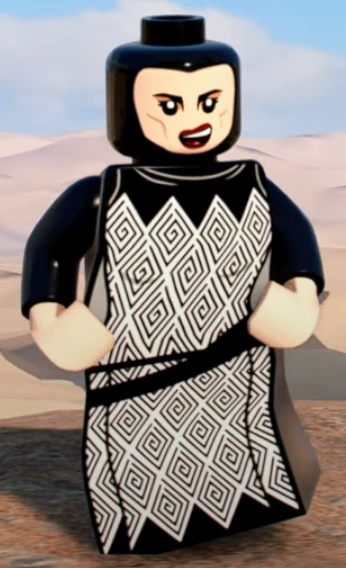
| |
| Beaumont Kin | Hero | 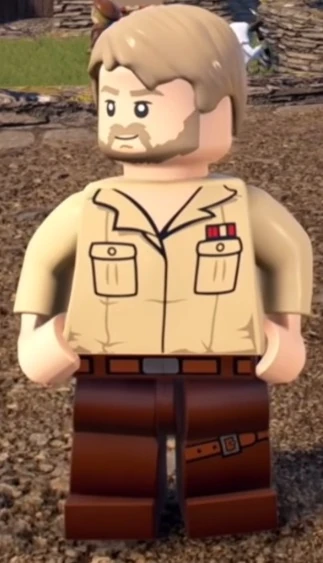
| |
| Ben Solo | Jedi | 
| |
| Bib Fortuna | Extra | 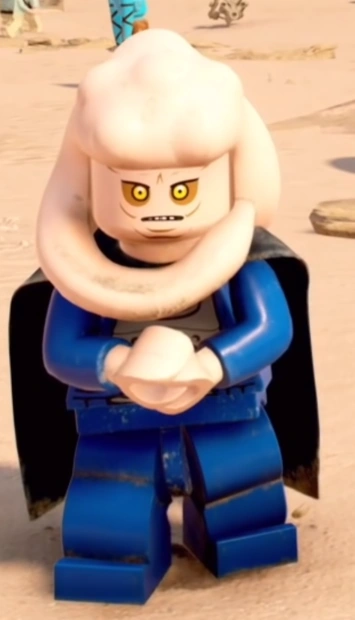
| |
| Biggs Darklighter | Hero | 
| |
| Boba Fett | Bounty Hunter |
|
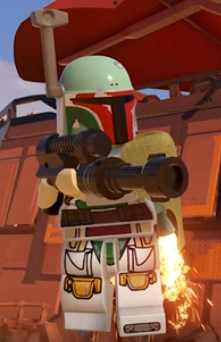
|
| Boba Fett (Young) | Extra | 
| |
| Bobbajo | Extra | 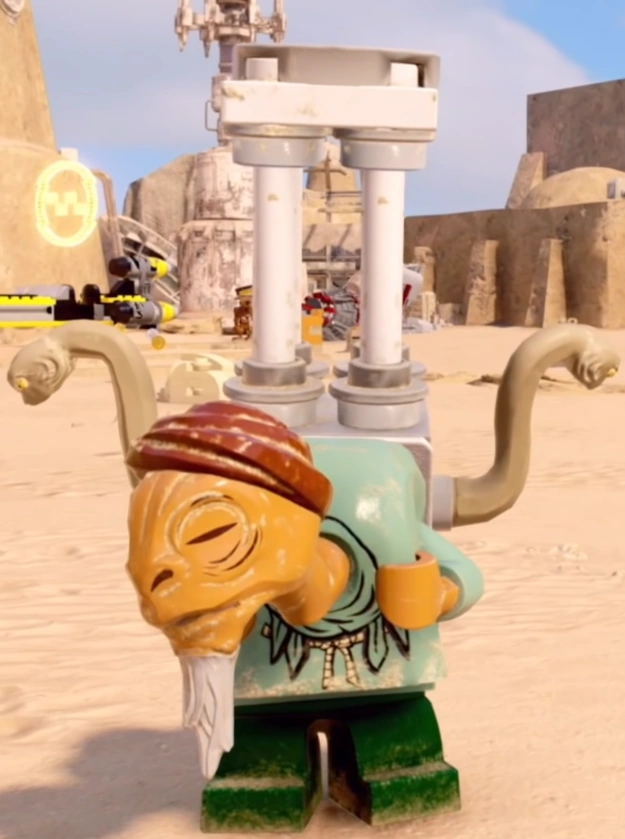
| |
| Boolio | Hero | 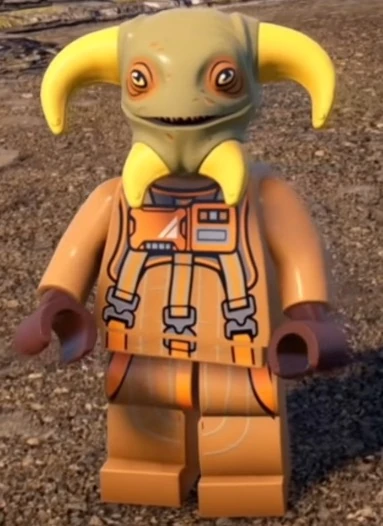
| |
| Boss Nass | Hero | 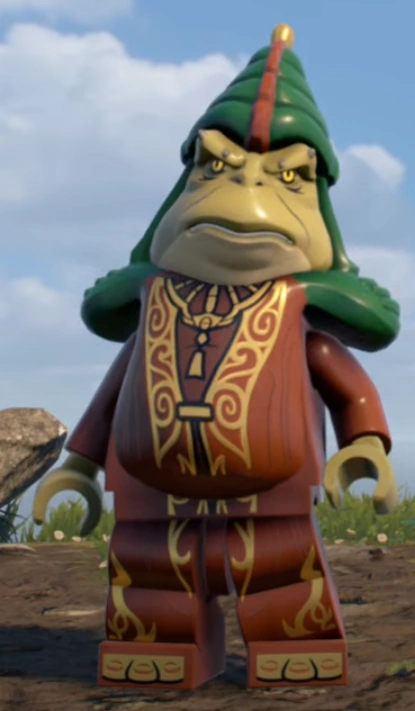
| |
| Bossk | Bounty Hunter | 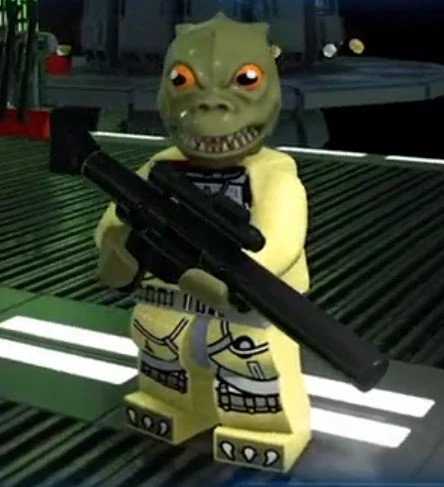
| |
| C'ai Threnalli | Hero | 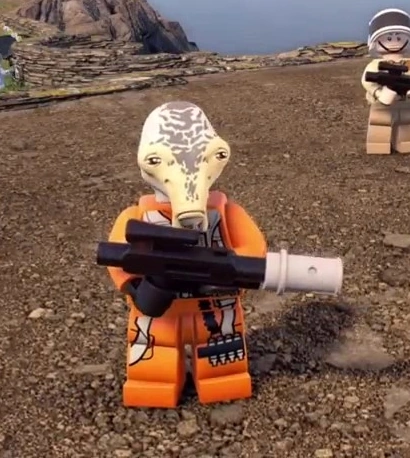
| |
| C-3PO (Episode I) | Protocol Droid |
|
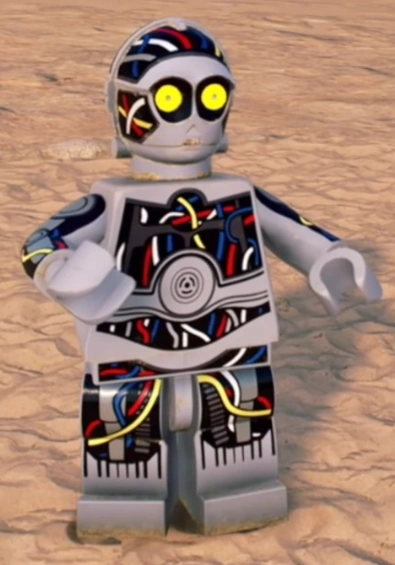
|
| C-3PO (Rusted) | Protocol Droid |
|
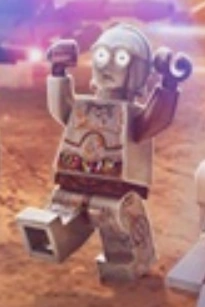
|
| C-3PO | Protocol Droid |
|
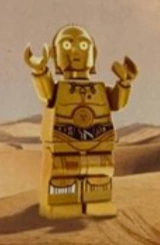
|
| C-3PO (Red Arm) | Protocol Droid |
|
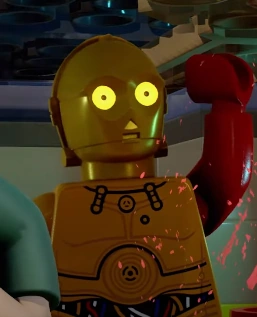
|
| C-3PO (Kijimi Coat) | Protocol Droid |
|
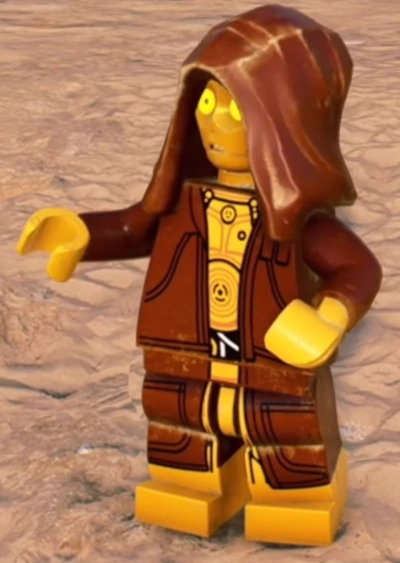
|
| C-3PO (Red Eyes) | Protocol Droid |
|
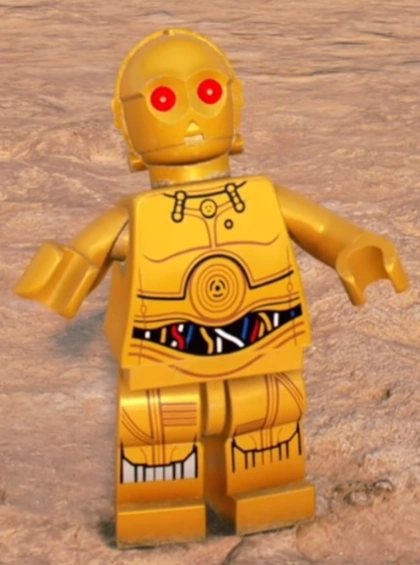
|
| C-3PO (Holiday Special) | Protocol Droid |
|
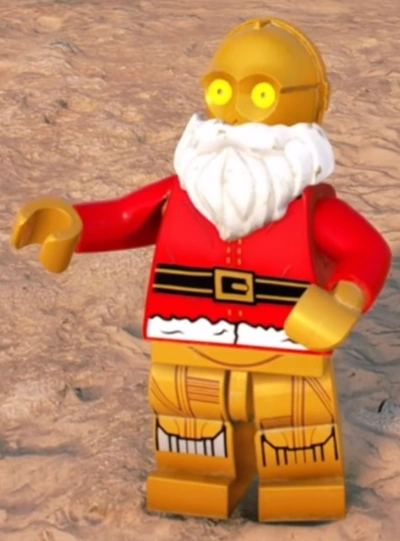
|
| Captain Antilles | Hero | 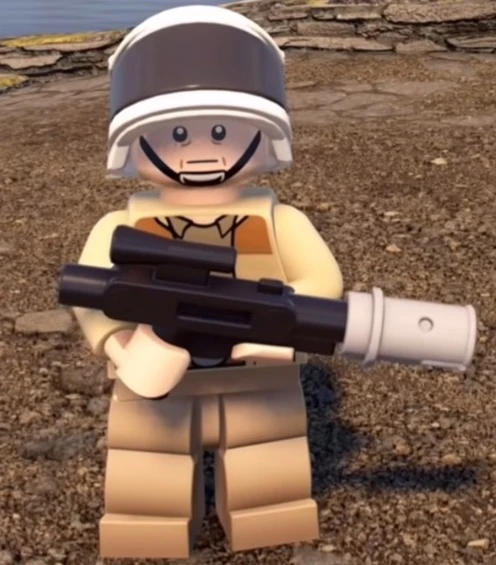
| |
| Captain Canady | Villain | 
| |
| Captain Panaka | Hero | 
| |
| Captain Peavey | Villain | 
| |
| Captain Phasma | Villain | 
| |
| Captain Phasma (Cracked Helmet) | Villain | 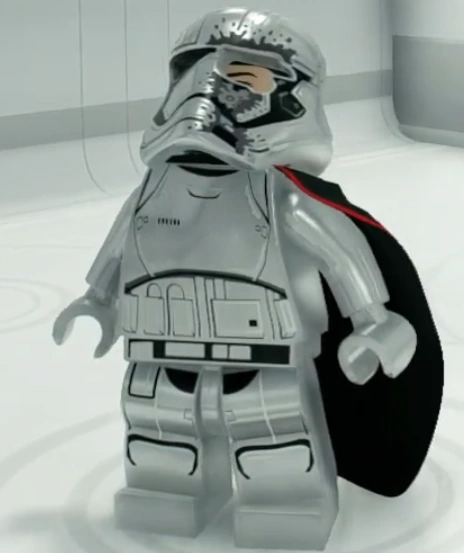
| |
| Captain Tarpals | Hero | 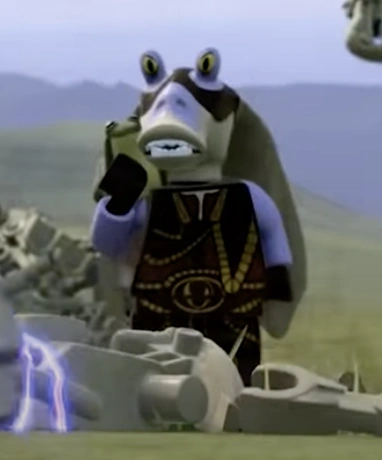
| |
| Captain Typho | Hero | 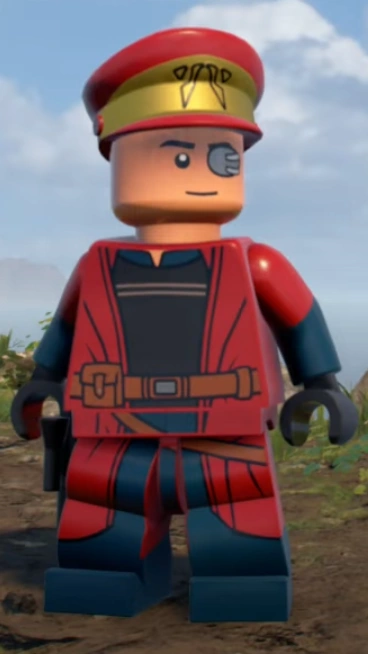
| |
| Cardo | Villain | 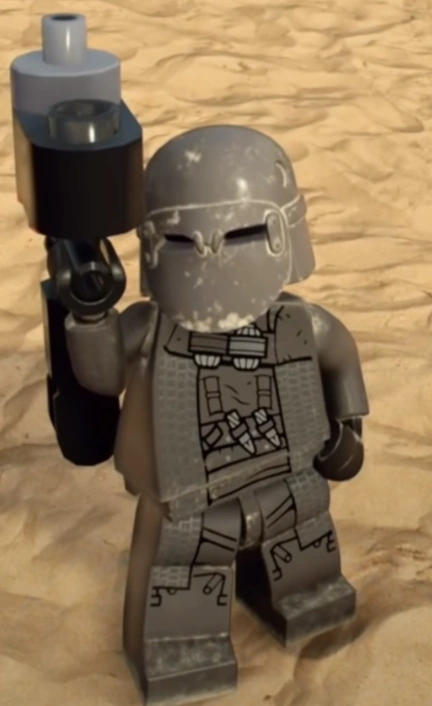
| |
| Carib Diss | Bounty Hunter | 
| |
| Chewbacca | Scoundrel | 
| |
| Chewbacca (Holiday Special) | Scoundrel | 
| |
| Chief Chirpa | Scavenger | 
| |
| Clone Trooper (Phase II) | Hero | 
| |
| Clone Trooper (212th Attack Battalion) | Hero | 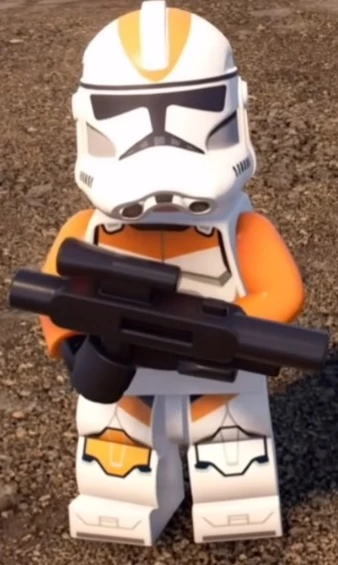
| |
| Clone Trooper (Kashyyyk) | Hero | 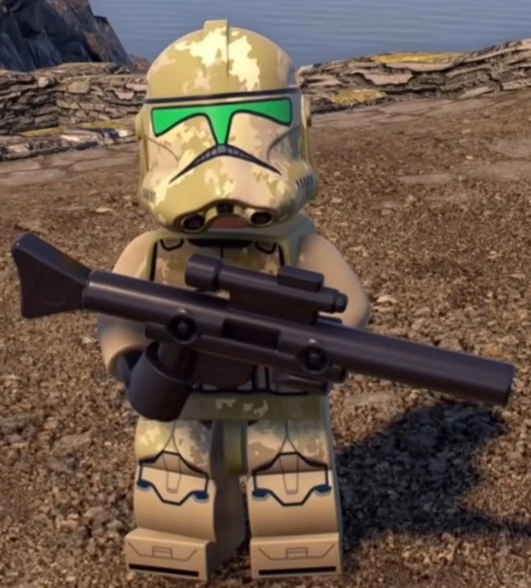
| |
| Clone Trooper (Coruscant Guard) | Hero | 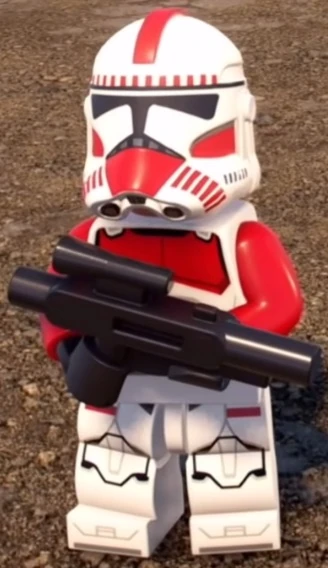
| |
| Clone Trooper (501st Legion) | Hero | 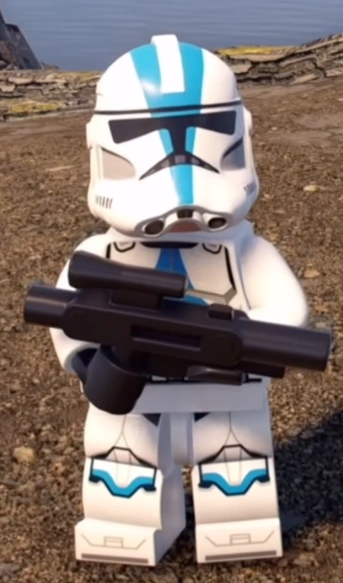
| |
| Clone Trooper (Phase I) | Hero | 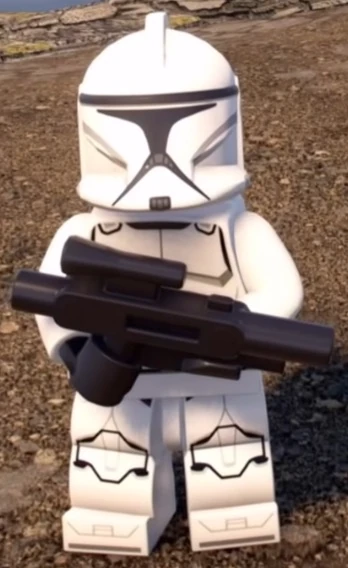
| |
| Clone Trooper (Sergeant) | Hero | 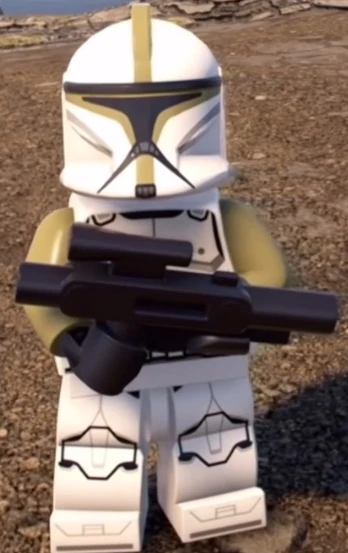
| |
| Clone Trooper (Lieutenant) | Hero | 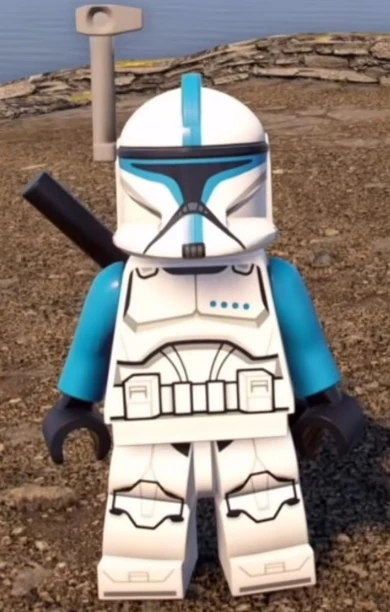
| |
| Clone Trooper (Captain) | Hero | 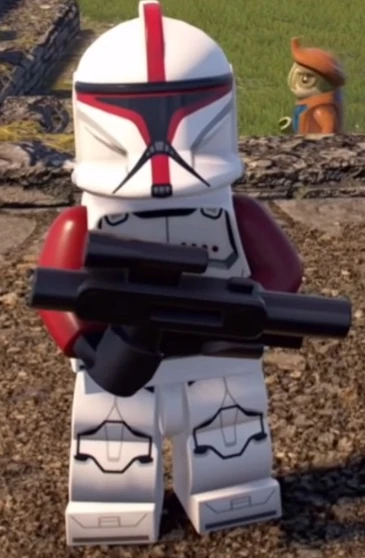
| |
| Clone Trooper (Commander) | Hero | 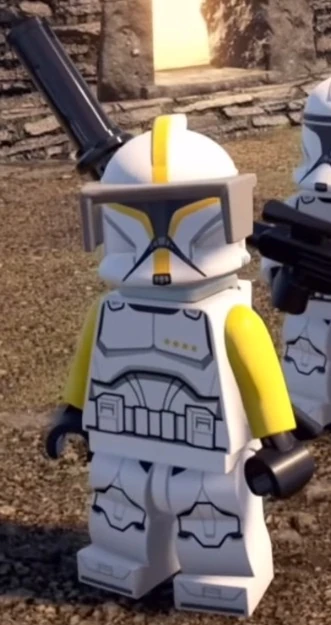
| |
| Commander Cody | Hero | 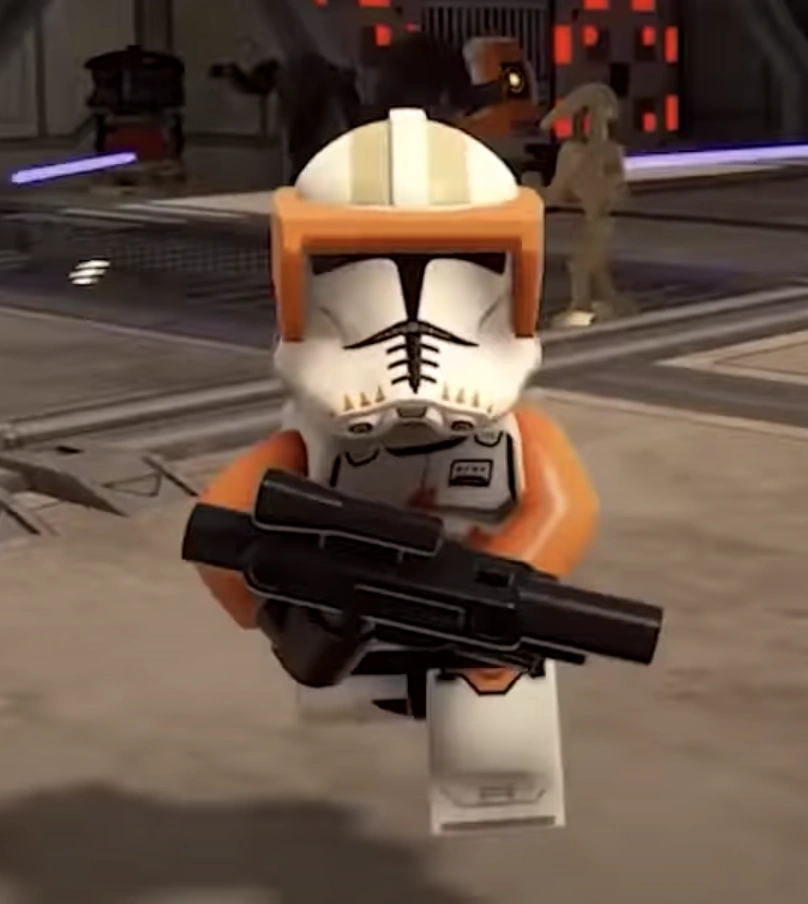
| |
| Commander D'acy | Hero | 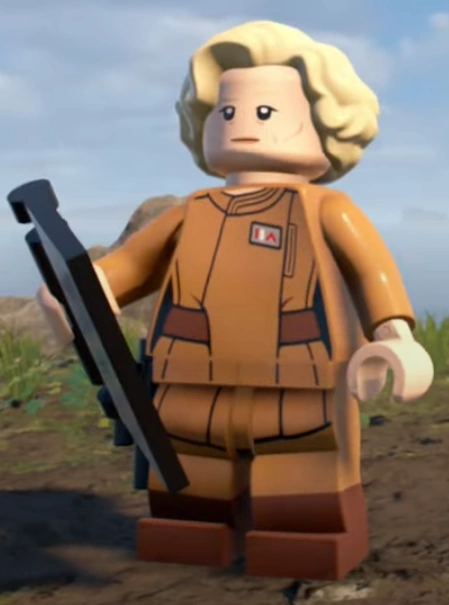
| |
| Commander Gree | Hero | 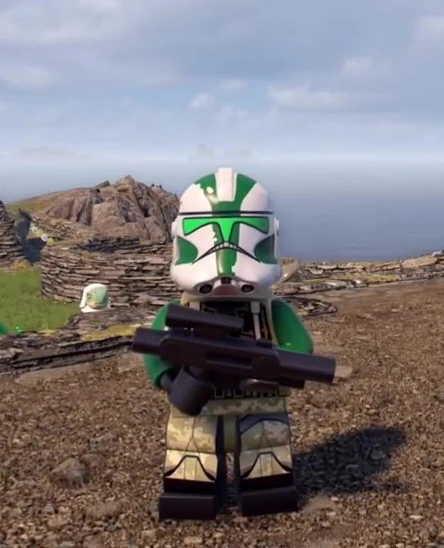
| |
| Commander Jir | Villain | 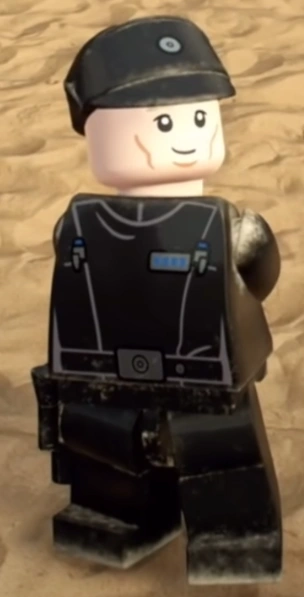
| |
| Count Dooku | Dark Side |
|
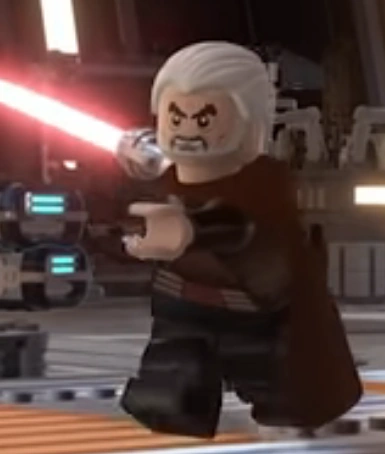
|
| D-O | Extra | 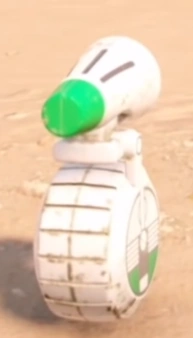
| |
| D-O (Holiday Special) | Extra | 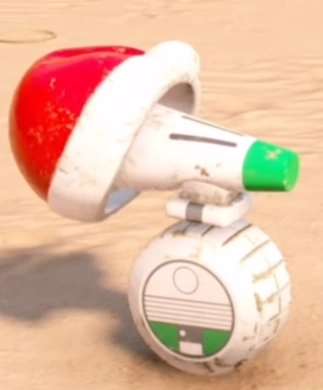
| |
| DJ | Scoundrel | 
| |
| DJ (First Order) | Villain | 
| |
| Darth Maul | Dark Side |
|
|
| Darth Maul (No Cape) | Dark Side |
|
|
| Darth Vader | Dark Side |
|

|
| Darth Vader (Holiday Special) | Dark Side |
|
|
| Darth Vader (No Helmet) | Dark Side |
|
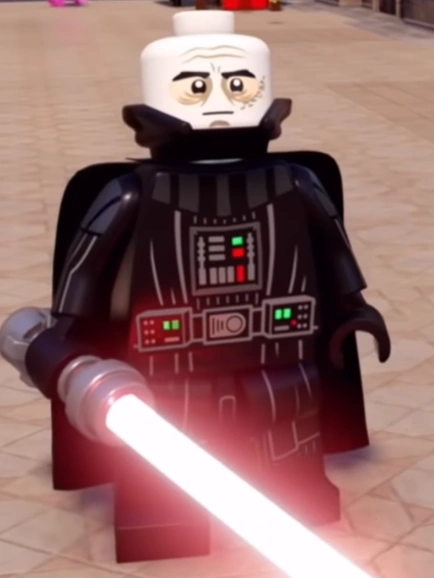
|
| Dellso Prin | Extra | 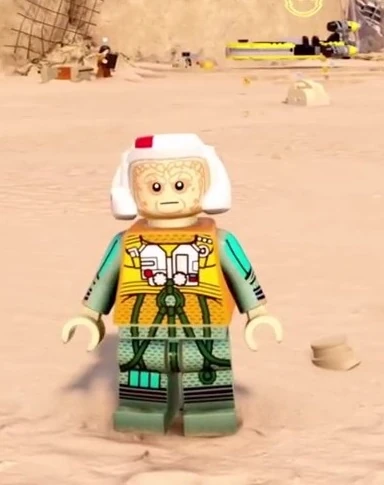
| |
| Dengar | Bounty Hunter | 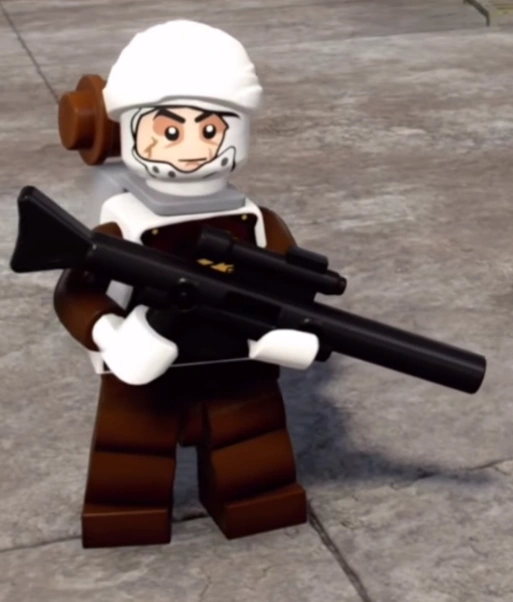
| |
| Dexter Jettster | Extra | 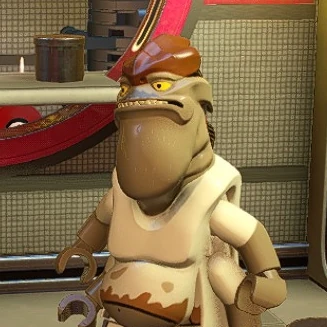
| |
| Doctor Evazan | Scoundrel | 
| |
| Droideka | Extra | 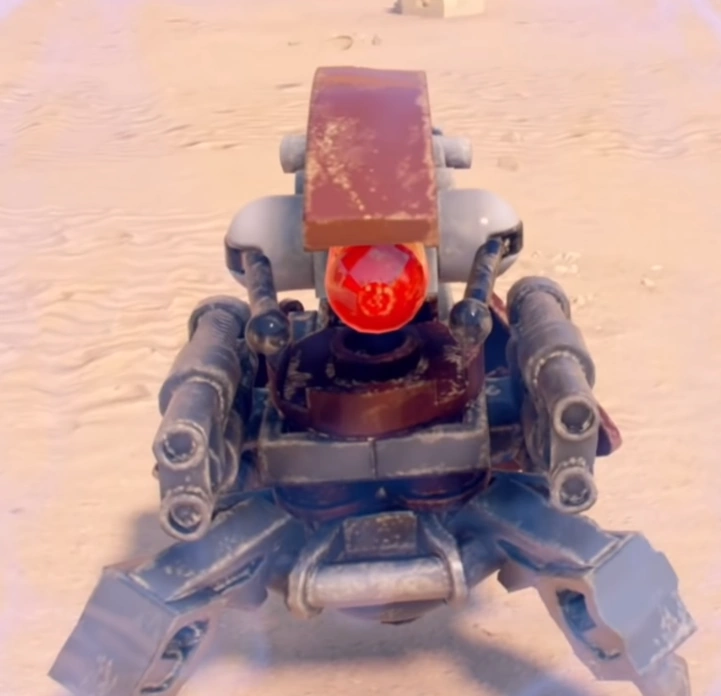
| |
| E-3PO | Protocol Droid | 
| |
| EV-9D9 Supervisor Droid | Extra | 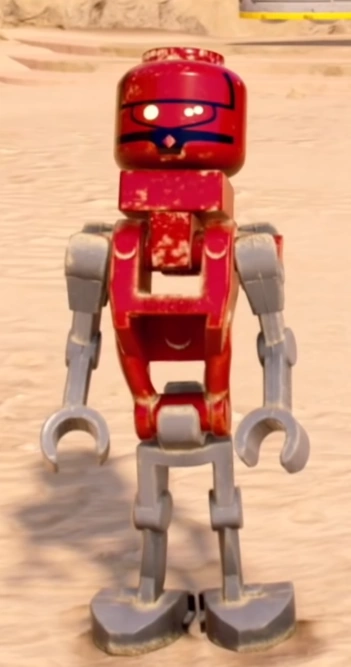
| |
| Ello Asty | Hero | 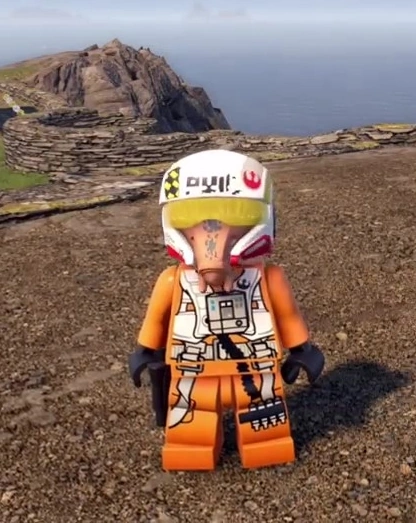
| |
| Emperor's Royal Guard | Villain | 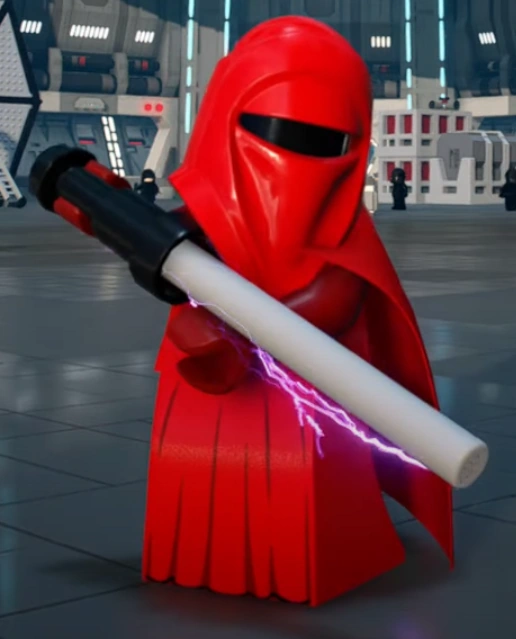
| |
| Empire Captain | Villain | 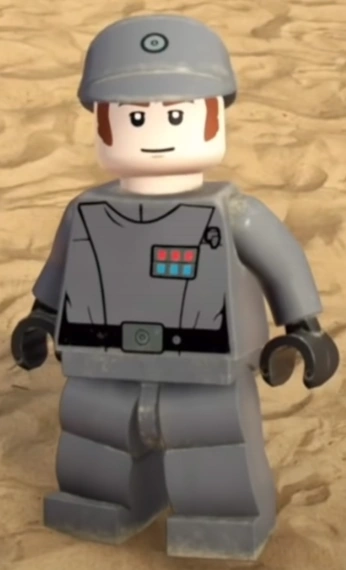
| |
| FN-2199 | Villain | 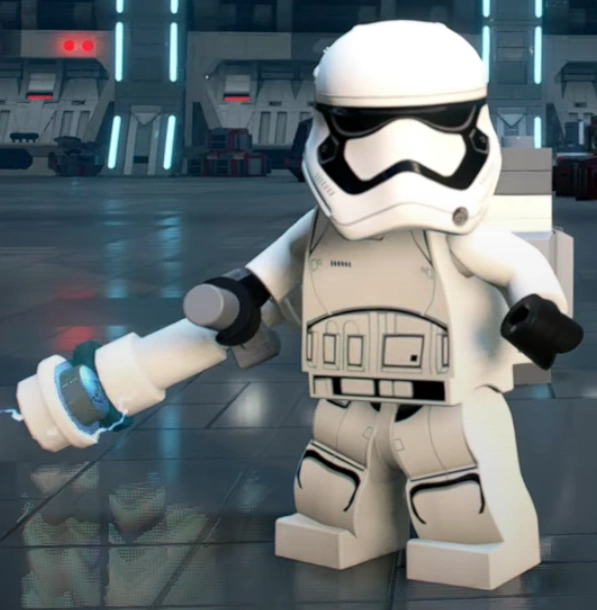
| |
| Figrin D'an | Extra | 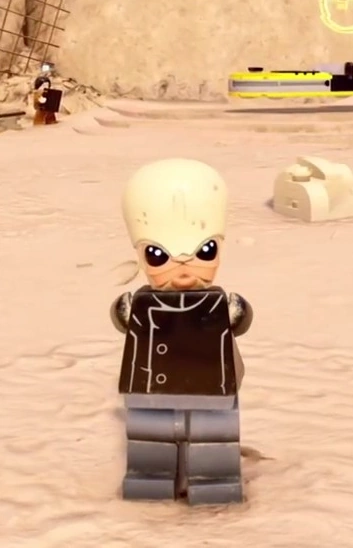
| |
| Finn (Episode VII) | Hero | 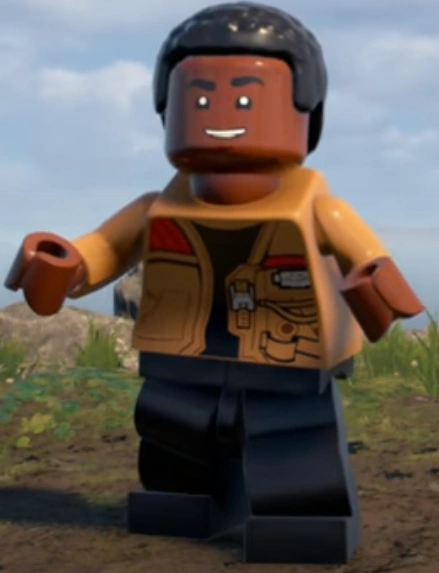
| |
| Finn (Bacta Suit) | Hero | 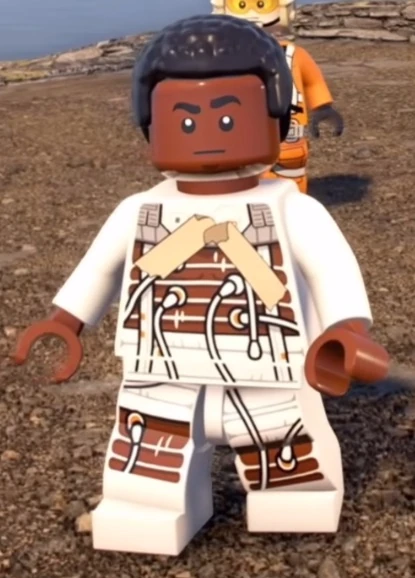
| |
| Finn (Jacket - White Shirt) | Hero | 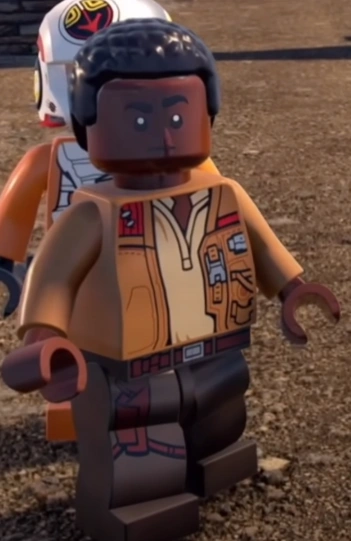
| |
| Finn (Crait) | Hero | 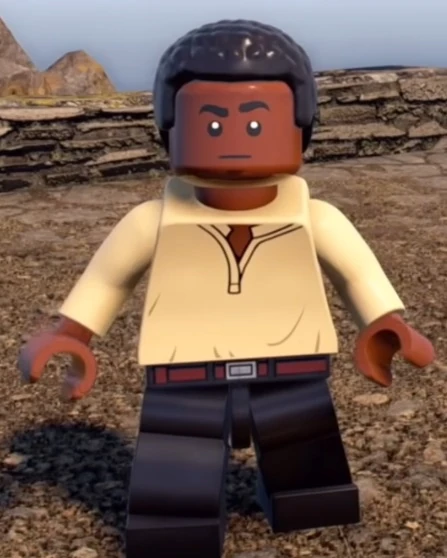
| |
| Finn (Episode IX) | Hero | 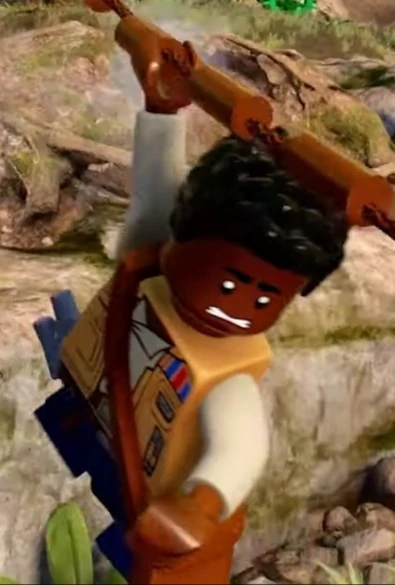
| |
| Finn (Kijimi Coat) | Hero | 
| |
| Finn (FN-2187) | Villain | 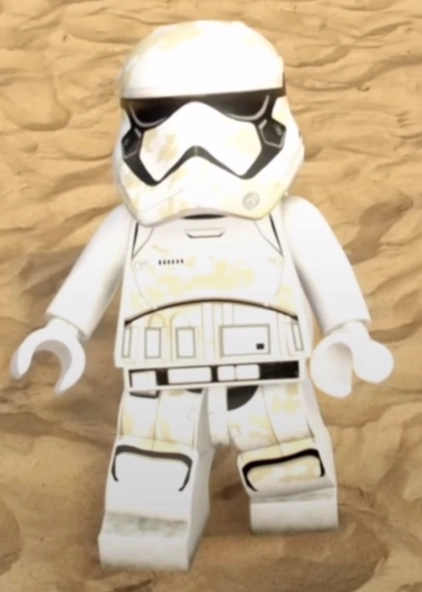
| |
| Finn (FN-2187 - No Helmet) | Villain | 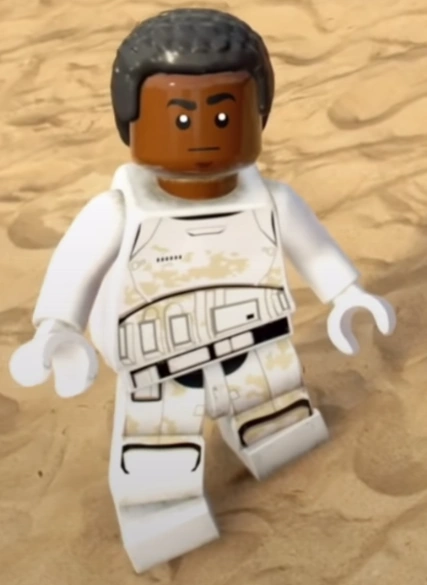
| |
| Finn (First Order) | Villain | 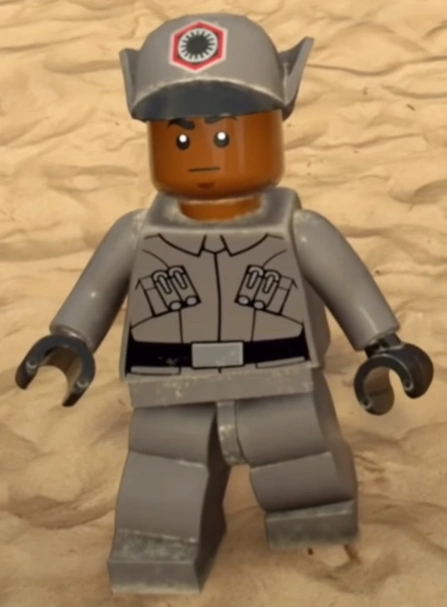
| |
| Finn (Episode VIII - Supremacy) | Villain | 
| |
| First Order Flametrooper | Villain | 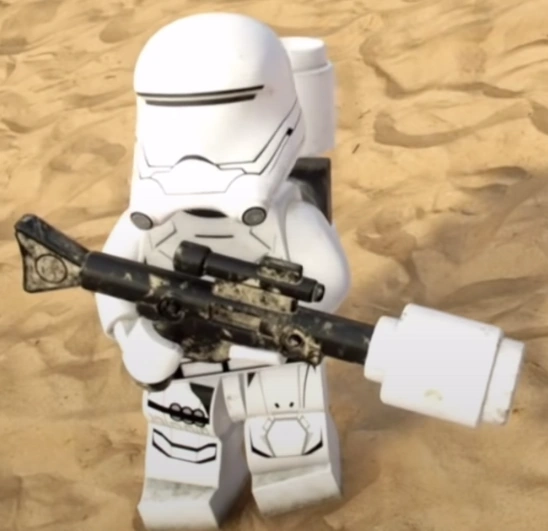
| |
| First Order Jet Trooper | Villain | 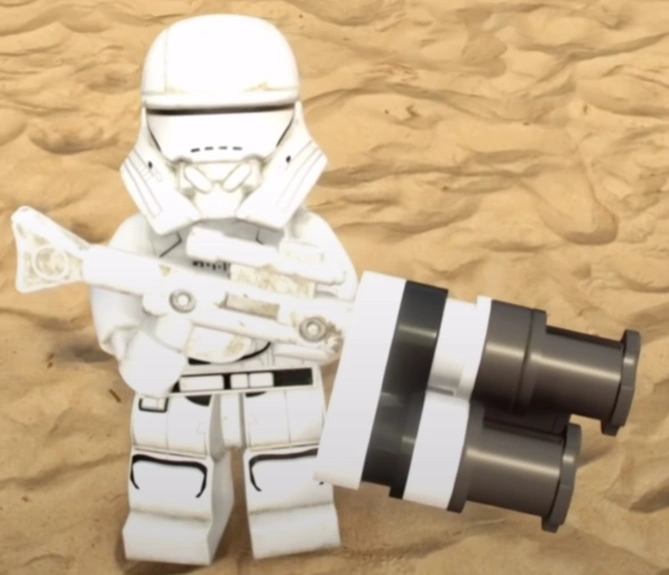
| |
| First Order Officer | Villain | 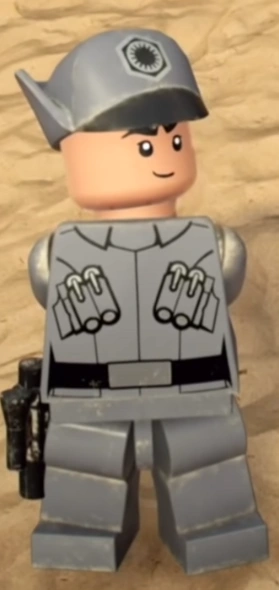
| |
| First Order Officer (Kijimi) | Villain | 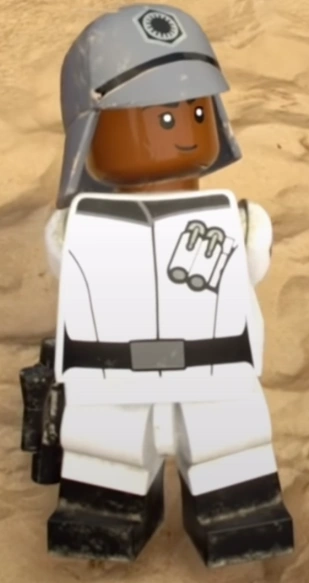
| |
| First Order Snowtrooper | Villain | 
| |
| First Order Cold Weather Assault Trooper | Villain | 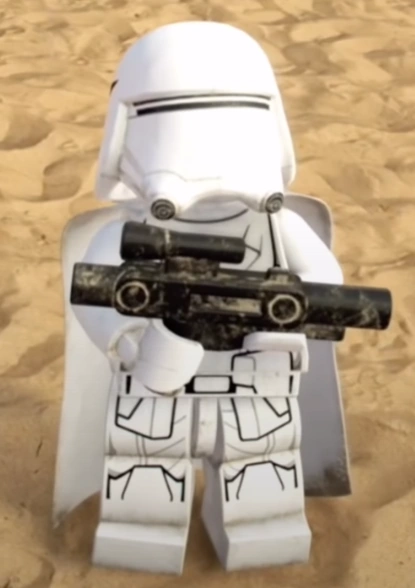
| |
| First Order Special Forces Fighter Pilot | Villain | 
| |
| First Order TIE Fighter Pilot | Villain | 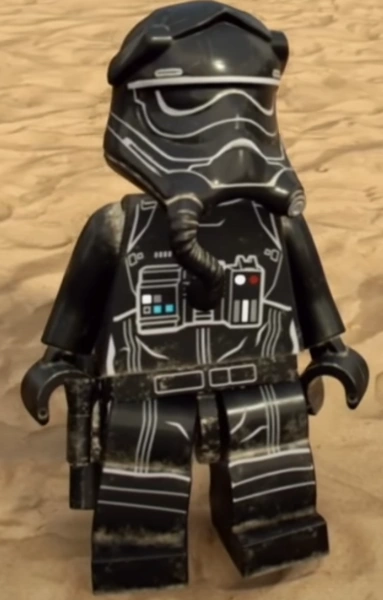
| |
| Fode and Beed | Extra | 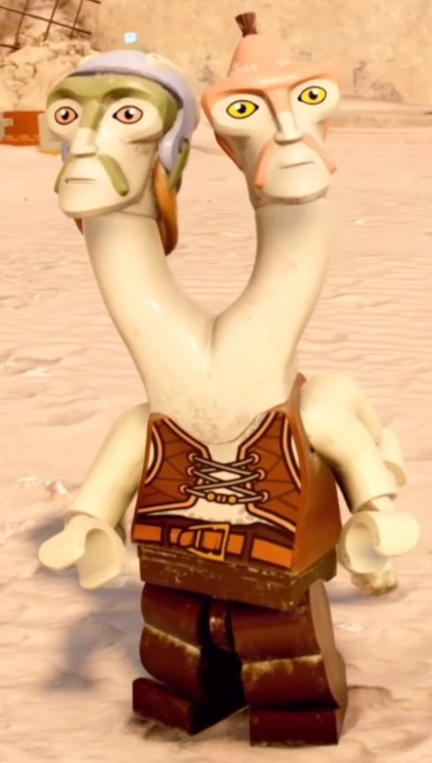
| |
| G8-R3 | Astromech Droid | 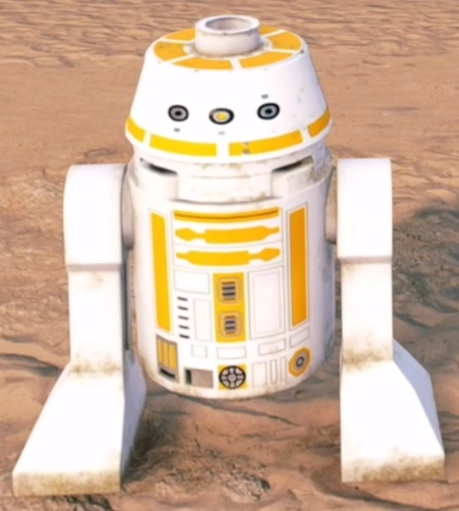
| |
| Garven Dreis (Red Leader) | Hero | 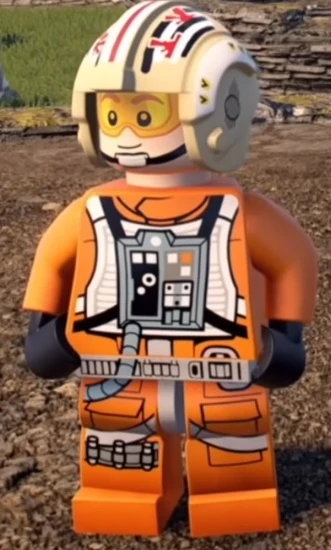
| |
| Gasgano | Extra | 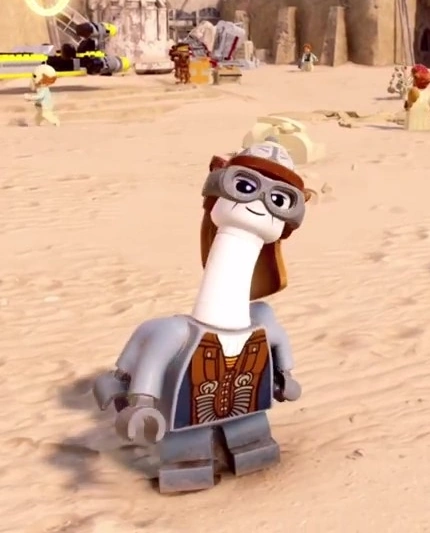
| |
| General Grievous | Villain | 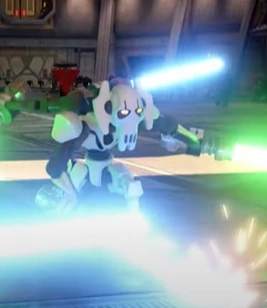
| |
| General Hux | Villain | 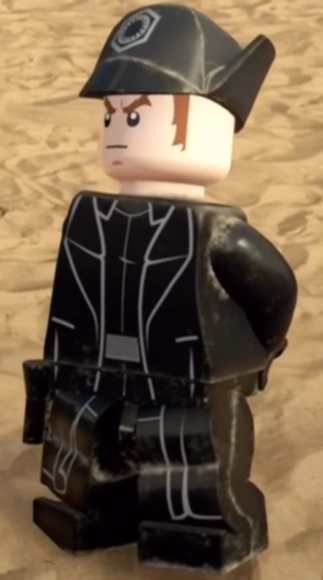
| |
| General Leia Organa | Hero | 
| |
| General Leia Organa (Silver/Grey Robes) | Hero | 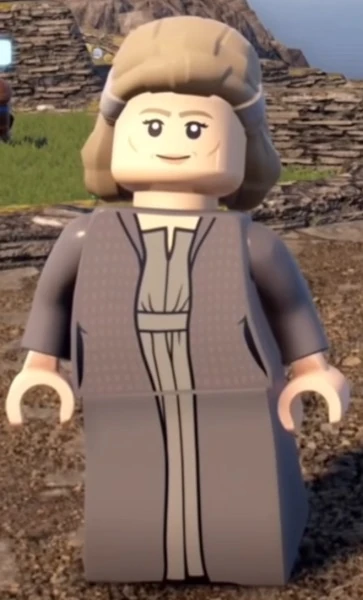
| |
| General Leia Organa (Bandaged) | Hero | 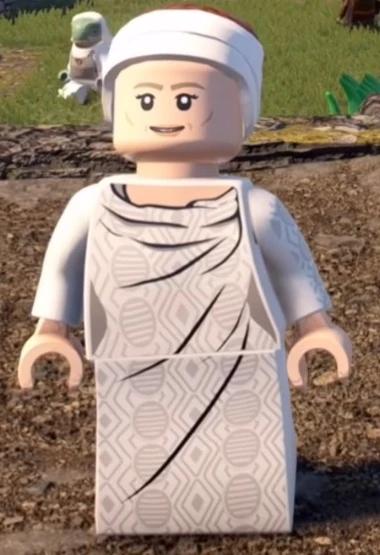
| |
| General Leia Organa (Black Robes) | Hero | 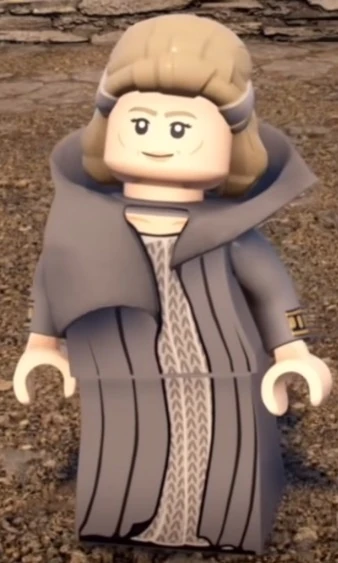
| |
| General Leia Organa (Episode IX) | Hero | 
| |
| General Rieekan | Hero | 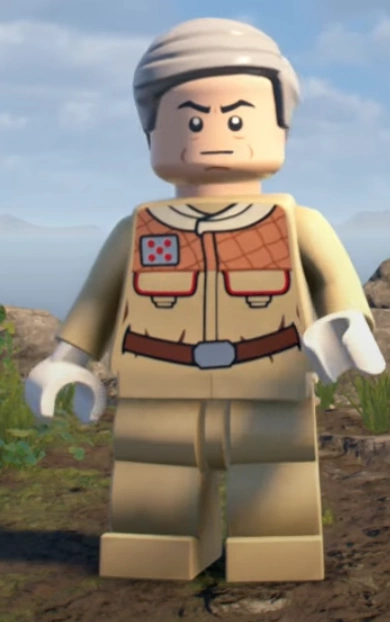
| |
| General Rieekan (Hoth - Hood) | Hero | 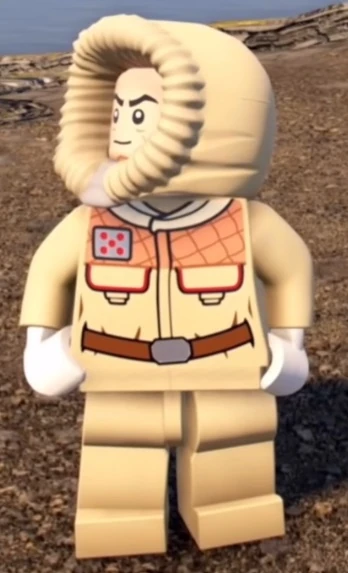
| |
| Gonk Droid | Extra | 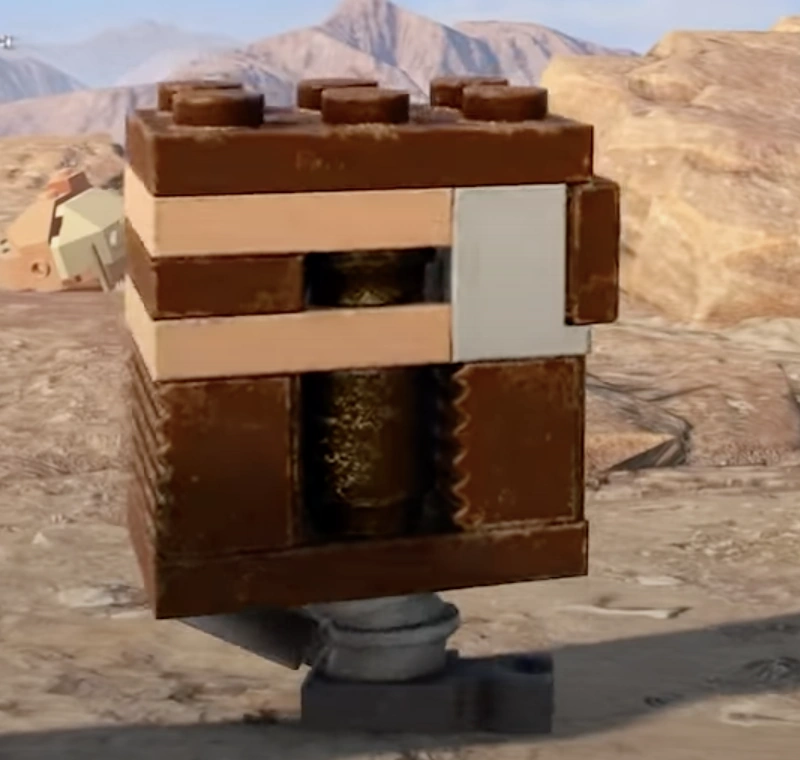
| |
| Gonk Droid (Holiday Speacial) | Extra | 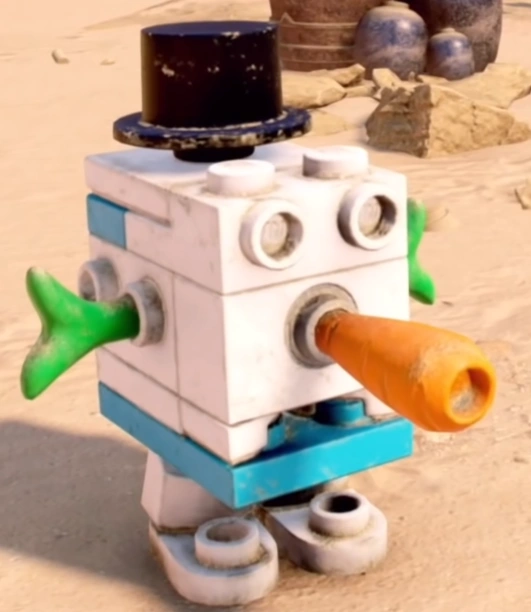
| |
| Gonkatine | Extra | 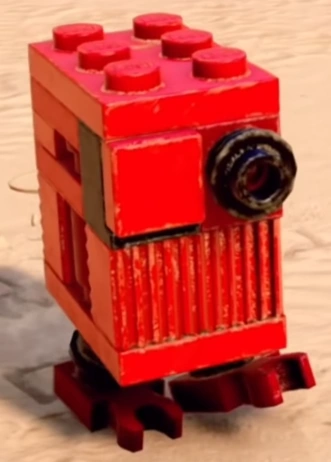
| |
| Grakchawwaa | Hero | 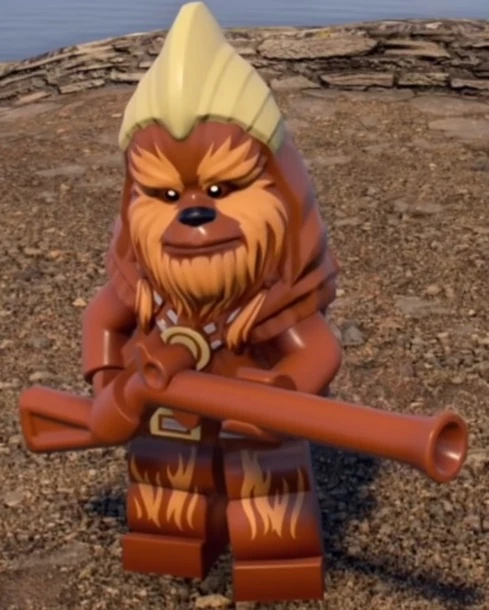
| |
| Grebe-Korora | Extra | 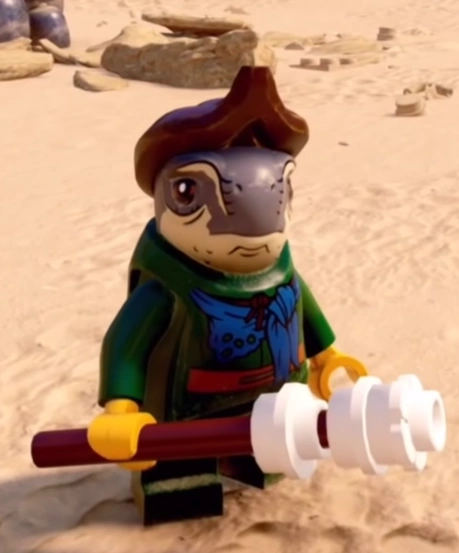
| |
| Greeata Jendowanian | Extra | 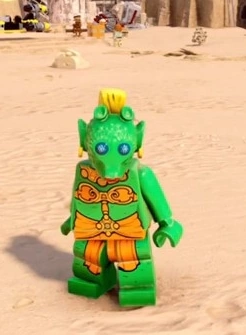
| |
| Greedo | Bounty Hunter | 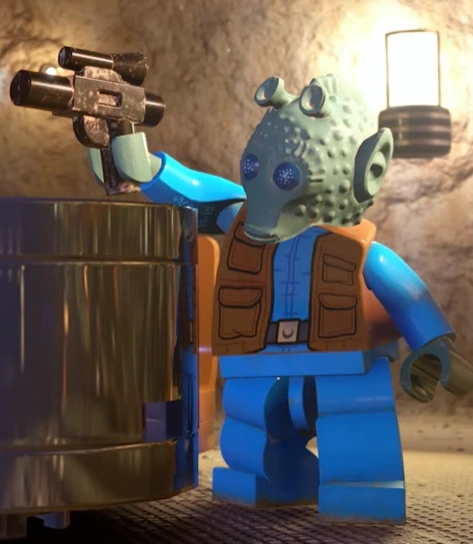
| |
| Grummgar | Extra | 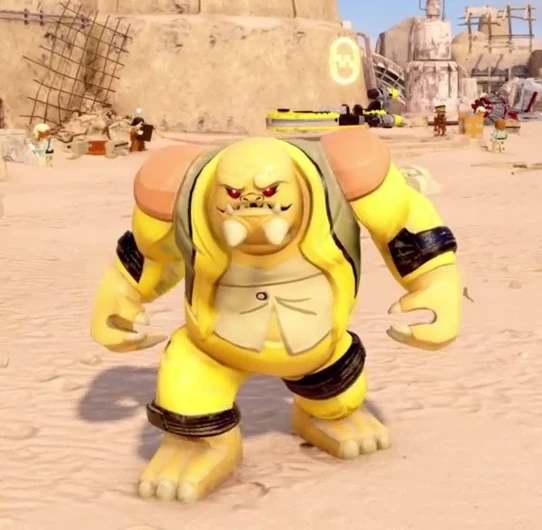
| |
| Gungan Warrior | Hero | 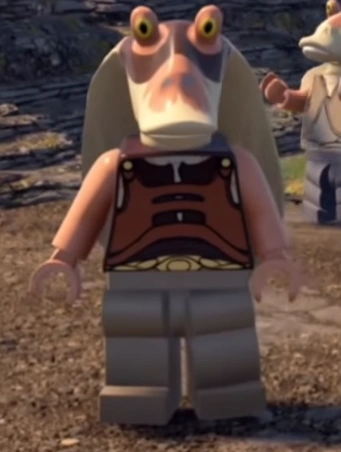
| |
| H1-NT | Protocol Droid | 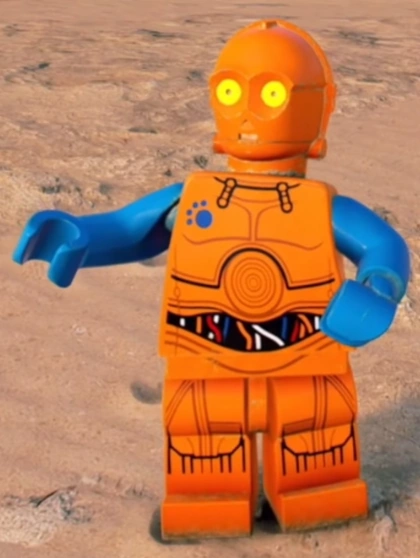
| |
| Han Solo (Episode IV) | Scoundrel | 
| |
| Han Solo (Hoth - Hood) | Scoundrel | 
| |
| Han Solo (Hoth) | Scoundrel | 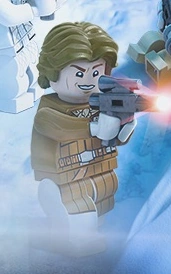
| |
| Han Solo (Episode V) | Scoundrel | 
| |
| Han Solo (Carbonite - Shirt) | Scoundrel | 
| |
| Han Solo (Endor) | Scoundrel | 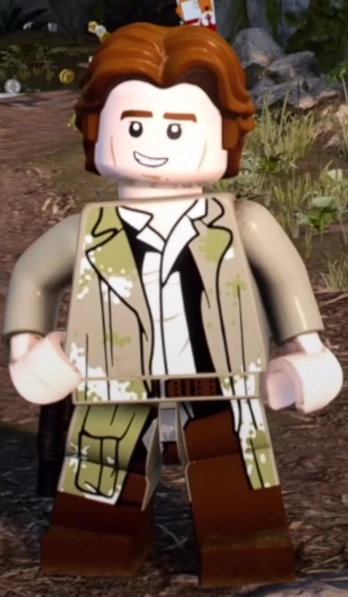
| |
| Han Solo (Carbonite) | Extra | 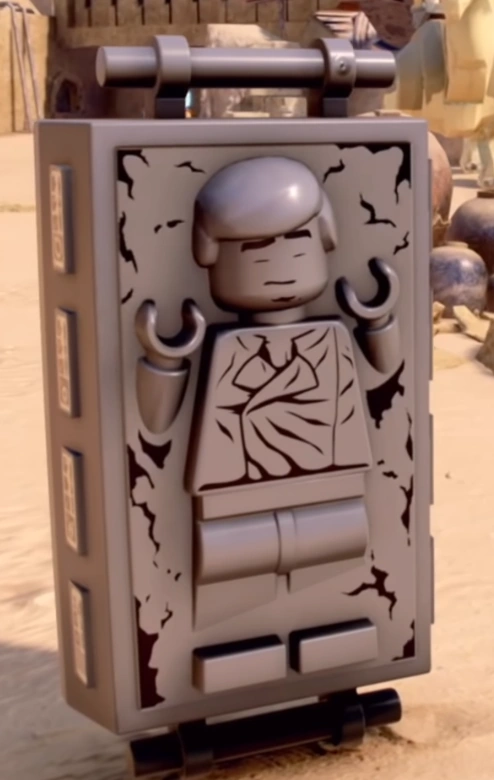
| |
| Han Solo (Episode VII) | Scoundrel | 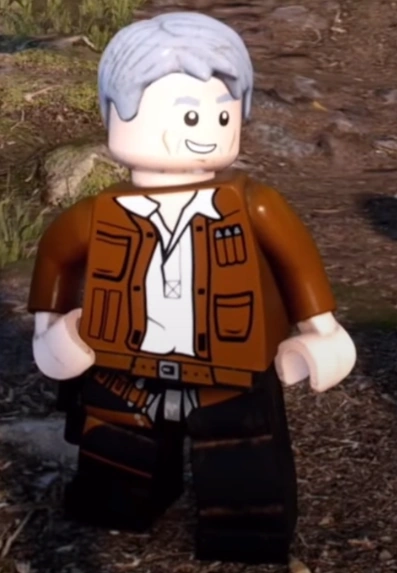
| |
| Han Solo (Stormtrooper - No Helmet) | Villain | 
| |
| Han Solo (Stormtrooper) | Villain | 
| |
| IG0101 MagnaGuard Droid | Extra | 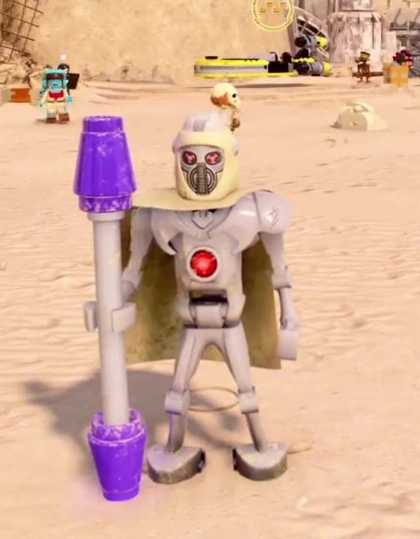
| |
| IG-88 | Bounty Hunter | 
| |
| Imperial Trooper | Villain | 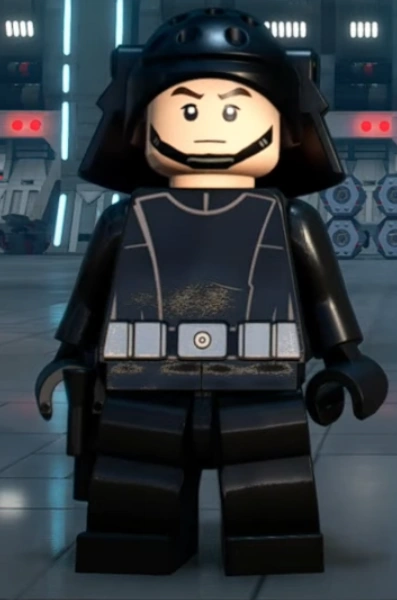
| |
| Imperial Gunnery Technician | Villain | 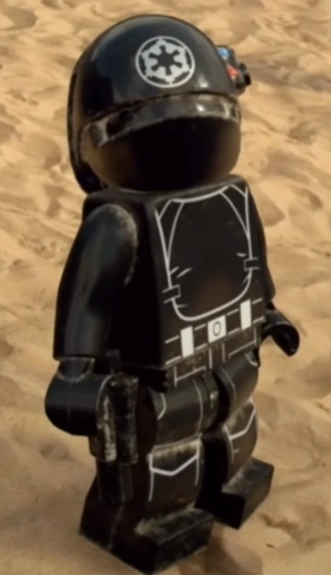
| |
| Imperial Probe Droid | Extra | 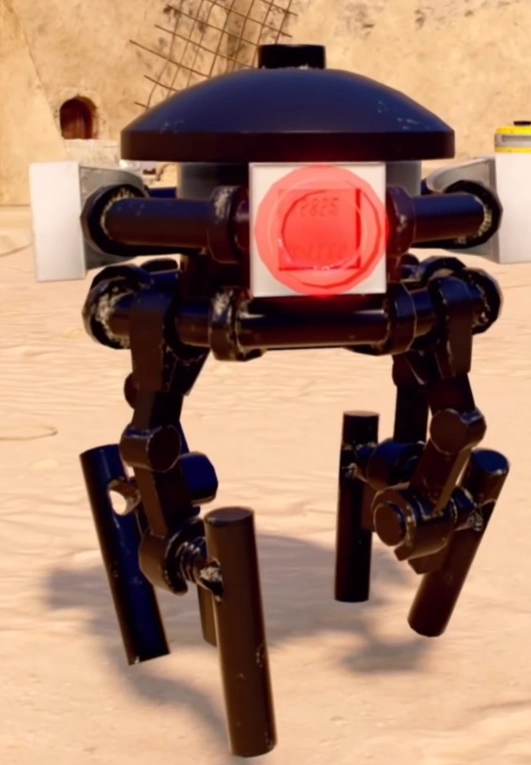
| |
| Jabba the Hutt | Extra | 
| |
| Jango Fett | Bounty Hunter | 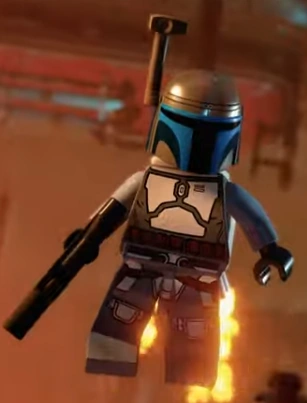
| |
| Jango Fett (Casual) | Bounty Hunter | 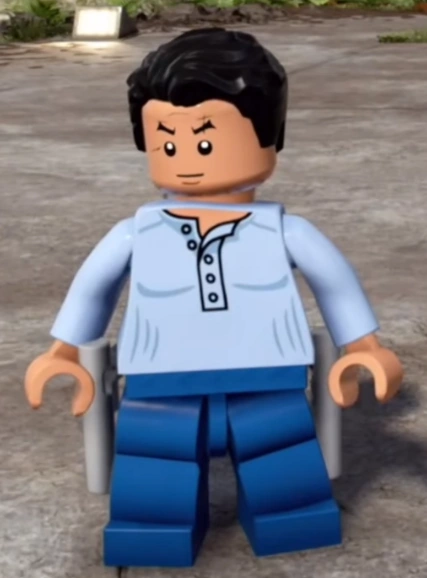
| |
| Jango Fett (Clone) | Extra | 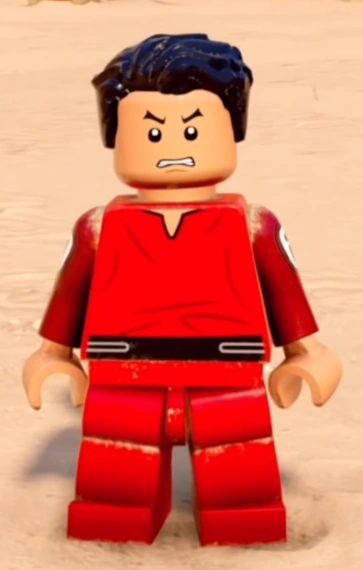
| |
| Jannah | Hero | 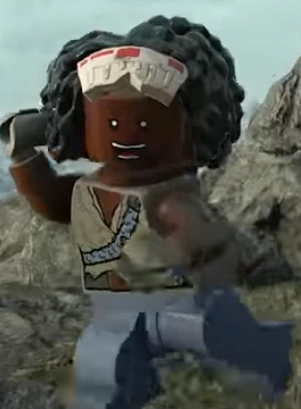
| |
| Jar Jar Binks | Hero | 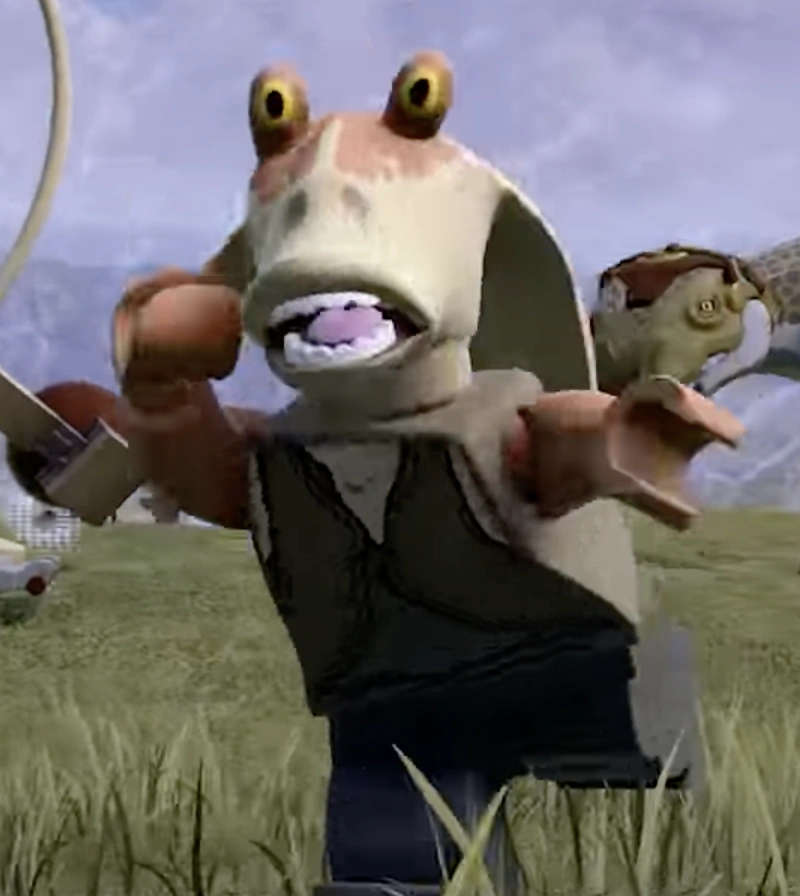
| |
| Jar Jar (Senator) | Hero | 
| |
| Jawa | Scavenger | 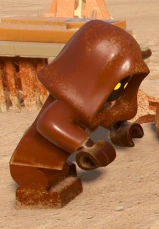
| |
| Jek Porkins | Hero | 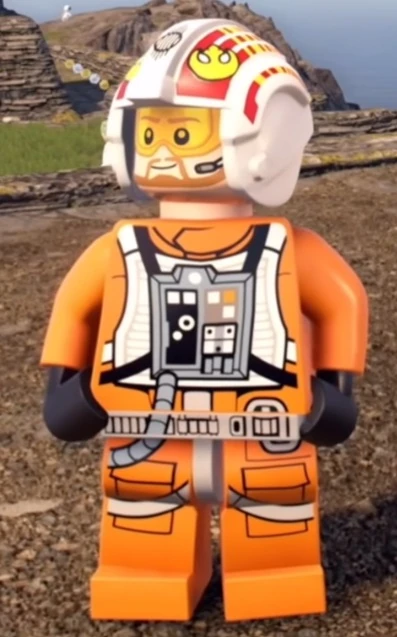
| |
| Jess Pava | Hero | 
| |
| Jocasta Nu | Jedi | 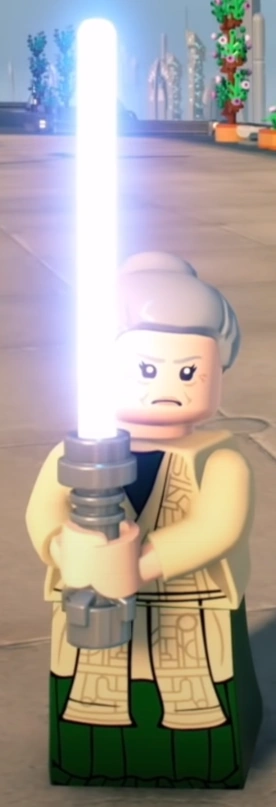
| |
| Jubnuk | Extra | 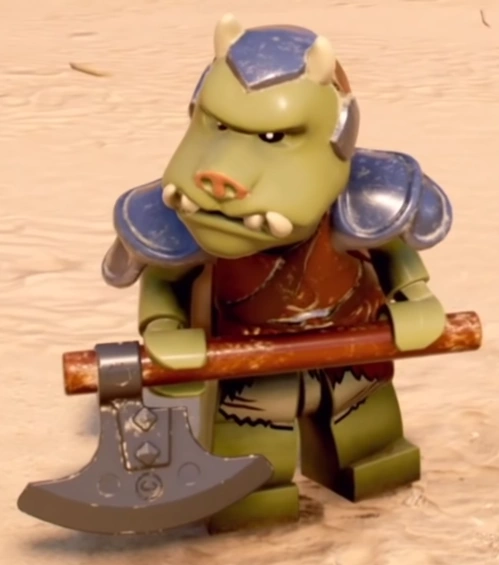
| |
| K-3PO | Protocol Droid | 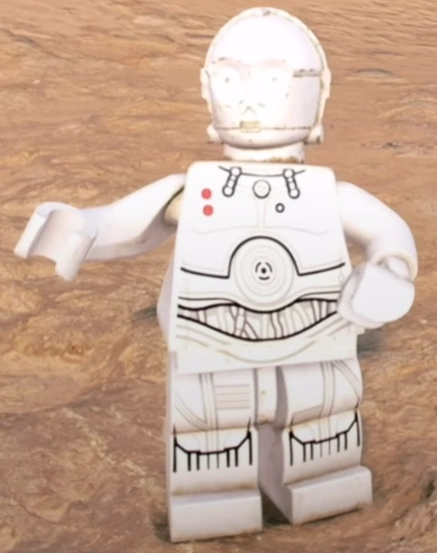
| |
| K3-R1 | Astromech Droid | 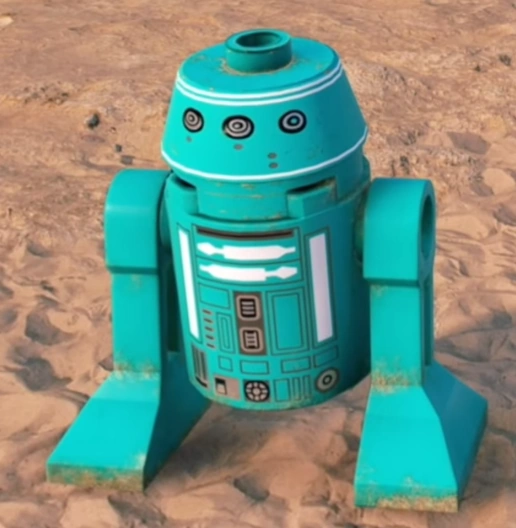
| |
| Kaydel Connix | Hero | 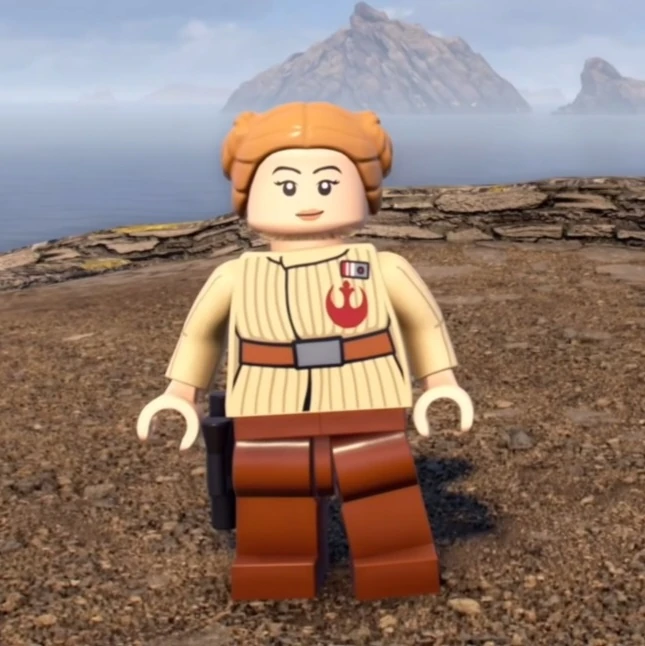
| |
| Kaydel Connix (Episode IX) | Hero | 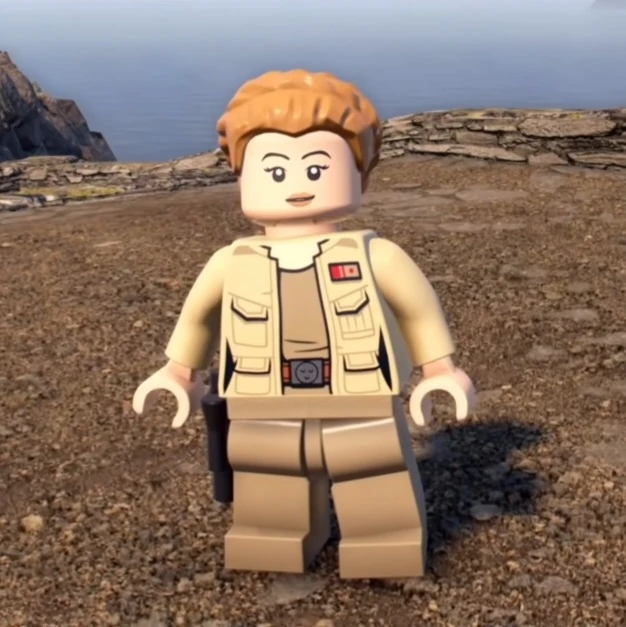
| |
| Ki-Adi-Mundi | Jedi |
|

|
| Kit Fisto | Jedi |
|
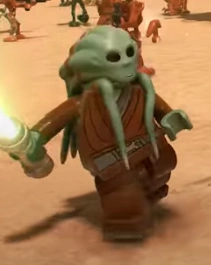
|
| Klaud | Extra | 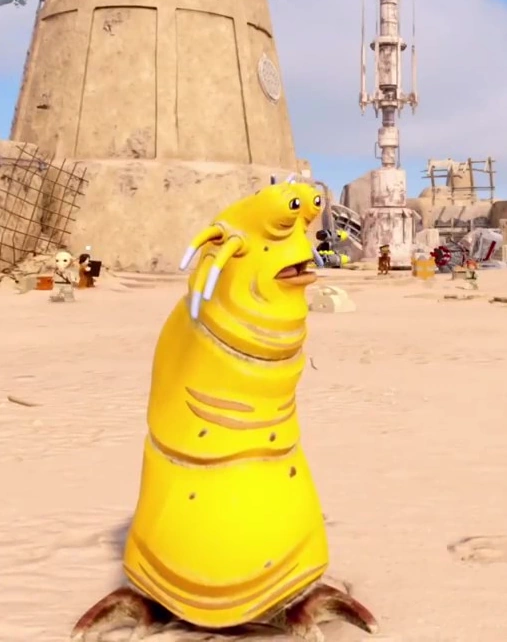
| |
| Kuruk | Villain | 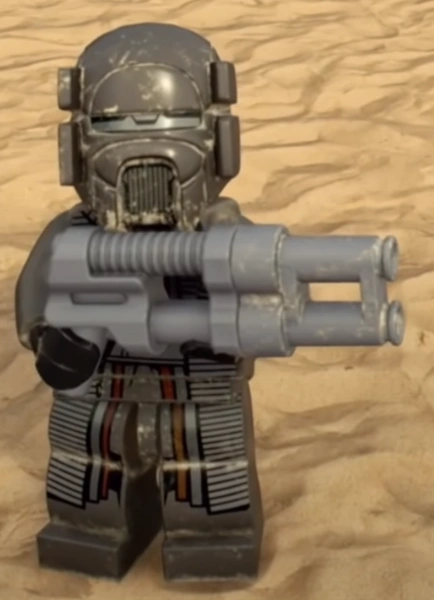
| |
| Kylo Ren | Dark Side |
|
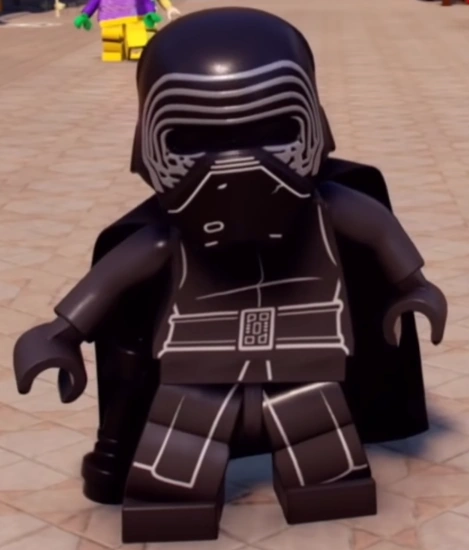
|
| Kylo Ren (No Helmet) | Dark Side |
|
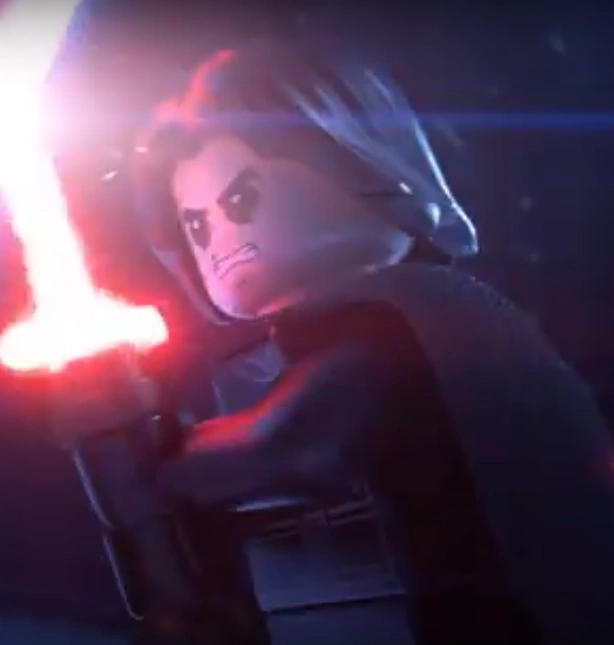
|
| Kylo Ren (Topless) | Dark Side |
|

|
| Kylo Ren (Episode IX) | Dark Side |
|
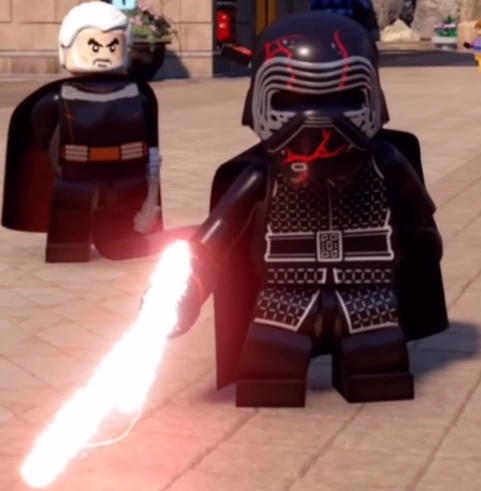
|
| Kylo Ren (No Helmet - Scar) | Dark Side |
|
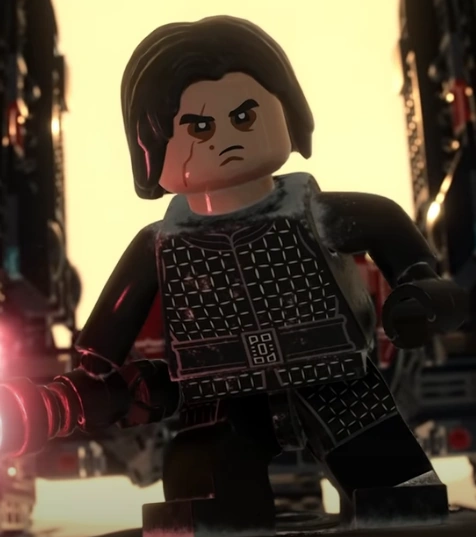
|
| Lama Su | Extra | 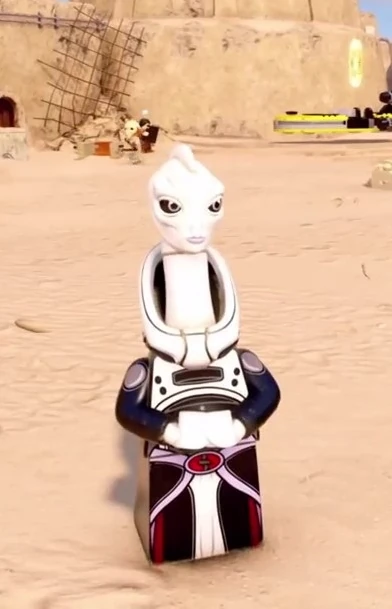
| |
| Lando Calrissian (Hermit) | Scoundrel | 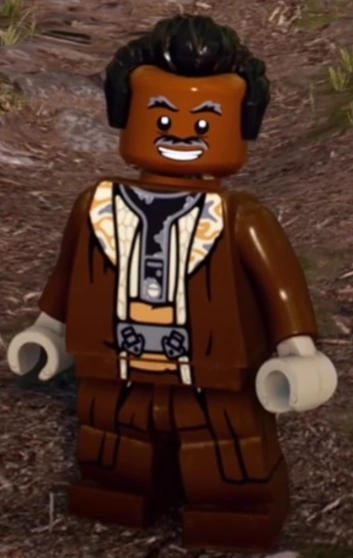
| |
| Lando Calrissian (Episode V) | Scoundrel | 
| |
| Lando Calrissian (Jabba's Palace) | Scoundrel | 
| |
| Lando Calrissian (Episode VI - General) | Scoundrel | 
| |
| Lando Calrissian (Episode IX) | Scoundrel | 
| |
| Lando Calrissian (Han Solo's Clothes) | Scoundrel | 
| |
| LC-24 | Extra | 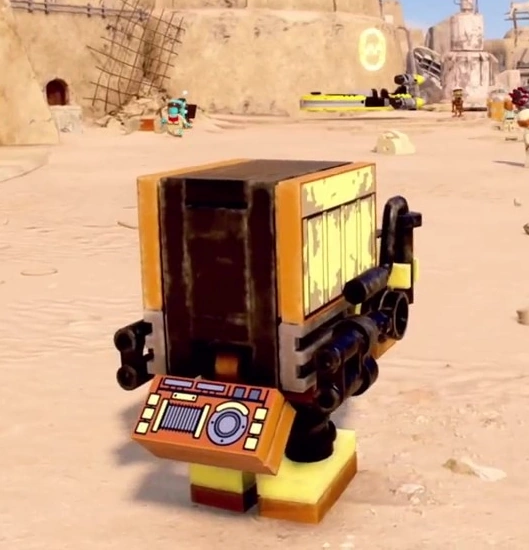
| |
| Leia (Boushh Disguise) | Bounty Hunter | 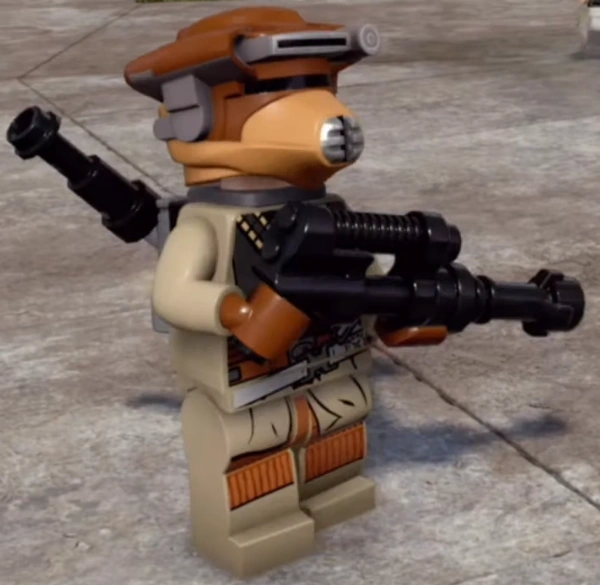
| |
| Leia (Episode IV) | Hero | 
| |
| Leia (Hoth) | Hero | 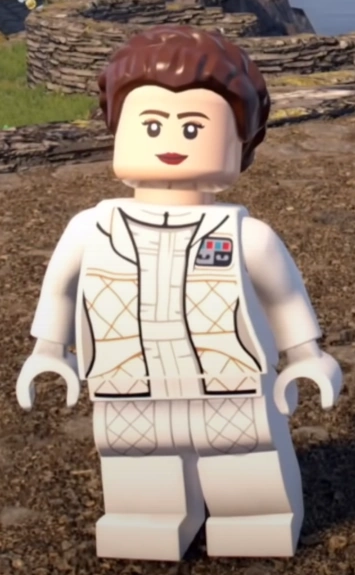
| |
| Leia (Jabba's Palace) | Hero | 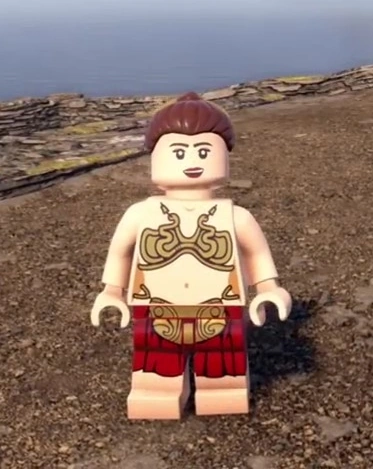
| |
| Leia (Endor - Hat) | hero | 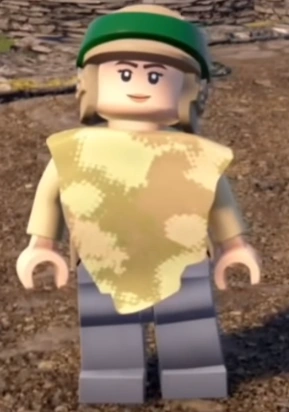
| |
| Leia (Episode V) | Hero | 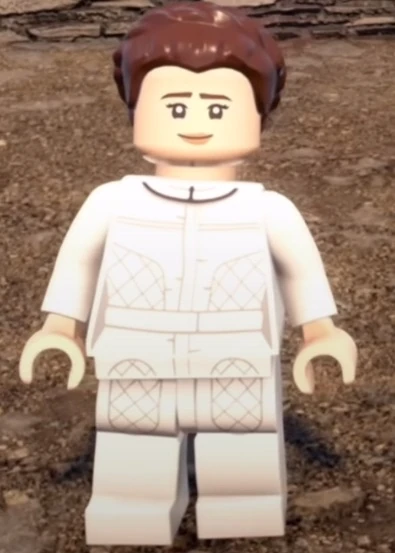
| |
| Leia (Ewok Village) | Hero | 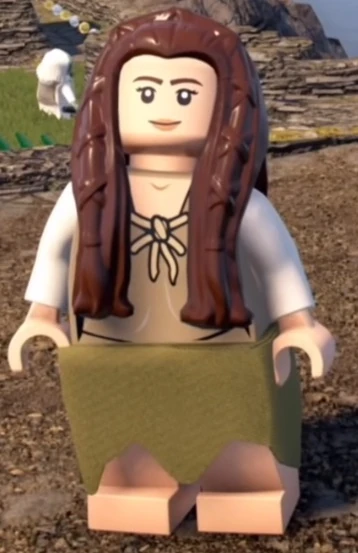
| |
| Leia (Cloud City) | Hero | 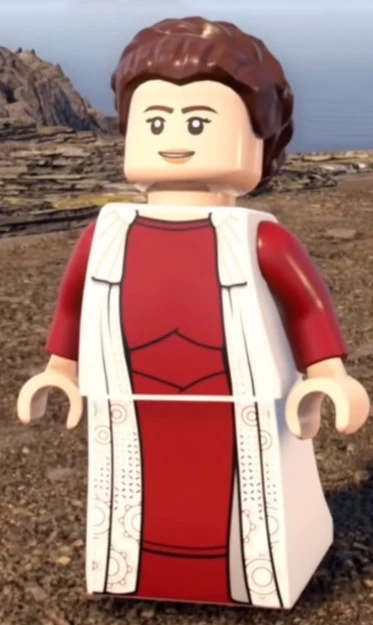
| |
| Leia (Endor) | Hero | 
| |
| Leia (Training Flashback) | Jedi | 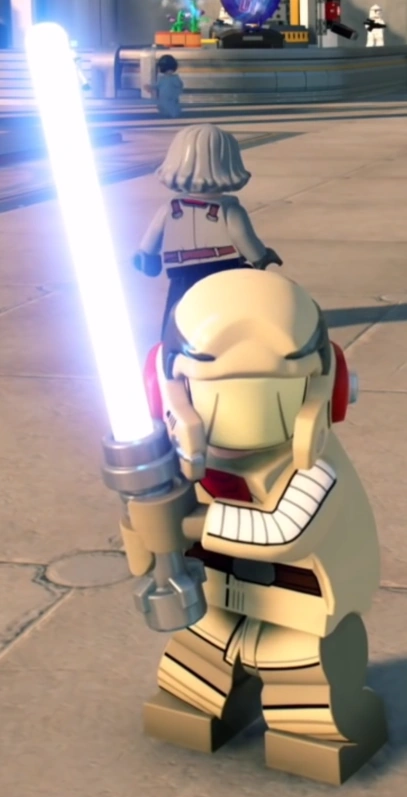
| |
| Lobot | Extra | 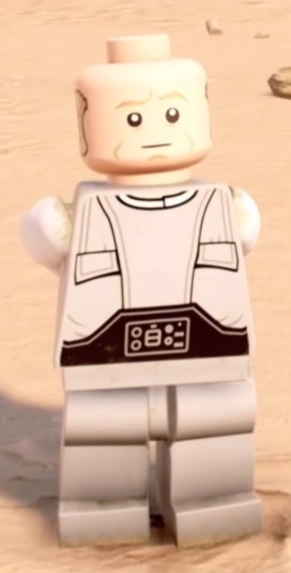
| |
| Logray | Scavenger | 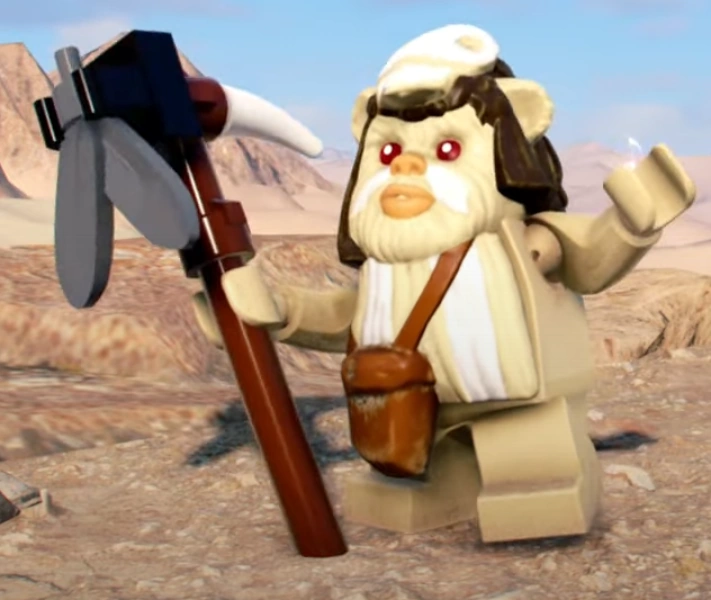
| |
| Luke Skywalker (Episode IV) | Hero | 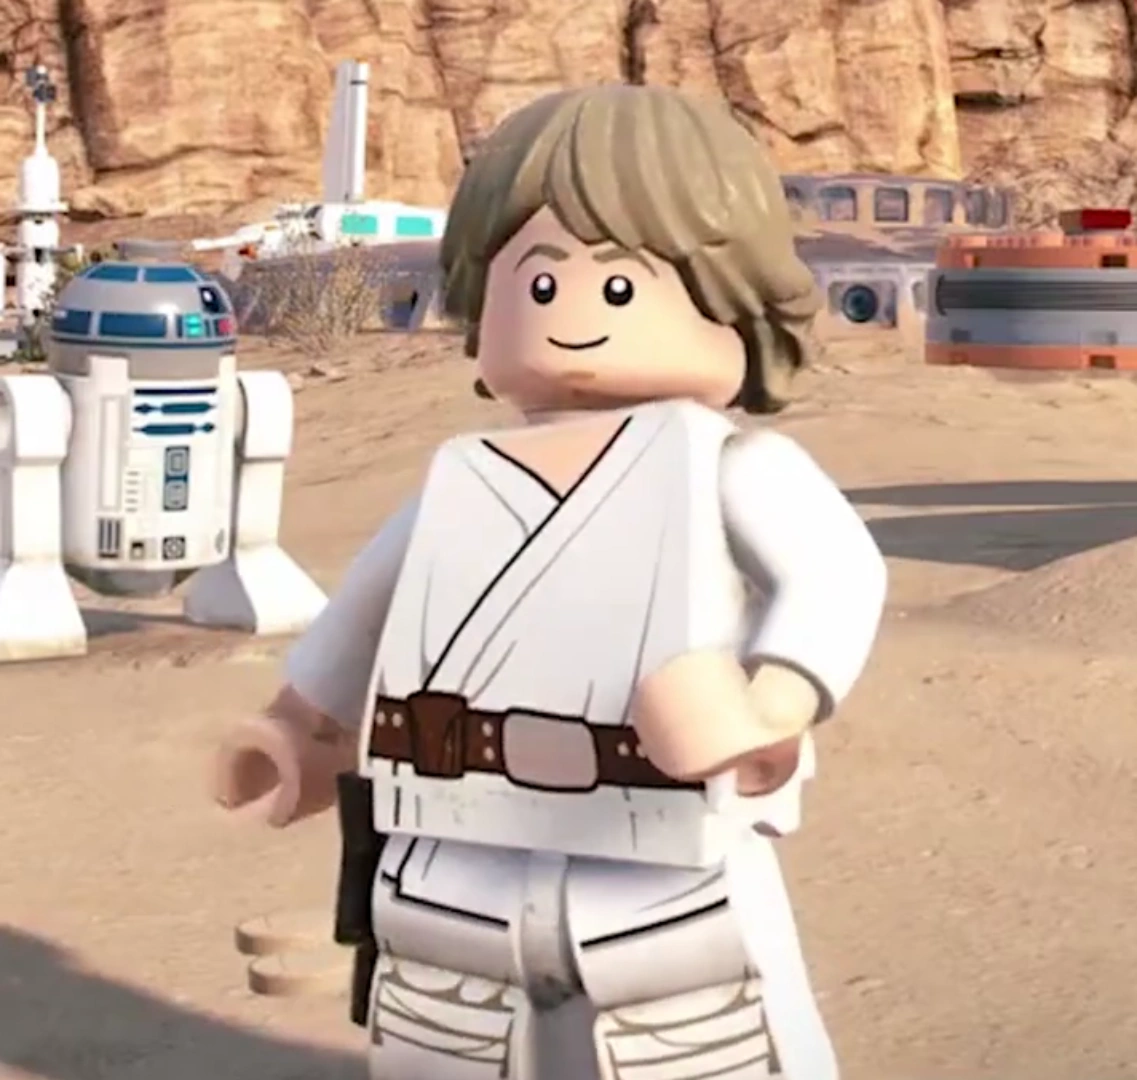
| |
| Luke Skywalker (Rebel Pilot) | Hero | 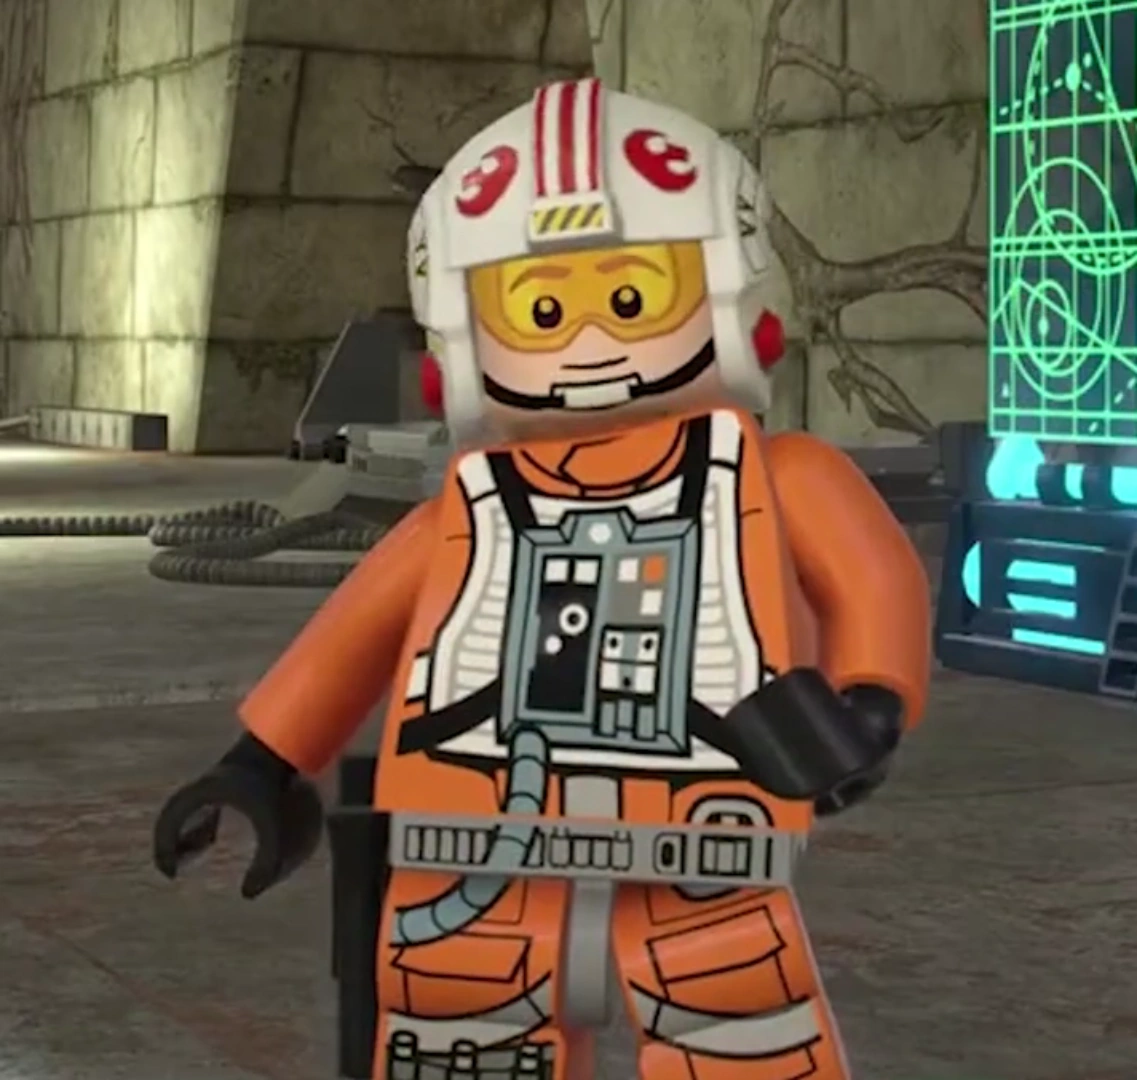
| |
| Luke Skywalker (Ceremony) | Hero | 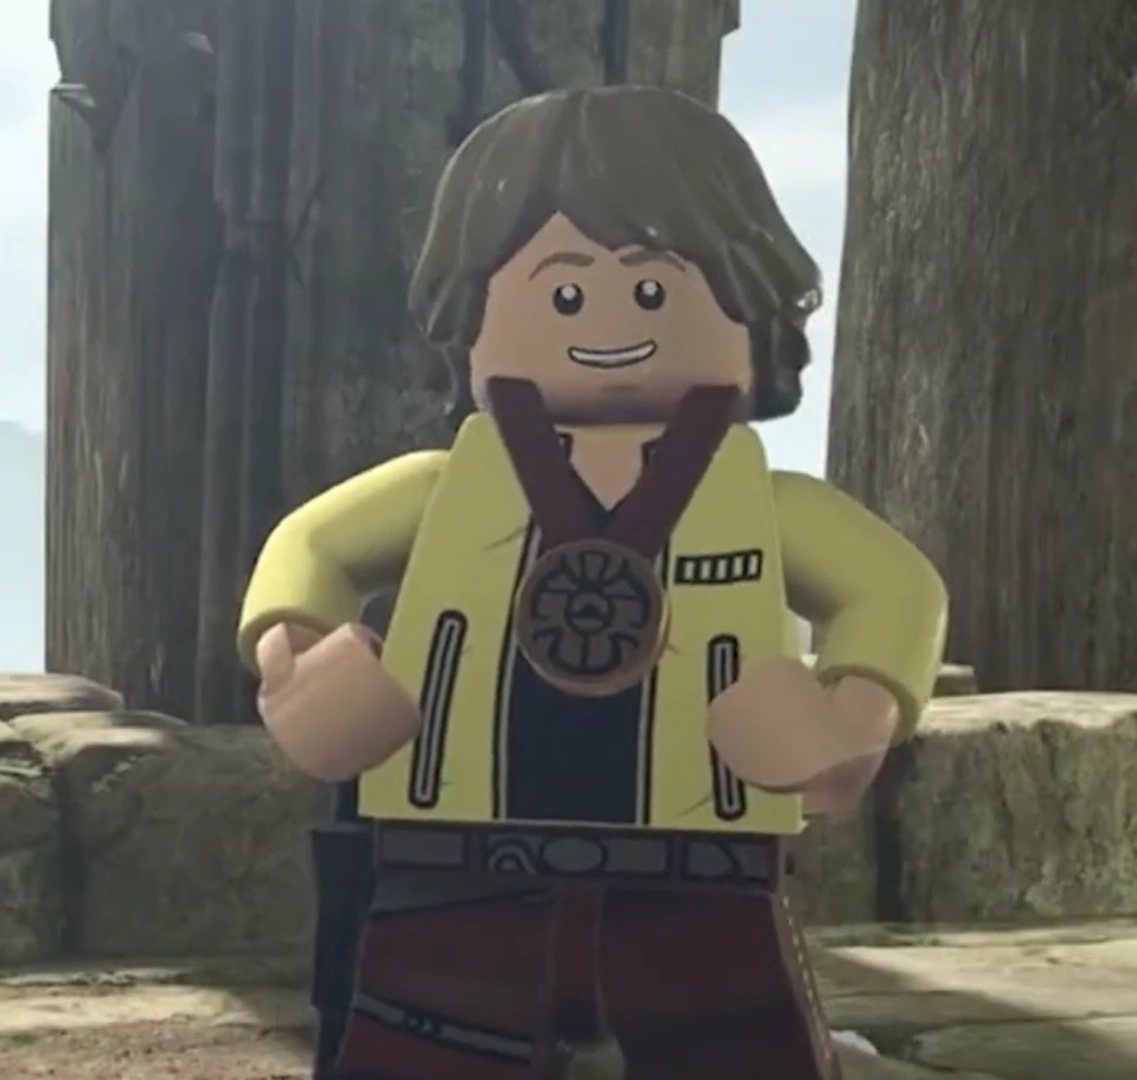
| |
| Luke Skywalker (Hoth) | Jedi | 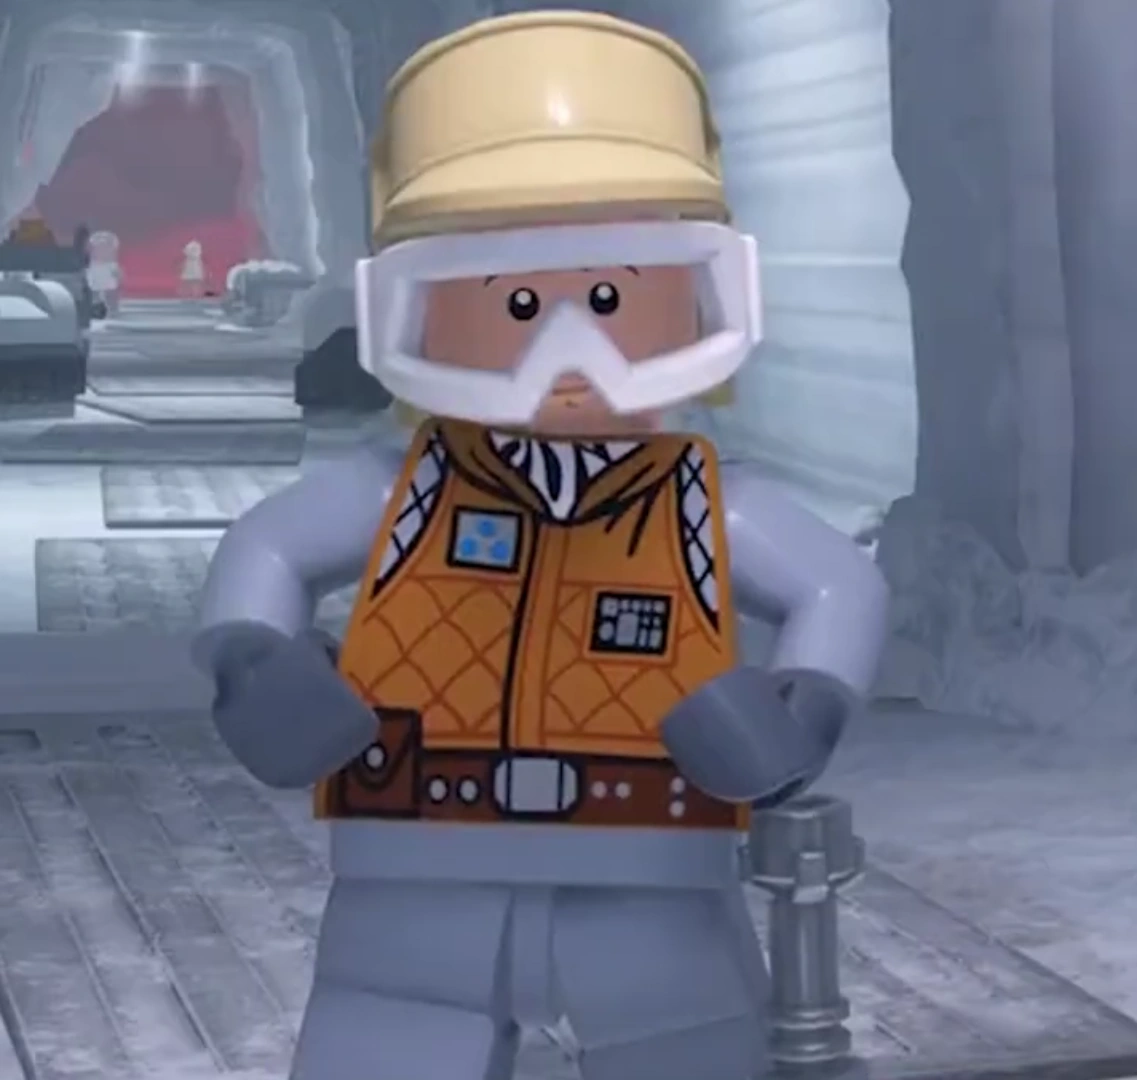
| |
| Luke Skywalker (Episode VI) | Jedi | 
| |
| Luke Skywalker (Episode V - Jedi) | Jedi | 
| |
| Luke Skywalker (Jabba's Palace) | Jedi | 
| |
| Luke Skywalker (Episode V - No Jacket) | Jedi | 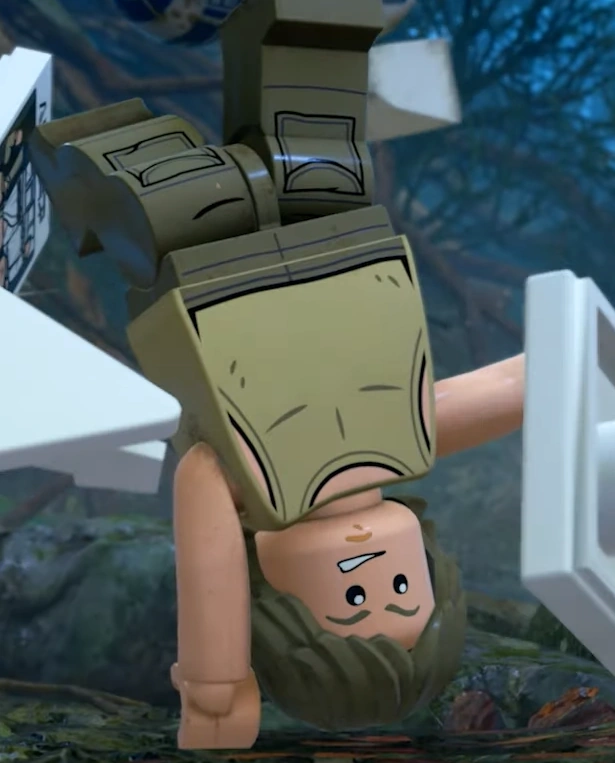
| |
| Luke Skywalker (Endor) | Jedi | 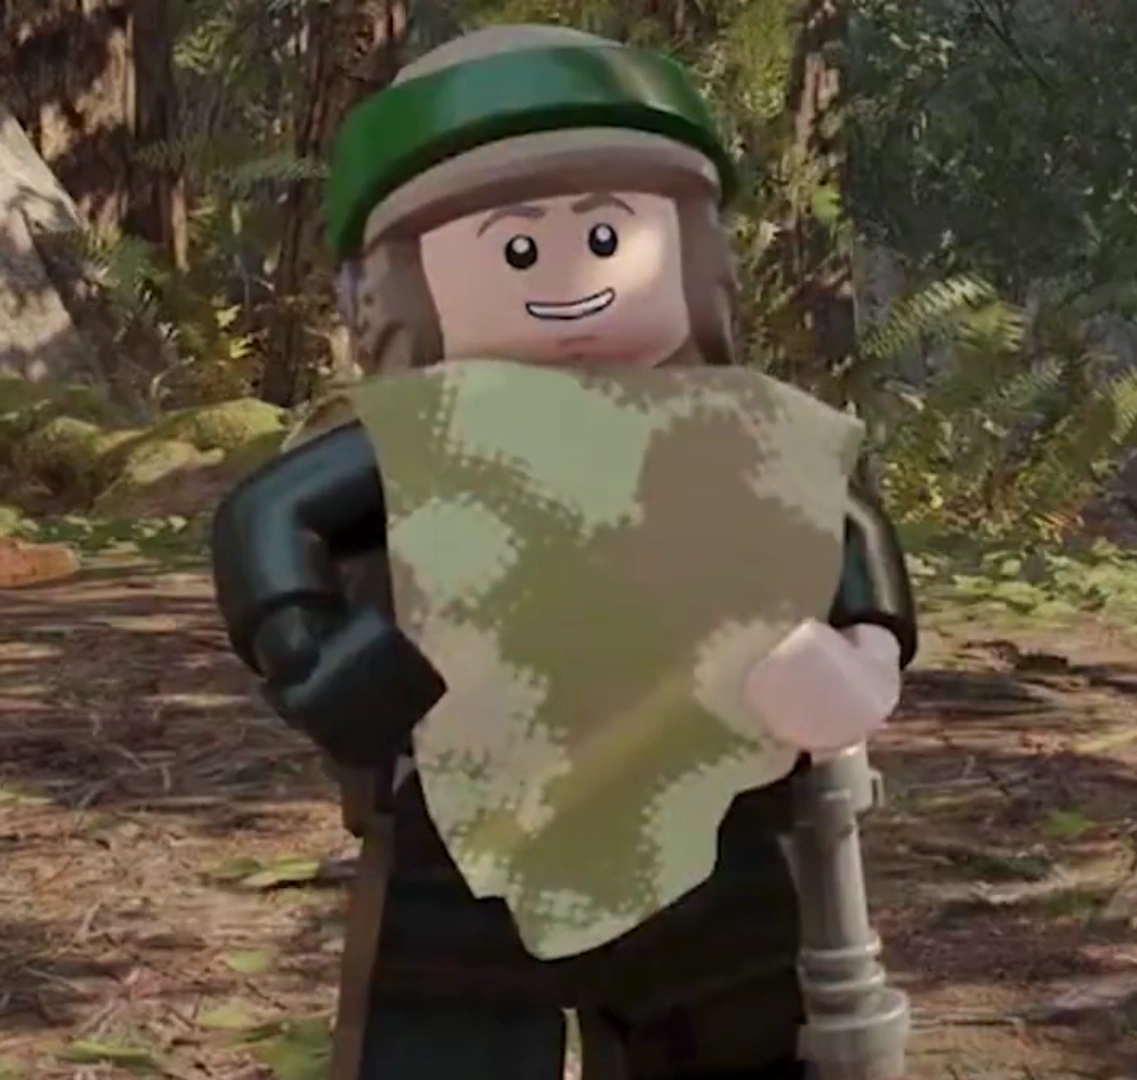
| |
| Luke Skywalker (Yoda Backpack) | Jedi | 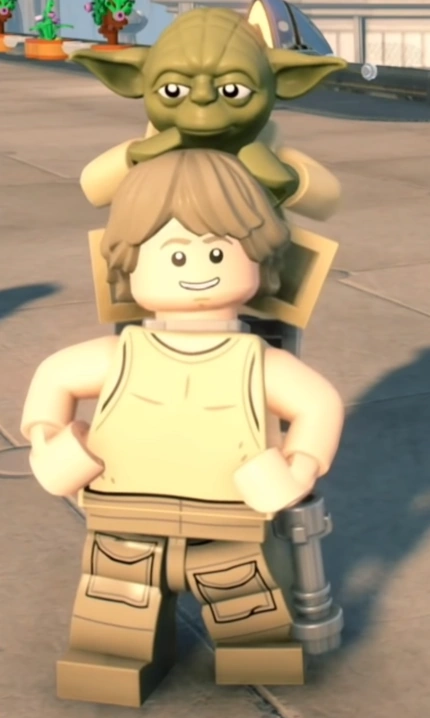
| |
| Luke Skywalker (Training Flashback) | Jedi | 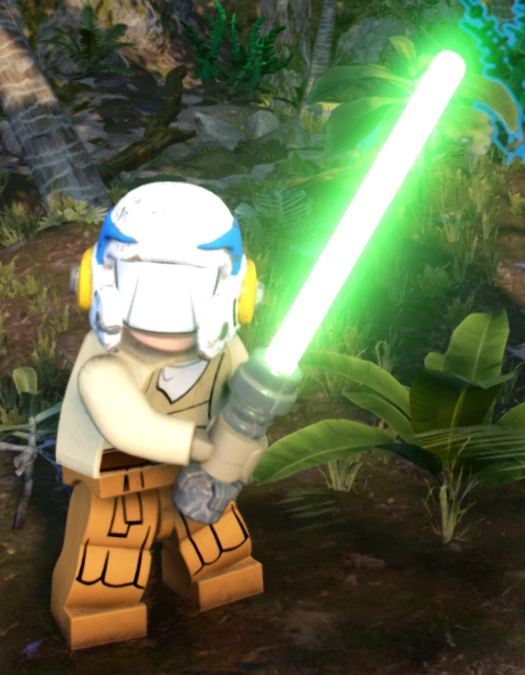
| |
| Luke Skywalker (Old - Flashback) | Jedi | 
| |
| Luke Skywalker (Old - Crait) | Jedi | 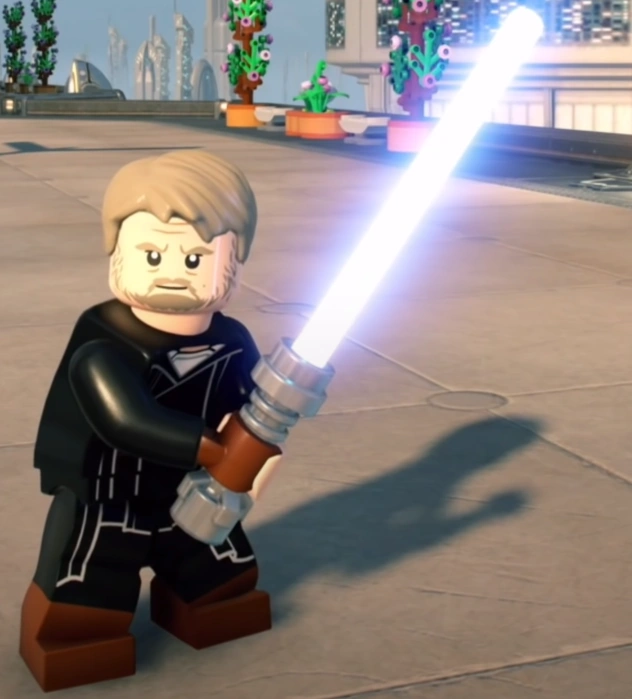
| |
| Luke Skywalker (Old - Ahch-To) | Extra | 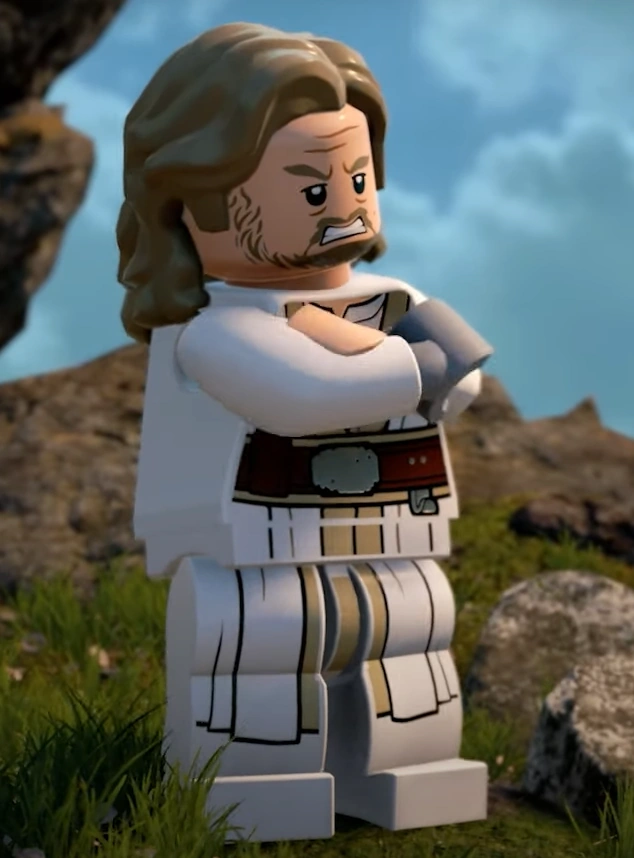
| |
| Luke Skywalker (Old - Raincoat) | Extra | 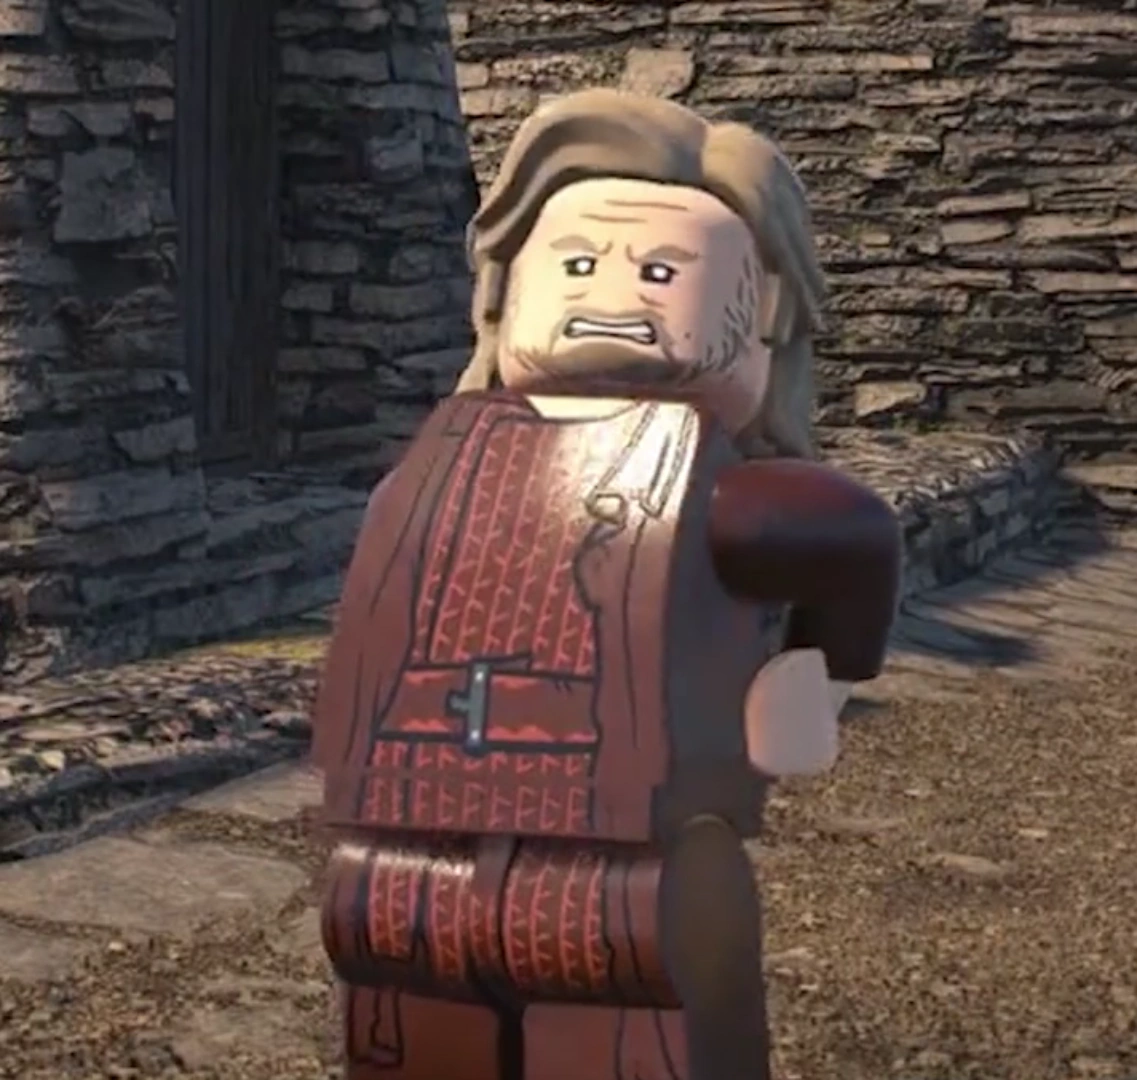
| |
| Luke Skywalker (Stormtrooper - No Helmet) | Villain | 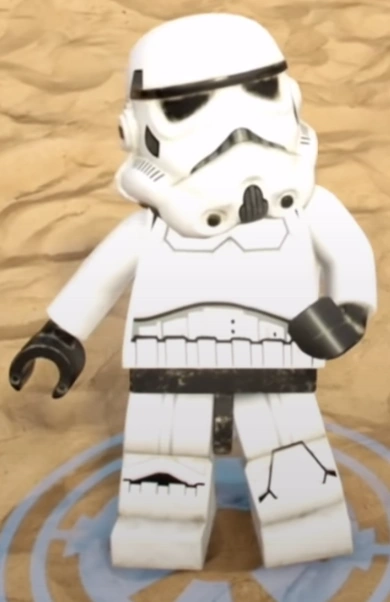
| |
| Luke Skywalker (Stormtrooper) | Villain | 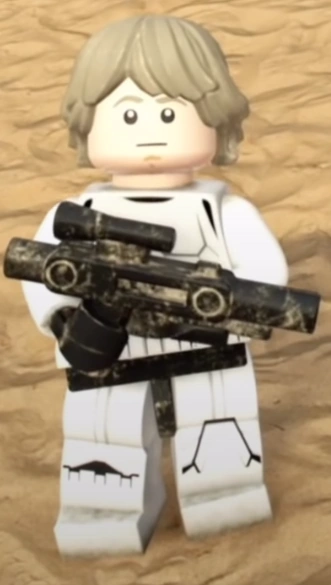
| |
| Luminara Unduli | Jedi | 
| |
| Mace Windu | Jedi | 
| |
| Mace Windu (Cape) | Jedi | 
| |
| Malakili | Extra | 
| |
| Mama the Hutt | Extra | 
| |
| Mas Amedda | Extra | 
| |
| Master Codebreaker | Extra | 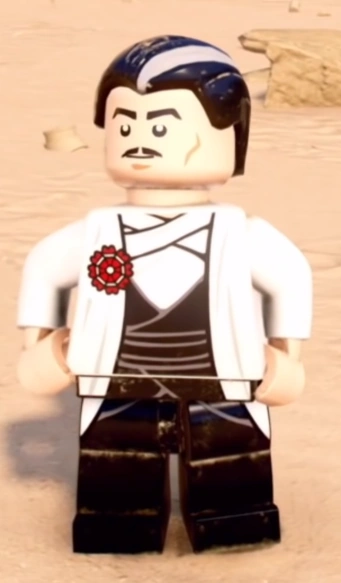
| |
| Mawhonic | Extra | 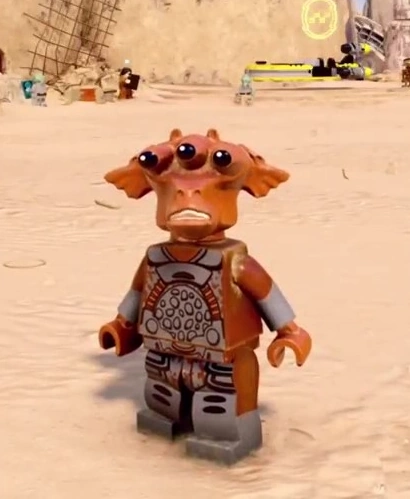
| |
| Max Rebo | Extra | 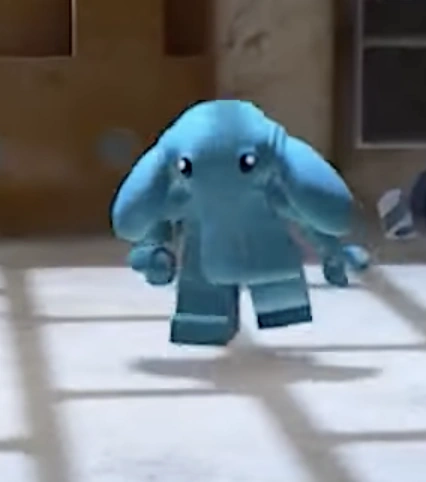
| |
| Maz Kanata | Scoundrel | 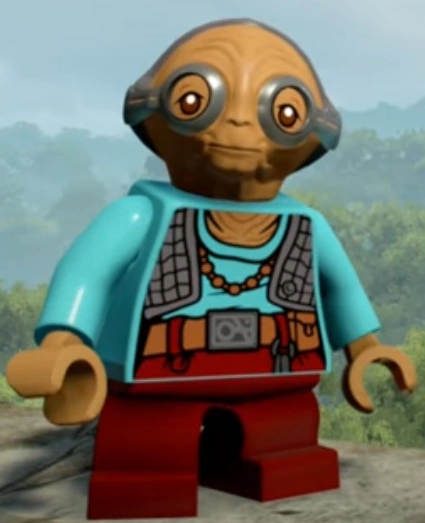
| |
| ME-8D9 | Protocol Droid | 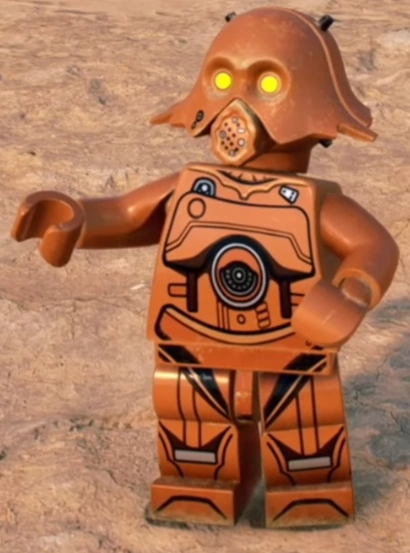
| |
| Mister Bones | Extra | 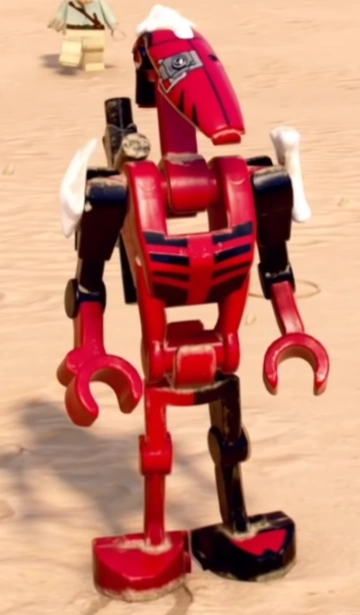
| |
| Mon Mothma | Hero | 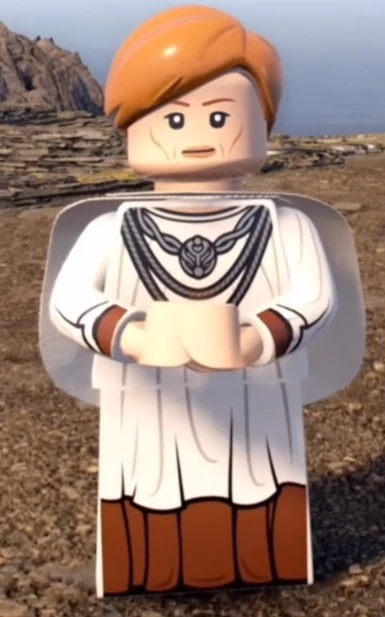
| |
| Mouse Droid | Extra | 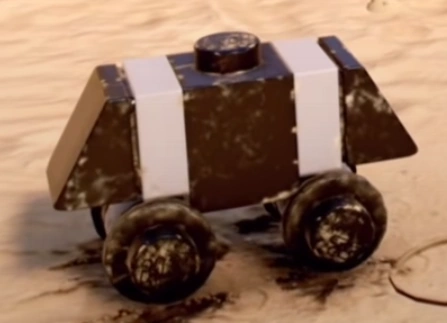
| |
| Mustafarian | Extra | 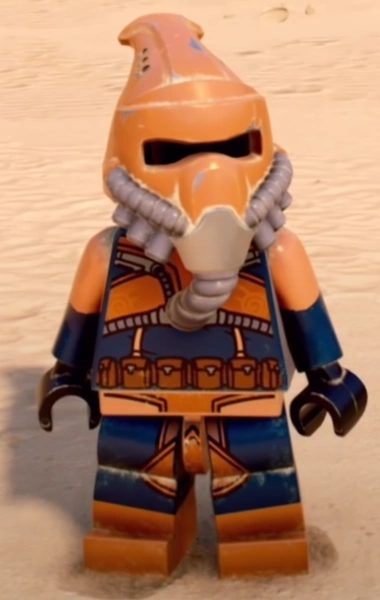
| |
| Nambi Ghima | Extra | 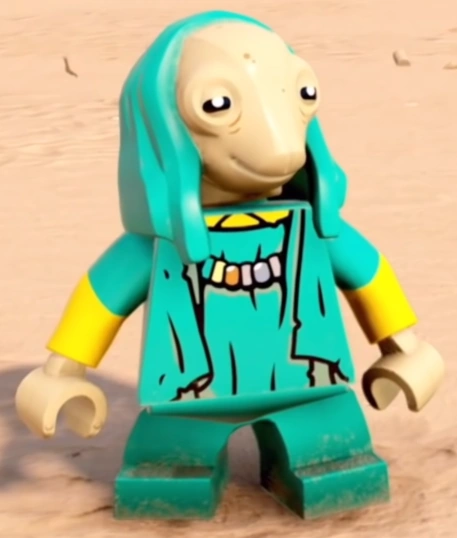
| |
| Nien Nunb | Hero | 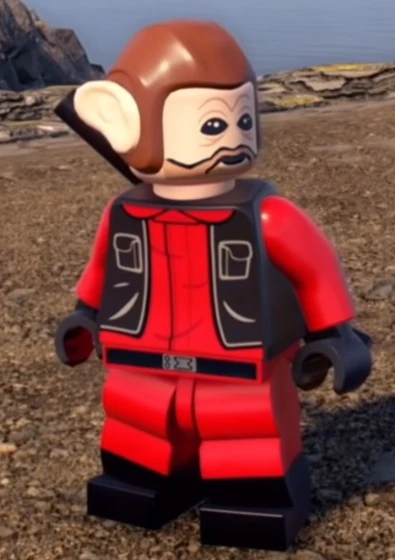
| |
| Nute Gunray | Villain | 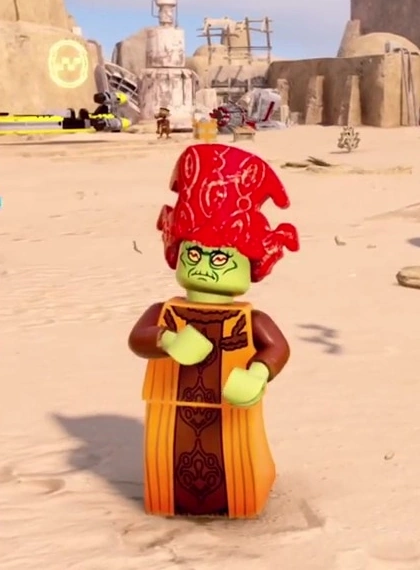
| |
| OOM-9 | Villain | 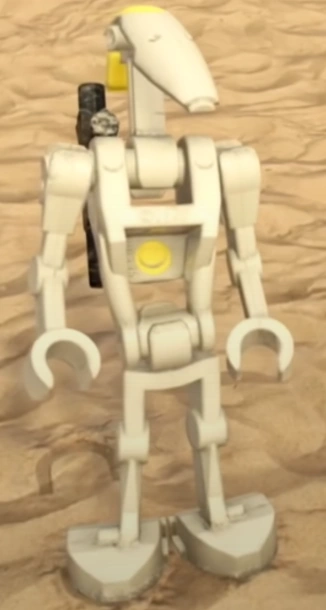
| |
| Obi-Wan Kenobi (Episode I) | Jedi | 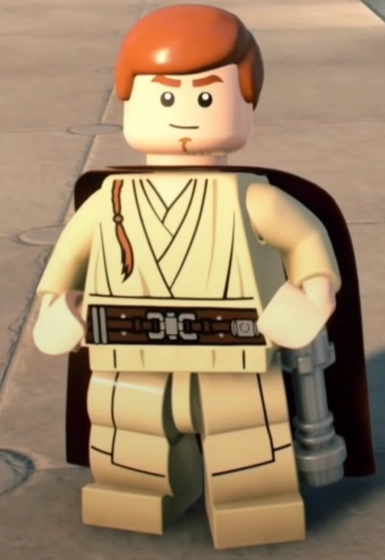
| |
| Obi-Wan Kenobi (Episode I - No Cape) | Jedi |
|
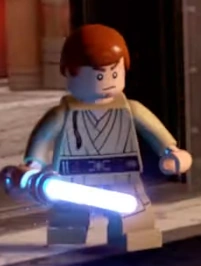
|
| Obi-Wan Kenobi (Episode II) | Jedi | 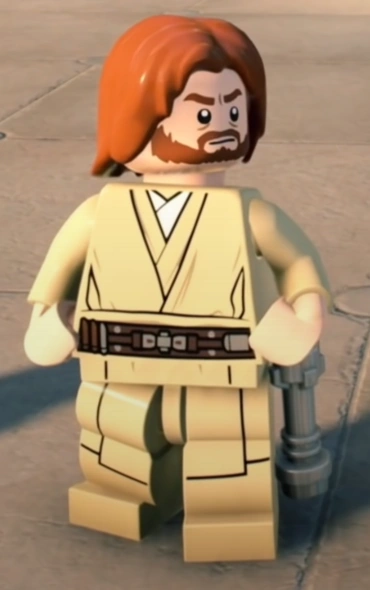
| |
| Obi-Wan Kenobi (Episode II - Robe) | Jedi | 
| |
| Obi-Wan Kenobi (Episode III) | Jedi | 
| |
| Obi-Wan Kenobi (Episode III - Cape) | Jedi | 
| |
| Ody Mandrell | Extra | 
| |
| Old Ben Kenobi (Tatooine) | Jedi | 
| |
| Old Ben Kenobi (Tatooine - Hood) | Jedi | 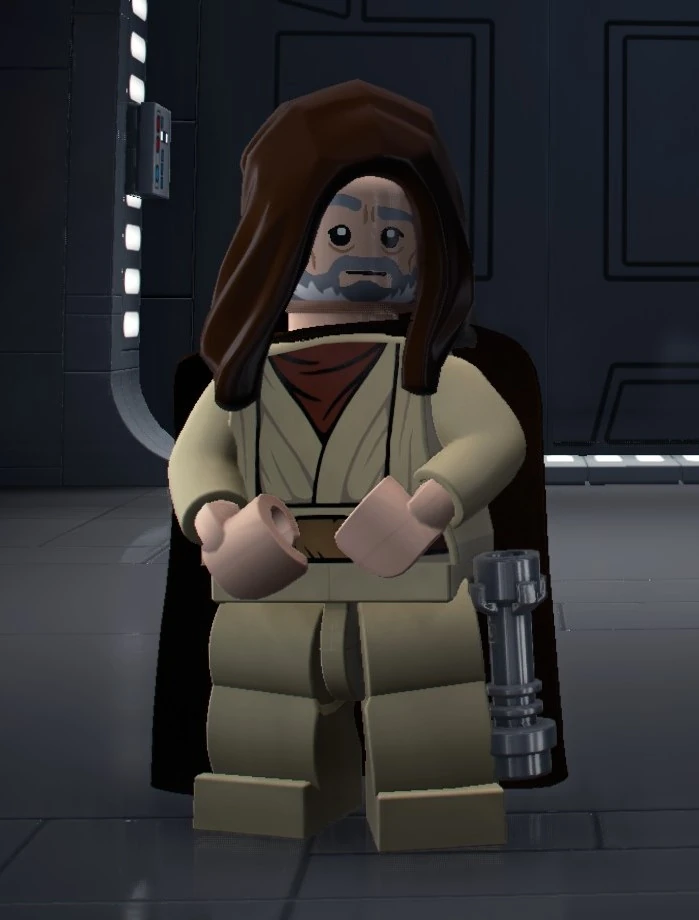
| |
| Oola | Extra | 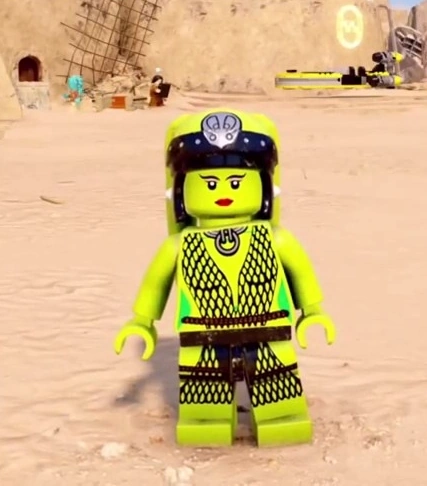
| |
| Padmé (Handmaiden - Orange) | Hero | 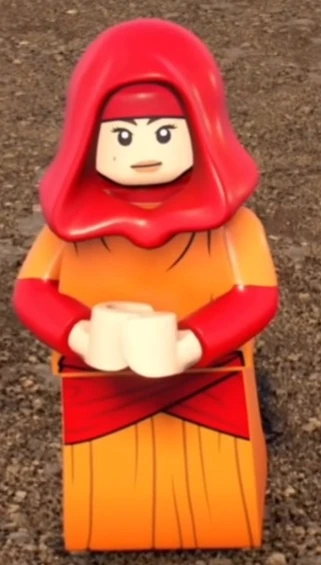
| |
| Padmé (Ship) | Hero | 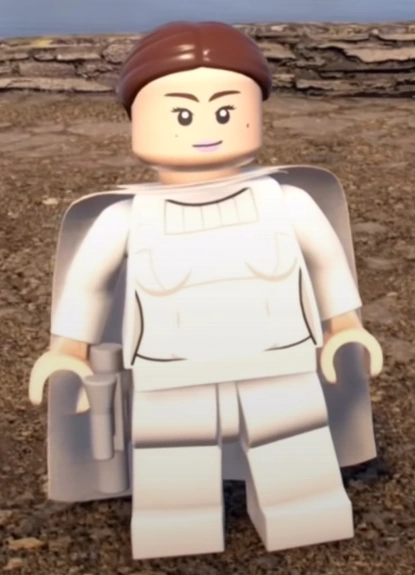
| |
| Padmé (Tatooine Disguise) | Hero | 
| |
| Padmé (Clawed) | Hero | 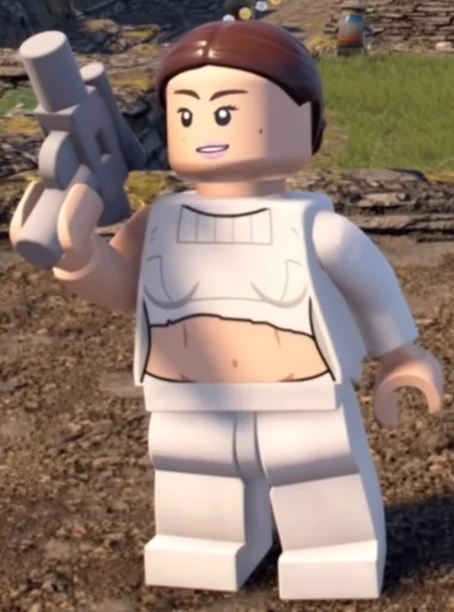
| |
| Padmé (Battle of Naboo) | Hero | 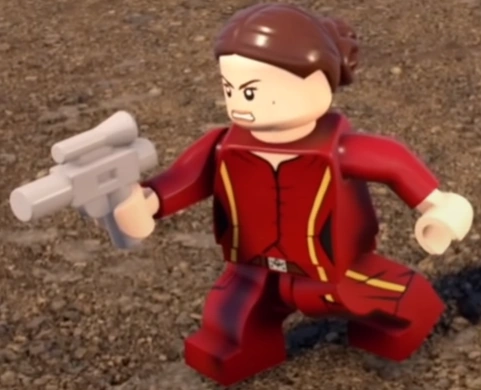
| |
| Padmé (Silver Cape) | Hero | 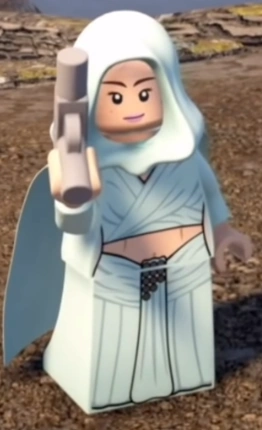
| |
| Padmé (Pilot) | Hero | 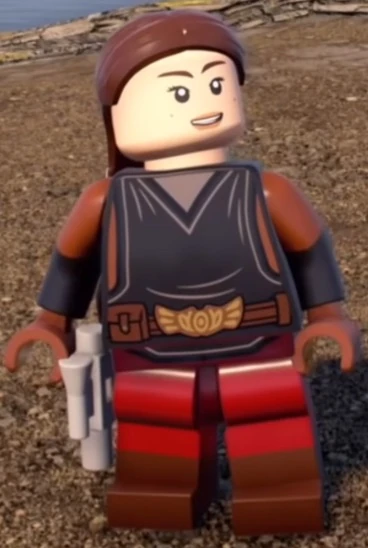
| |
| Padmé (Pregnant) | Hero | 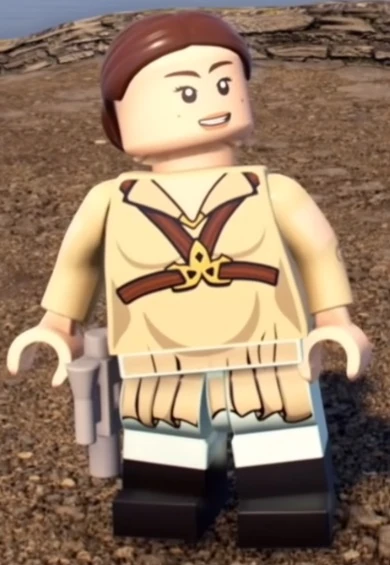
| |
| Padmé (Pilot - Helmet) | Hero | 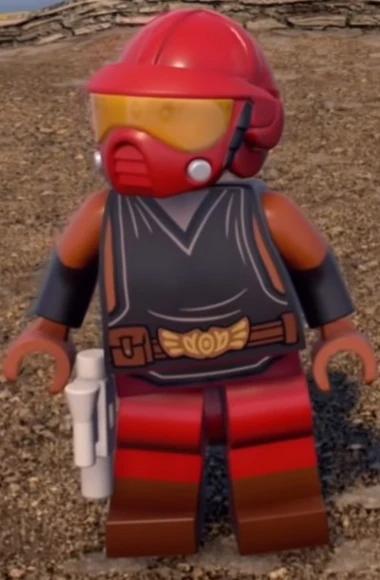
| |
| Palpatine (Senator) | Dark Side | 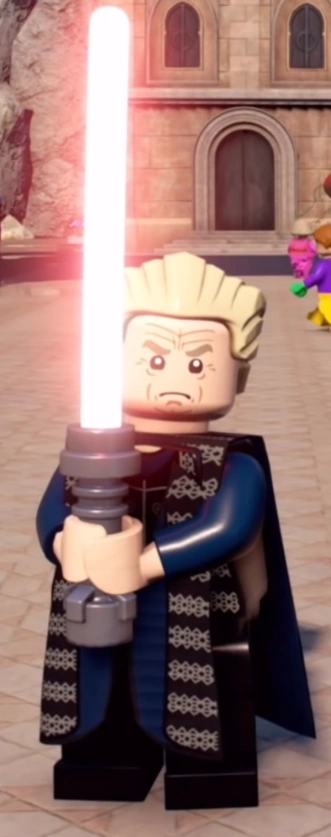
| |
| Palpatine (Chancellor - Grey) | Dark Side | 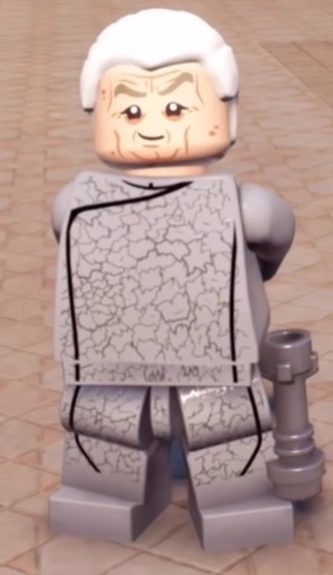
| |
| Palpatine (Chancellor - Red) | Dark Side | 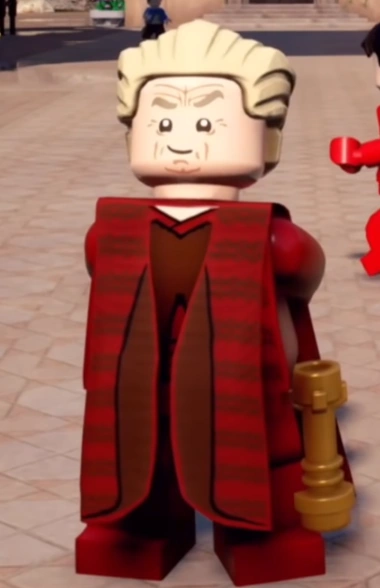
| |
| Palpatine (Scarred) | Dark Side | 
| |
| Paploo | Scavenger | 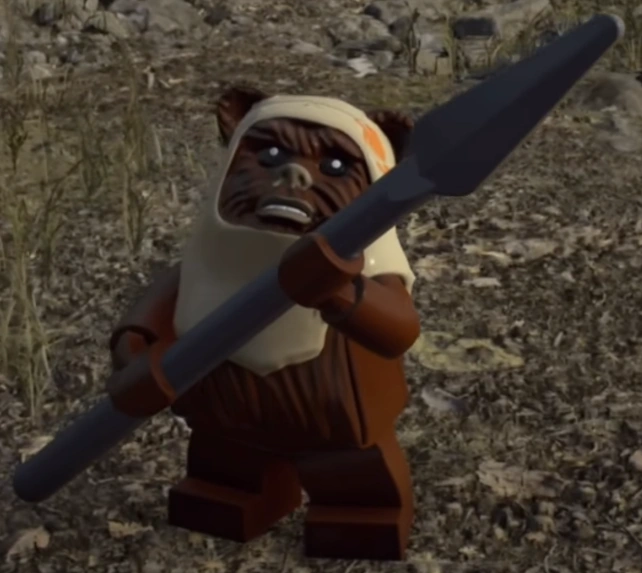
| |
| Pit Droid | Extra | 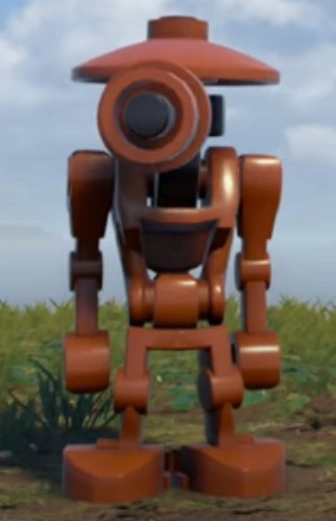
| |
| Plo Koon | Jedi |
|
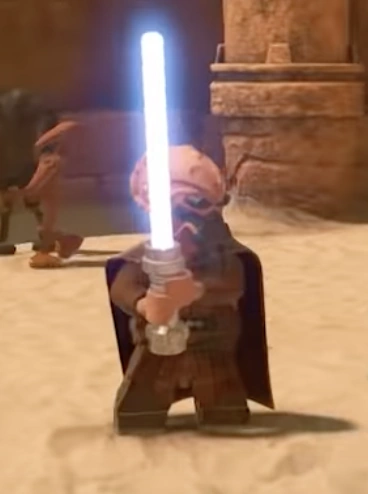
|
| Poe Dameron (Jacket) | Hero | 
| |
| Poe Dameron (Pilot - Helmet) | Hero | 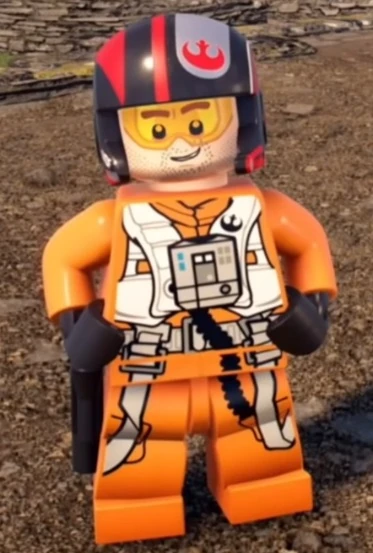
| |
| Poe Dameron (Pilot) | Hero | 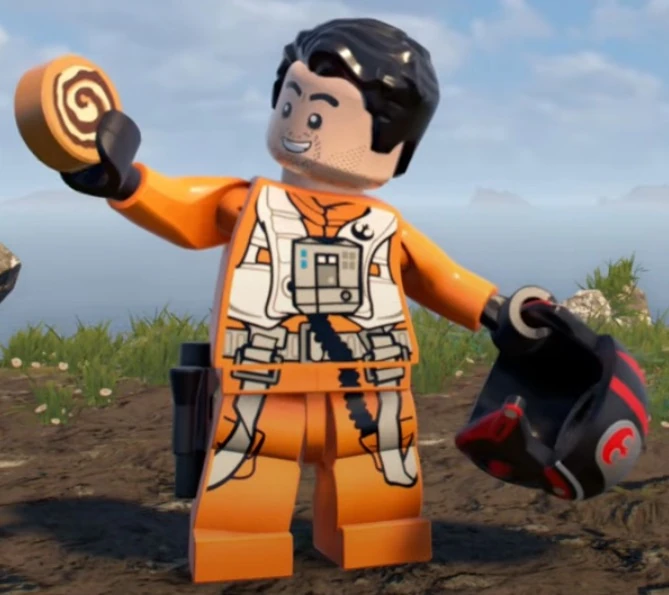
| |
| Poe Dameron (Black Resistance Jacket) | Hero | 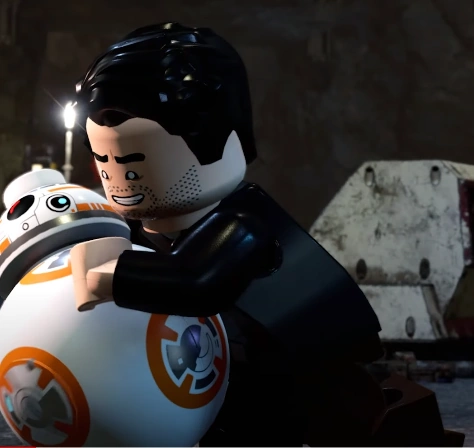
| |
| Poe Dameron (Episode IX) | Hero | 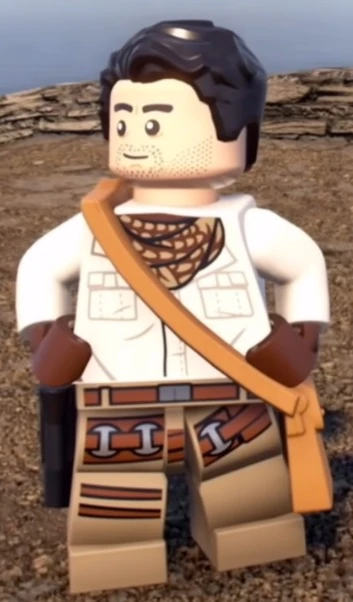
| |
| Poe Dameron (Kijimi Coat) | Hero | 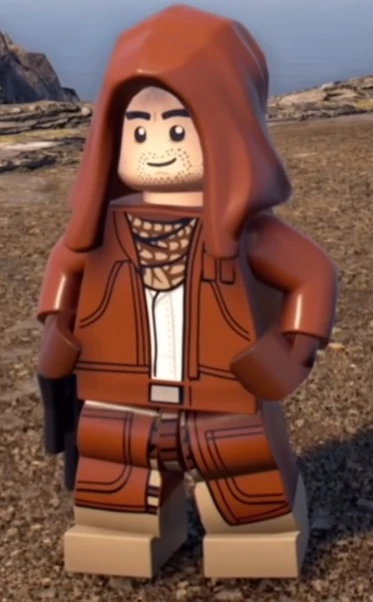
| |
| Poe Dameron (Holiday Special) | Hero | 
| |
| Poggle the Lesser | Extra | 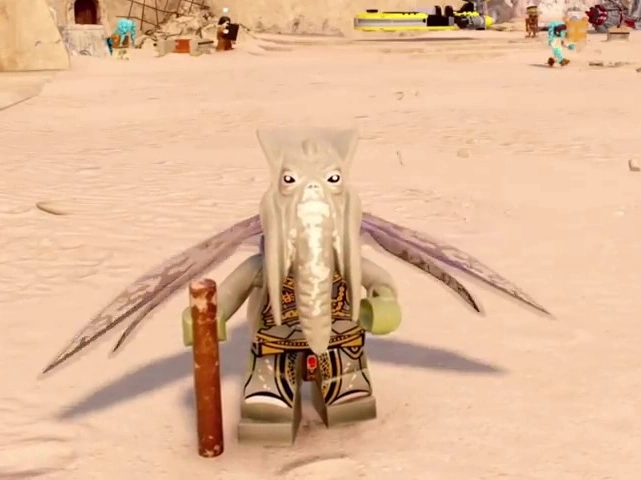
| |
| Ponda Baba | Scoundrel | 
| |
| Praetorian Guard (Eighth Guard) | Villain | 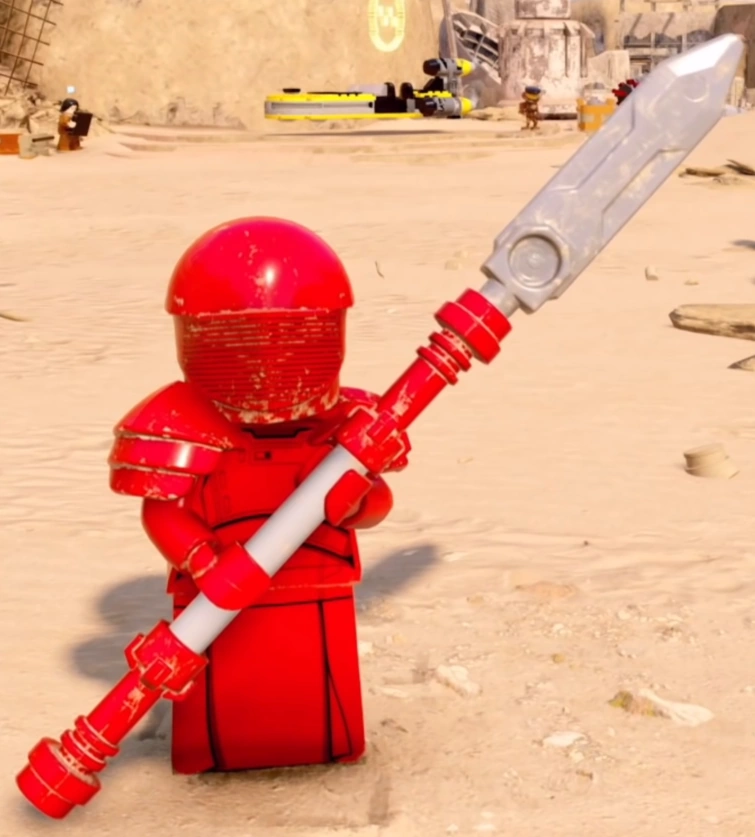
| |
| Praetorian Guard (First Guard) | Villain | 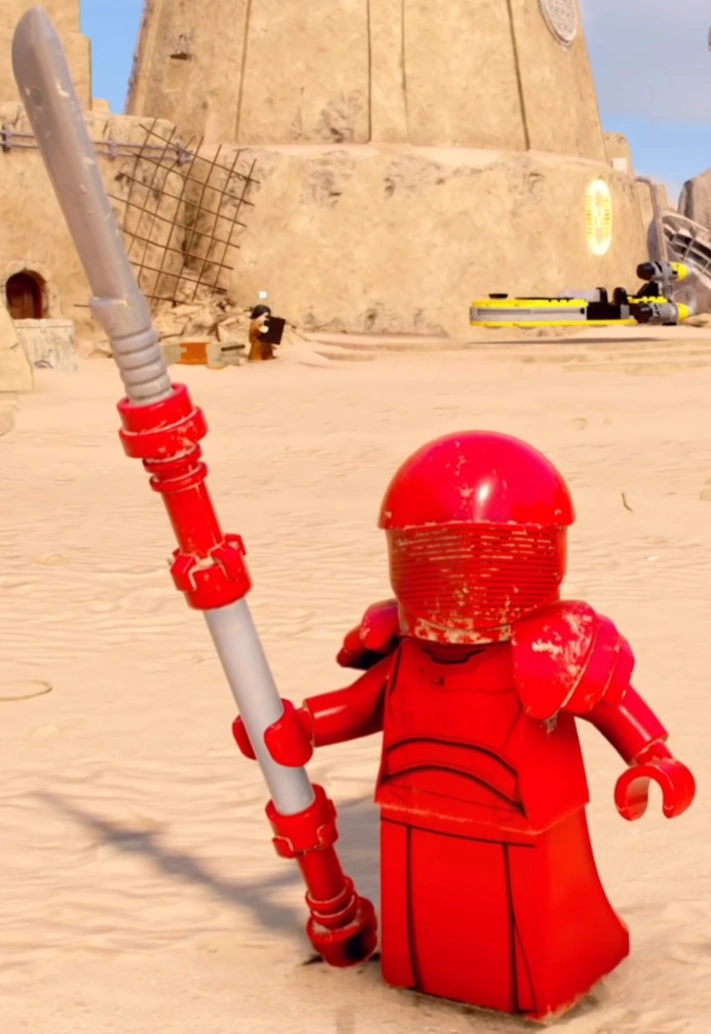
| |
| Praetorian Guard (Seventh Guard) | Villain | 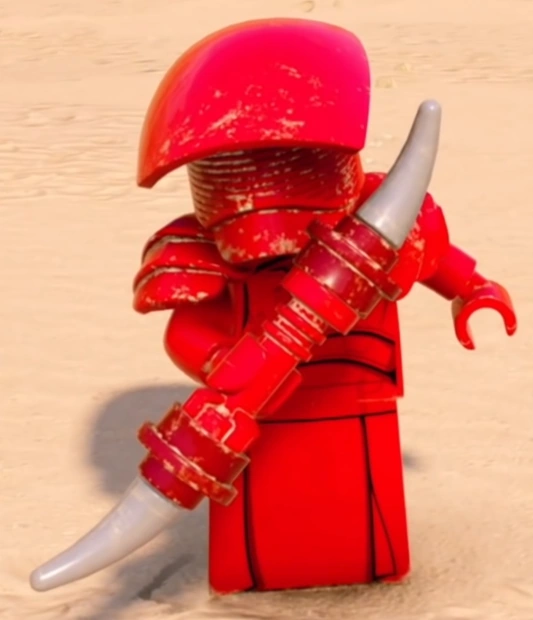
| |
| Praetorian Guard (Third Guard) | Villain | 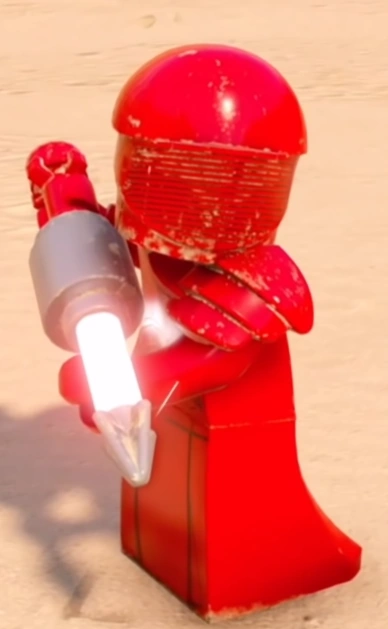
| |
| Pryde | Villain | 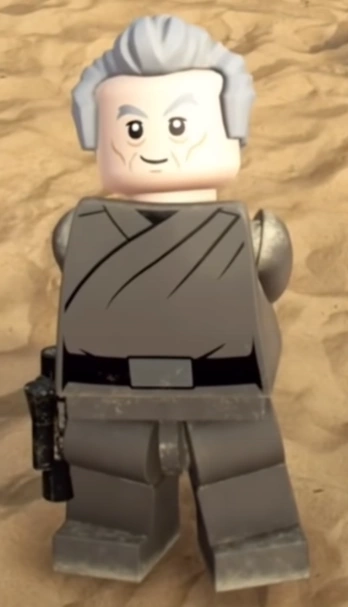
| |
| Queen Amidala | Extra | 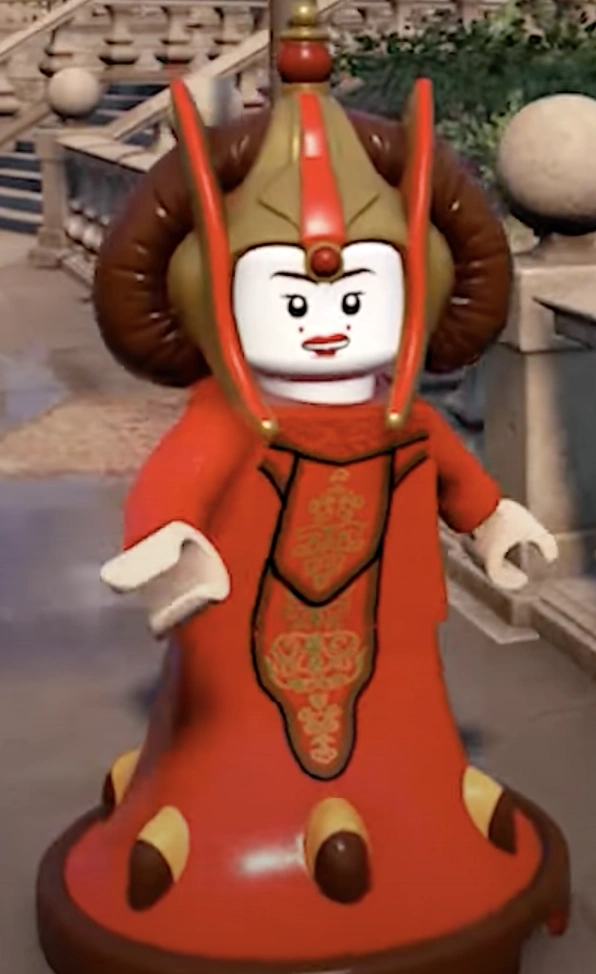
| |
| Qui-Gon Jinn (Cape) | Jedi | 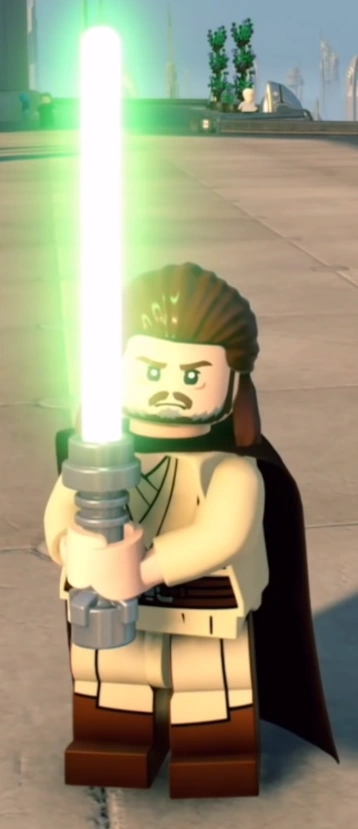
| |
| Qui-Gon Jinn | Jedi |
|
|
| Qui-Gon Jinn (Tatooine Disguise) | Jedi | 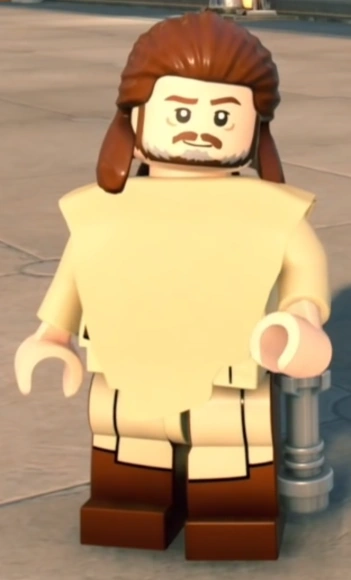
| |
| R-3PO | Protocol Droid | 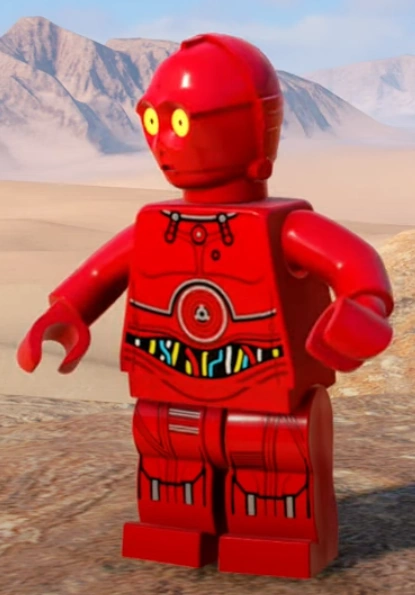
| |
| R2-A6 | Astromech Droid | 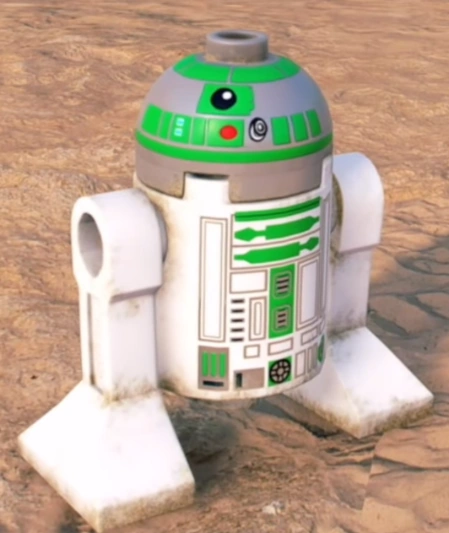
| |
| R2-B1 | Astromech Droid | 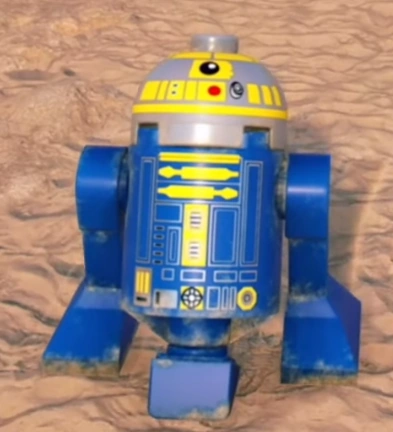
| |
| R2-D2 | Astromech Droid | 
| |
| R2-D2 (Swamp) | Astromech Droid | 
| |
| R2-D2 (Waiter) | Astromech Droid | 
| |
| R2-KT | Astromech Droid | 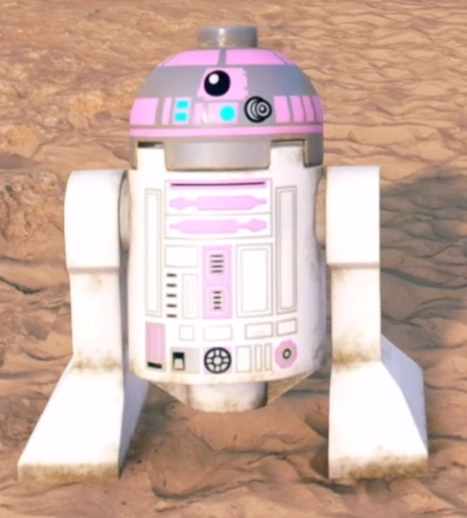
| |
| R2-N3 | Astromech Droid | 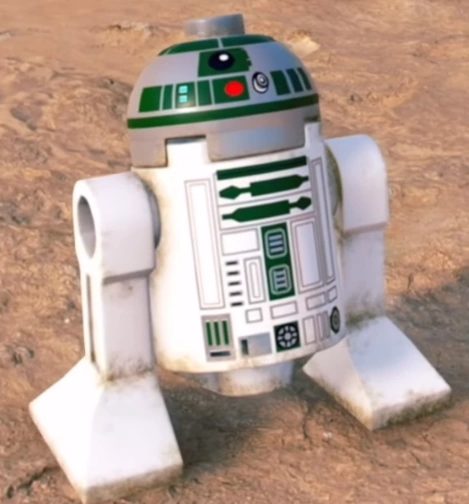
| |
| R2-Q5 | Astromech Droid | 
| |
| R2-R9 | Astromech Droid | 
| |
| R4-M9 | Astromech Droid | 
| |
| R4-P17 | Astromech Droid | 
| |
| R5-2JE | Astromech Droid | 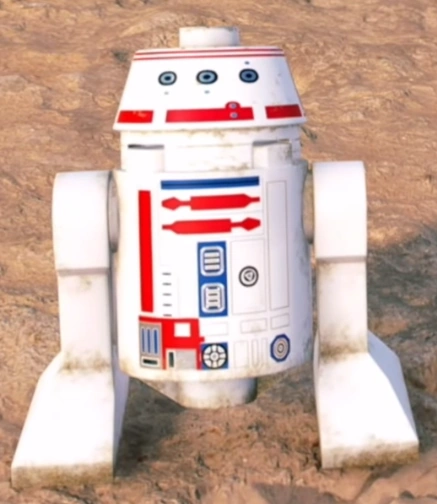
| |
| R5-D4 | Astromech Droid | 
| |
| R5-M2 | Astromech Droid | 
| |
| RA-7 | ProtocolDroid | 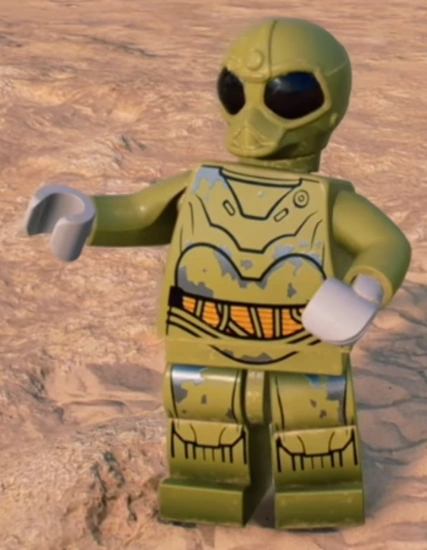
| |
| Rancor | Extra | 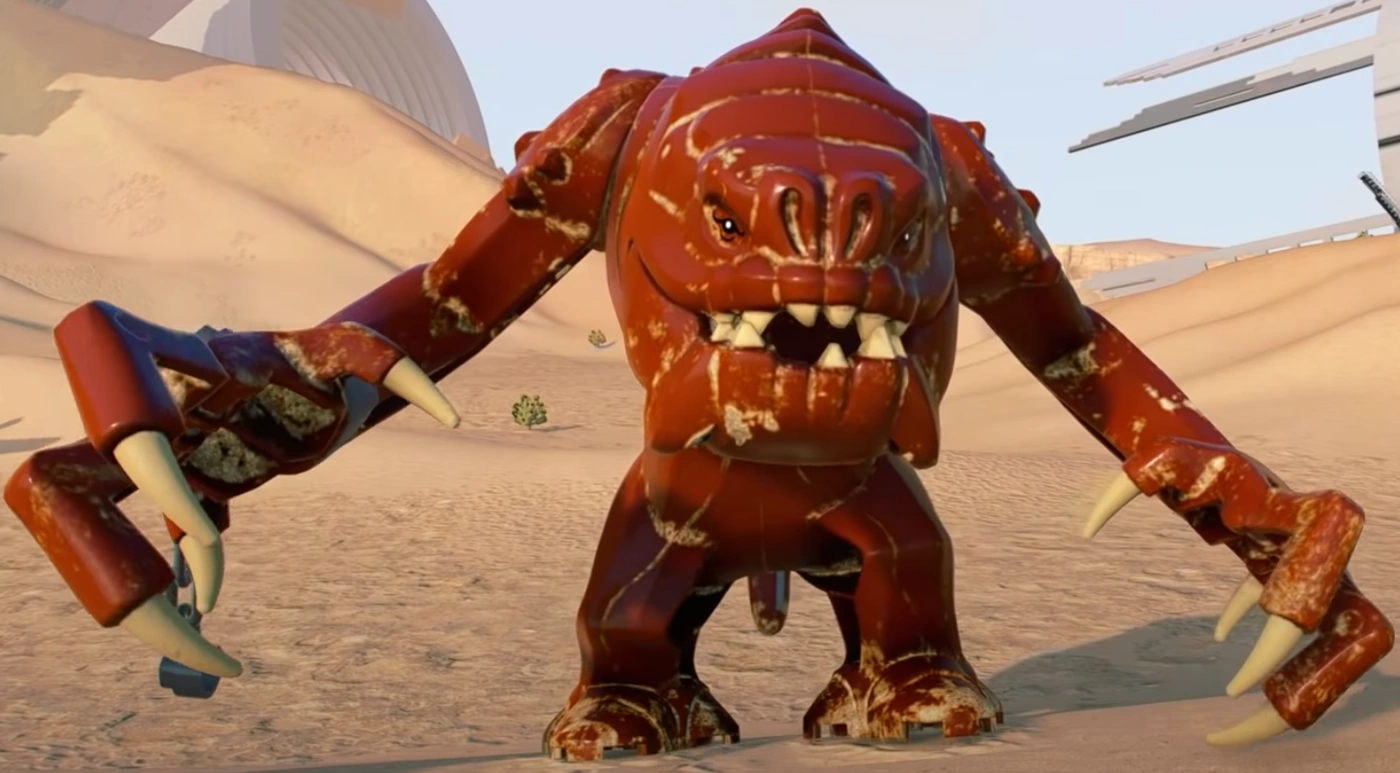
| |
| Ratts Tyerell | Extra | 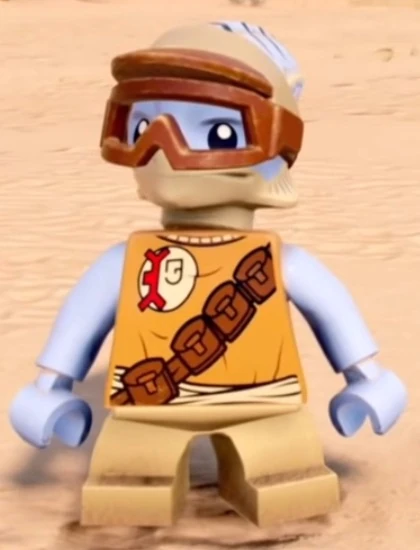
| |
| Rebel Friend | Hero | 
| |
| Ree-Yees | Extra | 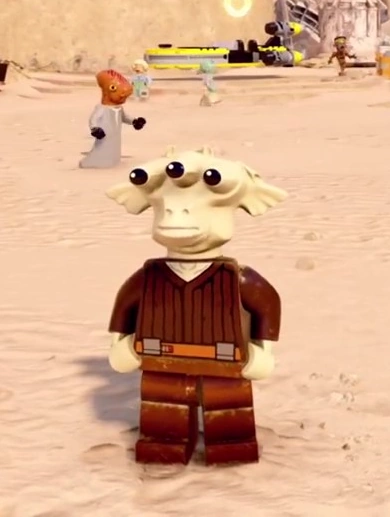
| |
| Rey (Episode VII - Jedi) | Jedi |
|

|
| Rey (Grey Jedi Wrap) | Jedi |
|
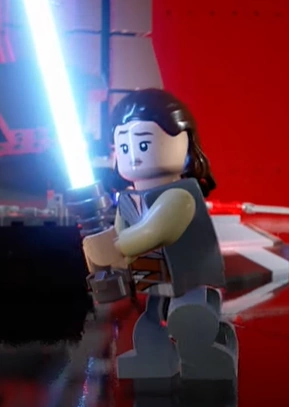
|
| Rey (Episode IX) | Jedi |
|
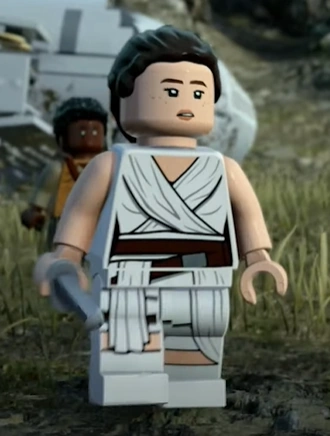
|
| Rey (Kijimi Coat) | Jedi |
|
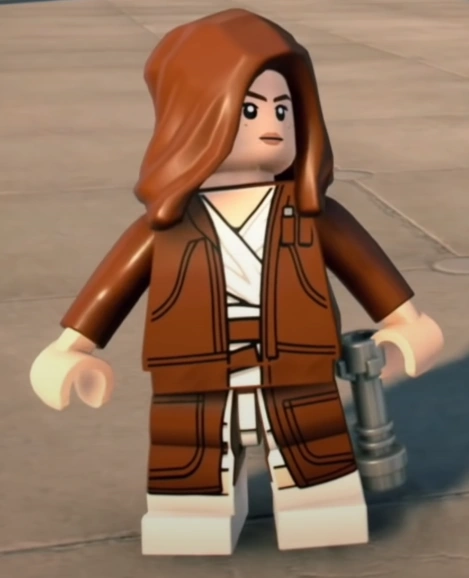
|
| Rey Skywalker | Jedi |
|
|
| Rey (Episode VII) | Scavenger | 
| |
| Rey (Episode VII - Starkiller Base) | Scavenger |
|
|
| Rey (Sith) | Dark Side |
|

|
| Ric Olié | Hero | 
| |
| Roger | Extra | 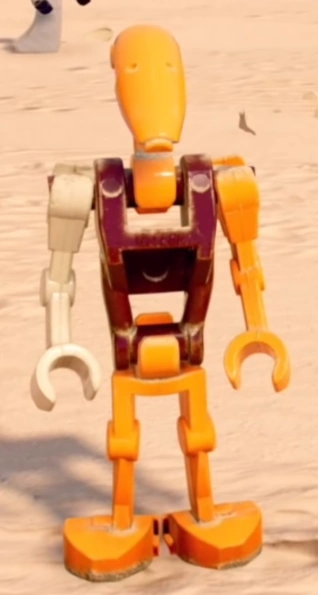
| |
| Rose Tico | Hero | 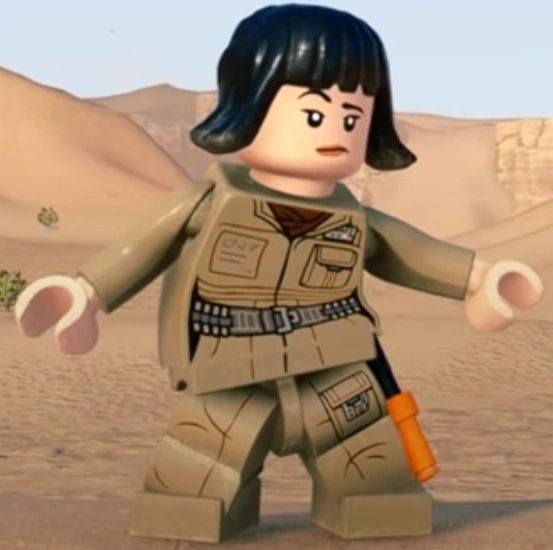
| |
| Rose Tico (Crait) | Hero | 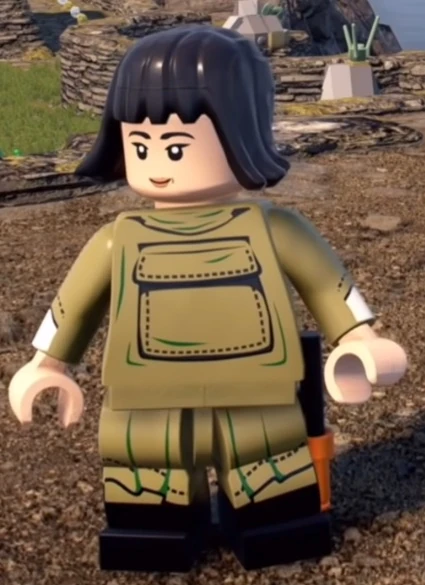
| |
| Rose Tico (Episode IX) | Hero | 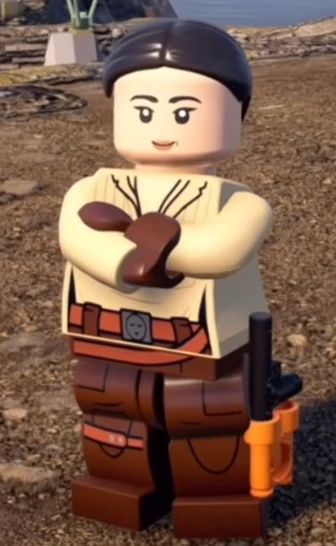
| |
| Rose Tico (First Order) | Villain | 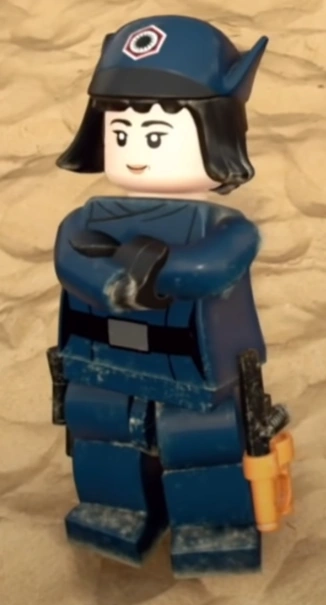
| |
| Rose Tico (Episode VIII - Supremacy) | Villain | 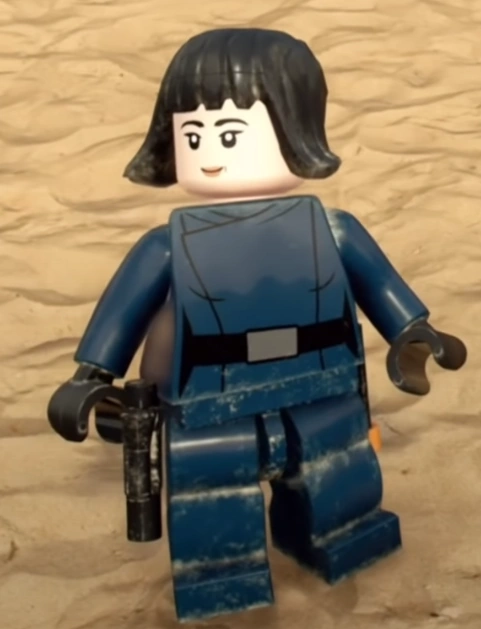
| |
| Rothgar Deng | Bounty Hunter | 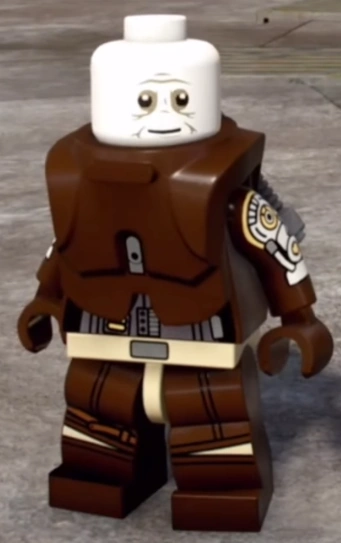
| |
| Rune Haako | Extra | 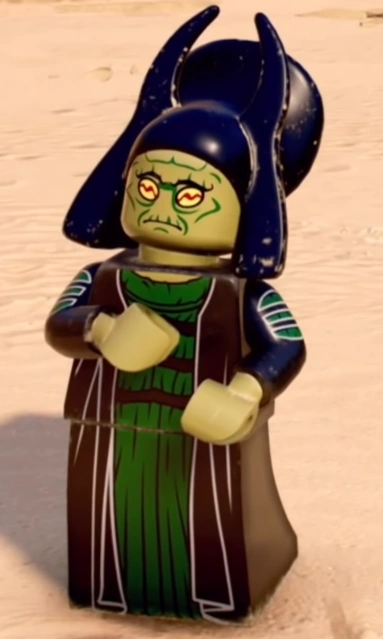
| |
| Salacious B. Crumb | Extra | 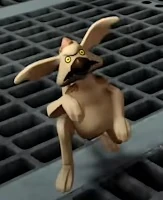
| |
| Sandtrooper | Villain | 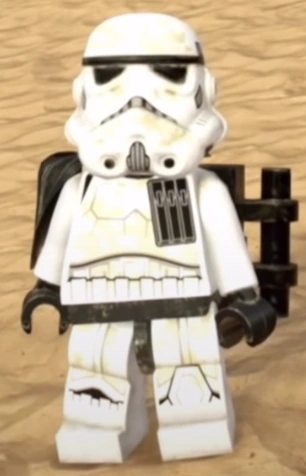
| |
| Sandtrooper (Commander) | Villain | 
| |
| Sandtrooper (Sergeant) | Villain | 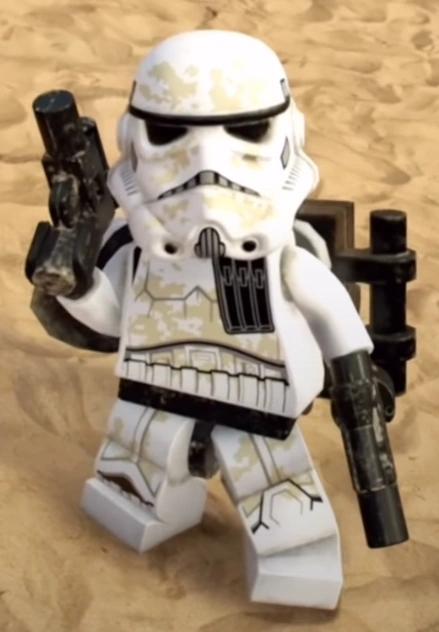
| |
| Scout Trooper | Villain | 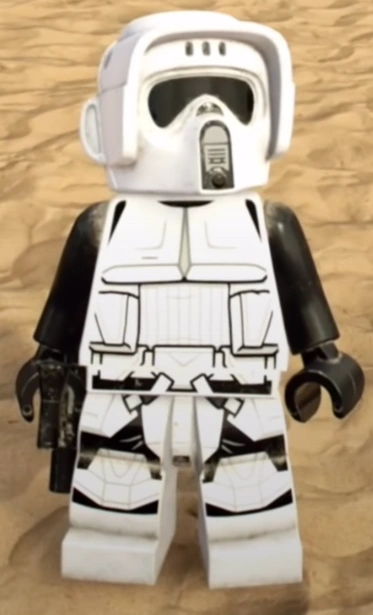
| |
| Scout Trooper (Kashyyyk) | Villain | 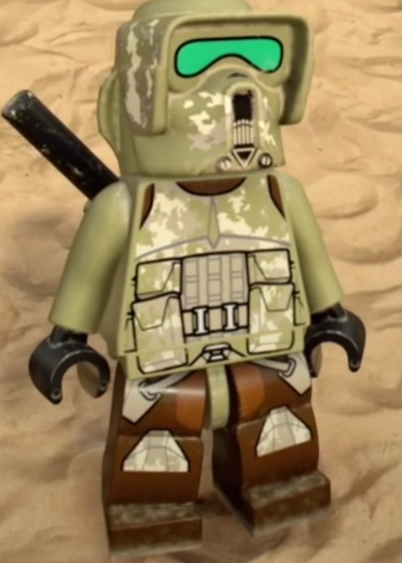
| |
| Sebulba | Extra | 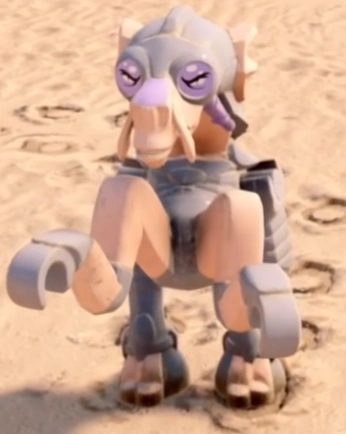
| |
| Senate Guard | Extra | 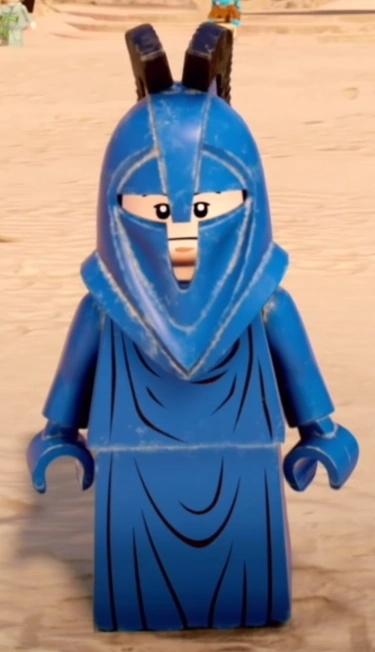
| |
| Shaak Ti | Jedi |
|
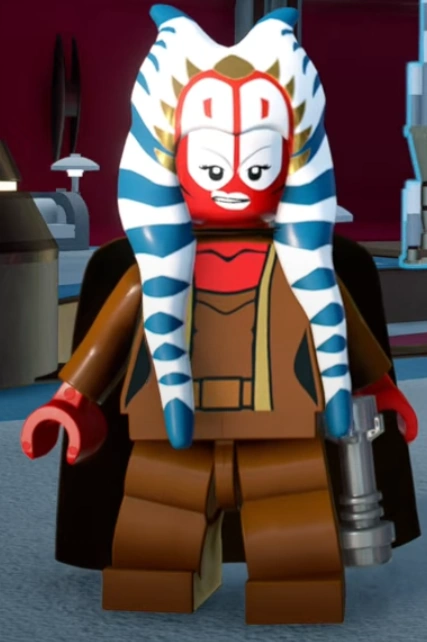
|
| Shmi Skywalker | Extra | 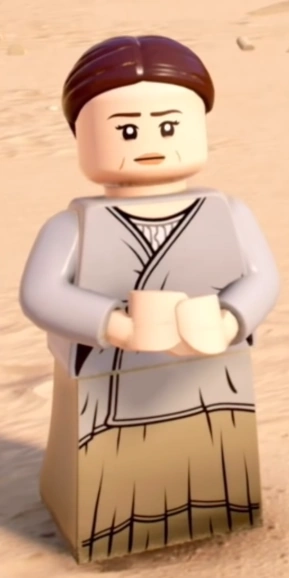
| |
| Sidon Ithano | Scoundrel | 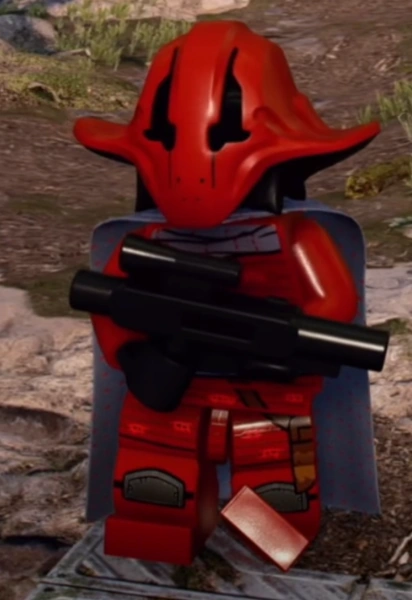
| |
| Sith Acolyte | Extra | 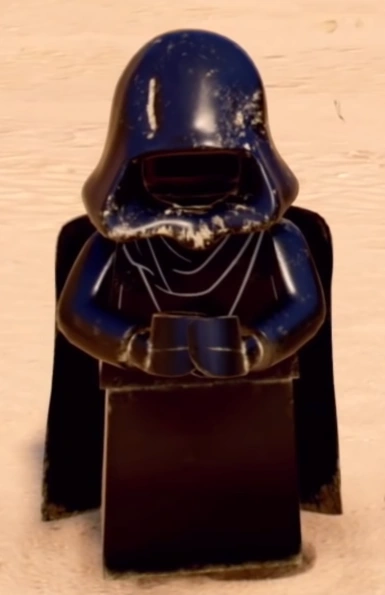
| |
| Sith Jet Trooper | Villain | 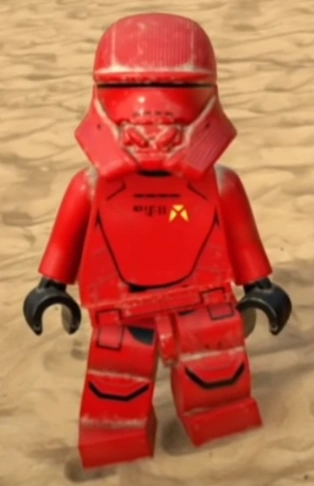
| |
| Sith Probe Droid | Villain | 
| |
| Sith Trooper | Villain | 
| |
| Snoke | Dark Side |
|

|
| Snowtrooper | Villain | 
| |
| Sovereign Protector | Villain | 
| |
| Stormtrooper | Villain | 
| |
| Stormtrooper (Empire Sergeant) | Villain | 
| |
| Stormtrooper (Empire Commander) | Villain | 
| |
| Stormtrooper (First Order) | Villain | 
| |
| Stormtrooper (First Order Driver) | Villain | 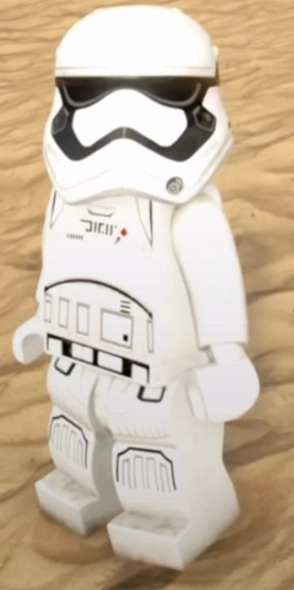
| |
| Stormtrooper (First Order Officer) | Villain | 
| |
| Stormtrooper (First Order Heavy Assault) | Villain | 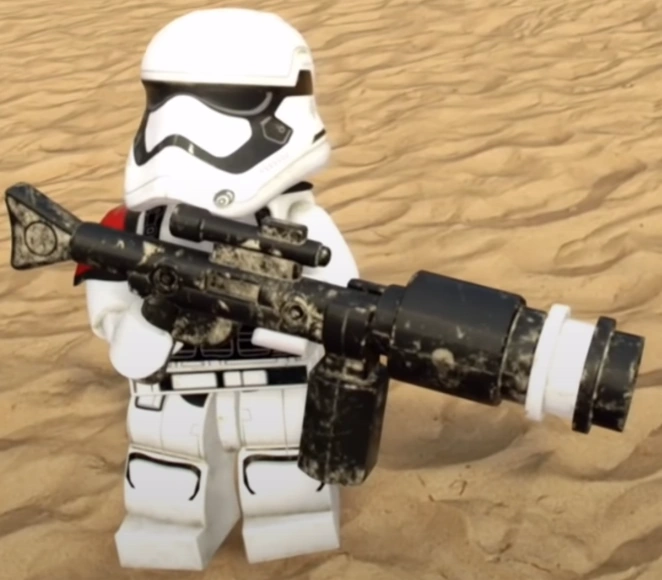
| |
| Stormtrooper (First Order Squad Leader) | Villain | 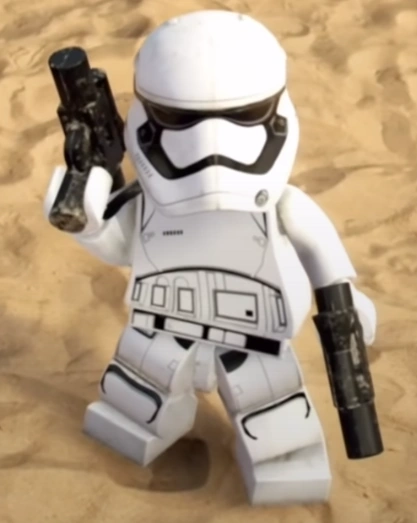
| |
| Stormtrooper (First Order Sergeant) | Villain |
| |
| Sy Snootles | Extra | 
| |
| TC-14 | Protocol Droid | 
| |
| TIE Fighter Pilot | Villain | 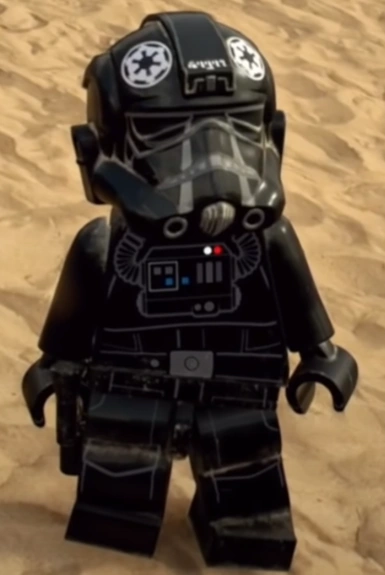
| |
| Tallie Lintra | Hero | 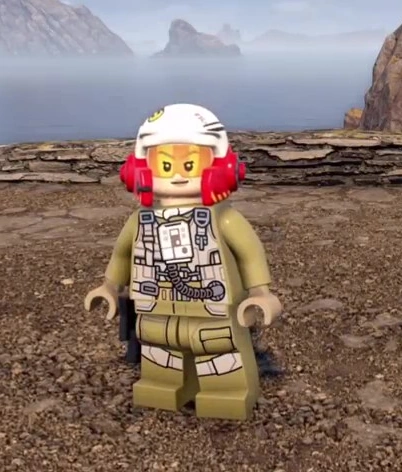
| |
| Tarfful | Hero | 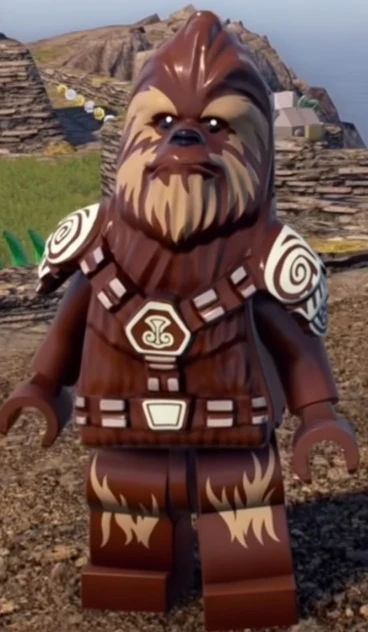
| |
| Tarkin | Villain | 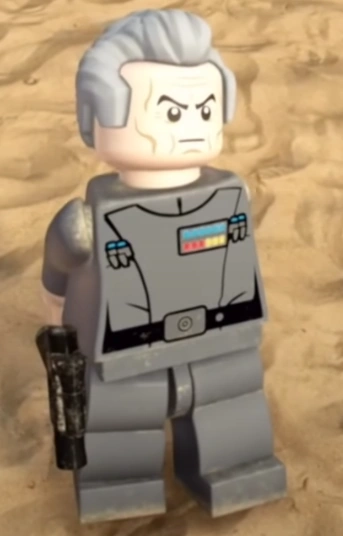
| |
| Tasu Leech | Scoundrel | 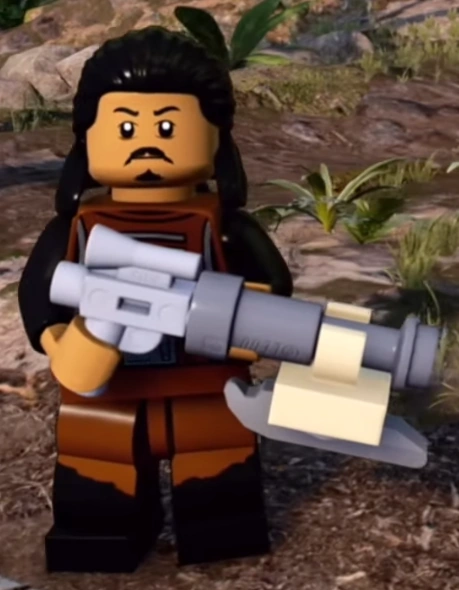
| |
| Teebo | Scavenger | 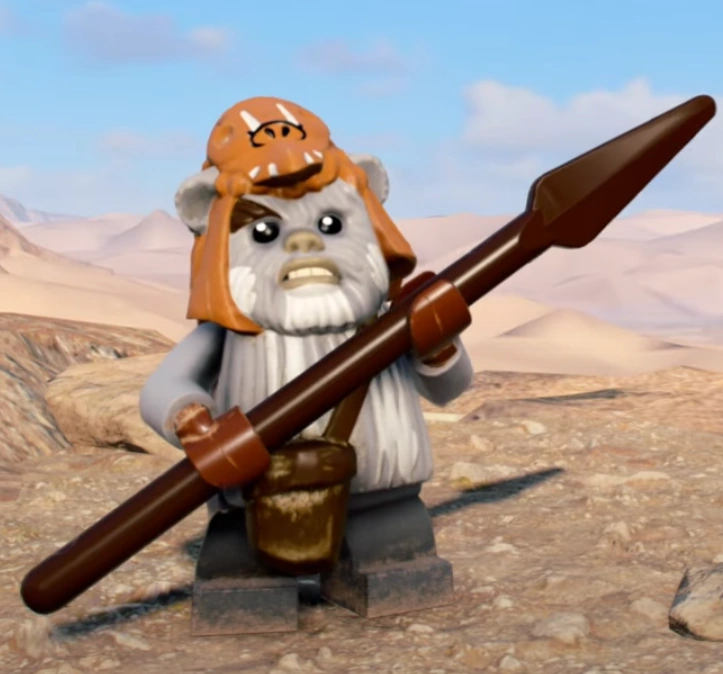
| |
| Teedo | Scavenger | 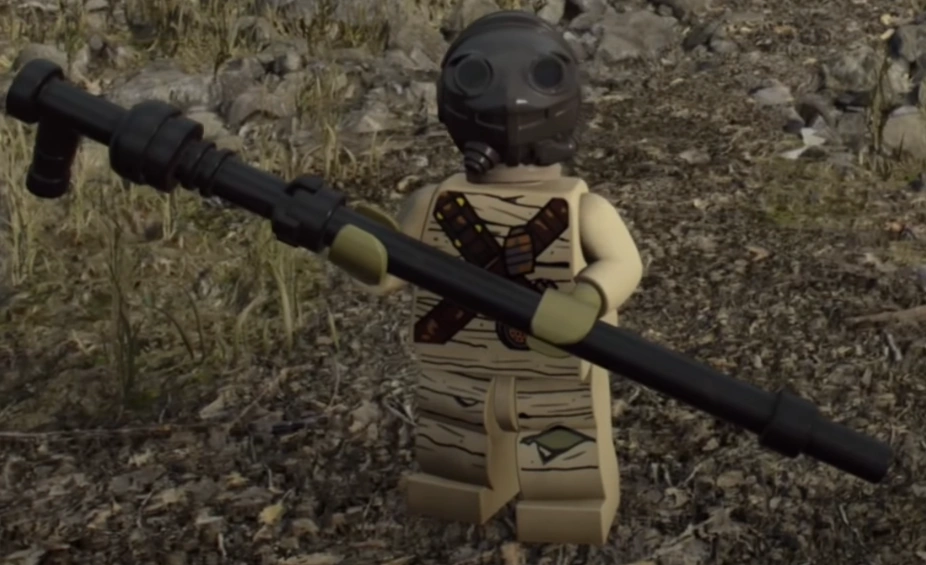
| |
| Temiri Blagg | Extra | 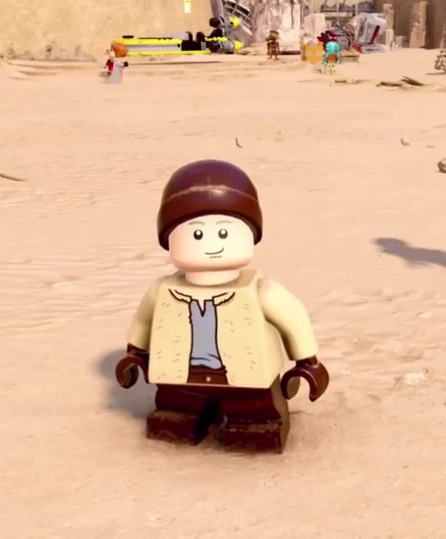
| |
| Temmin Wexley | Hero | 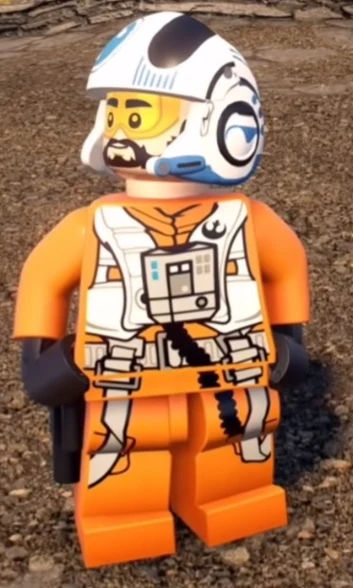
| |
| Palpatine | Dark Side |
|
|
| The Emperor (Clone) | Dark Side |
|
|
| Theron Nett | Hero | 
| |
| Tion Medon | Extra | 
| |
| Trudgen | Villain | 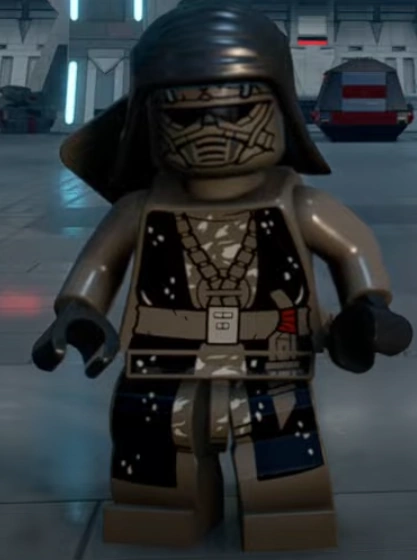
| |
| Tusken Raider | Scavenger | 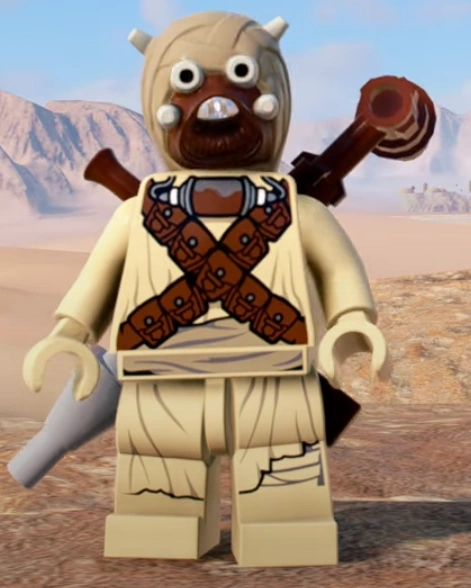
| |
| Ubbla Mollbro | Extra | 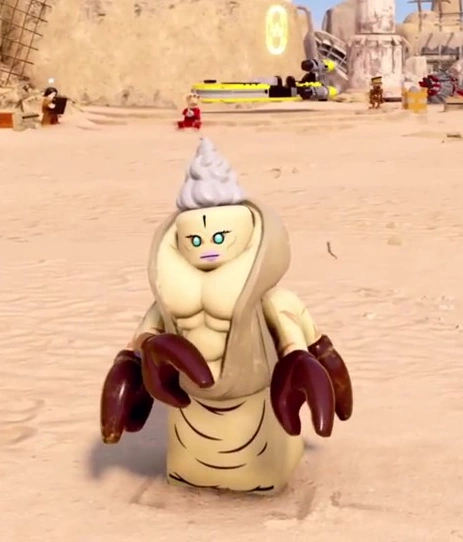
| |
| Ugnaught | Extra | 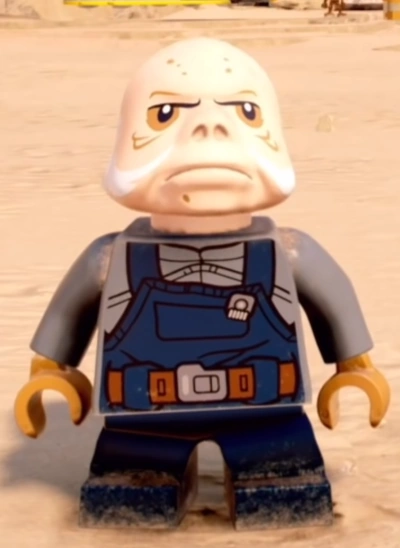
| |
| Unkar Plutt | Extra | 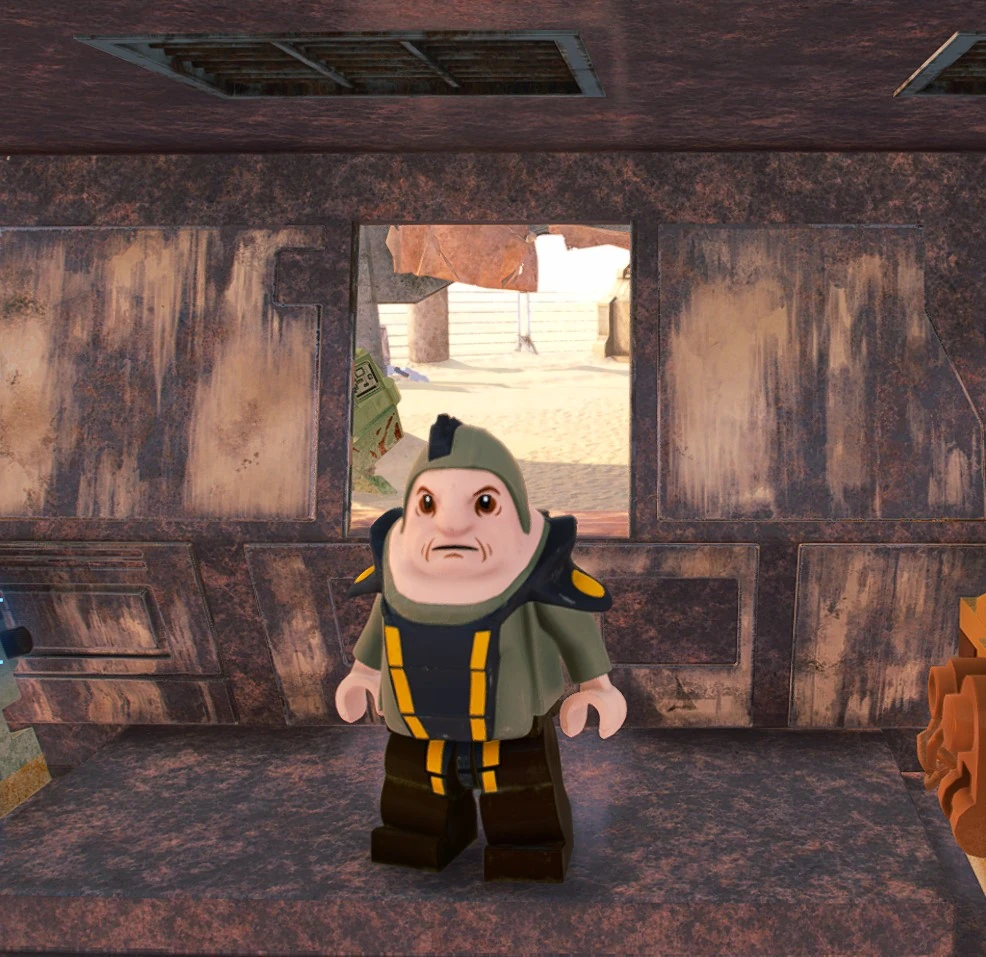
| |
| Ushar | Villain | 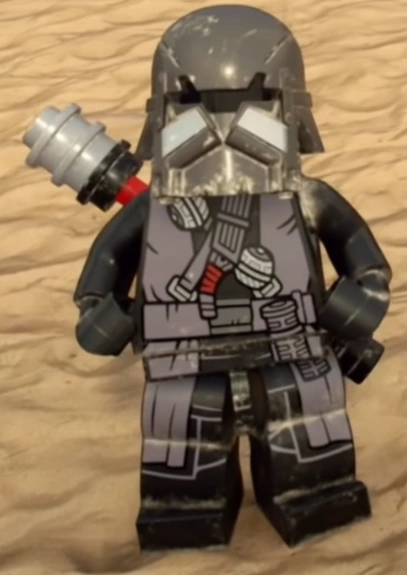
| |
| Vicrul | Villain | 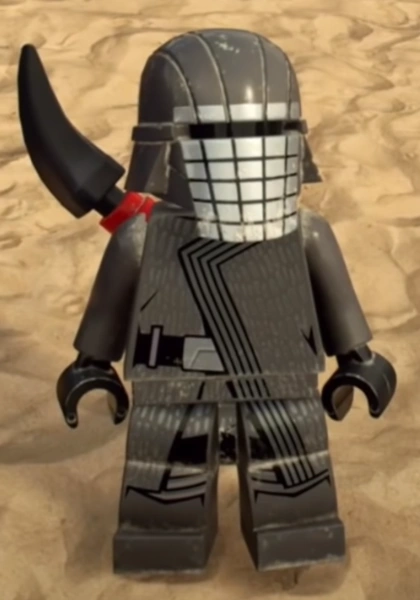
| |
| Wampa | Extra | 
| |
| Wandering Wookiee | Scoundrel | 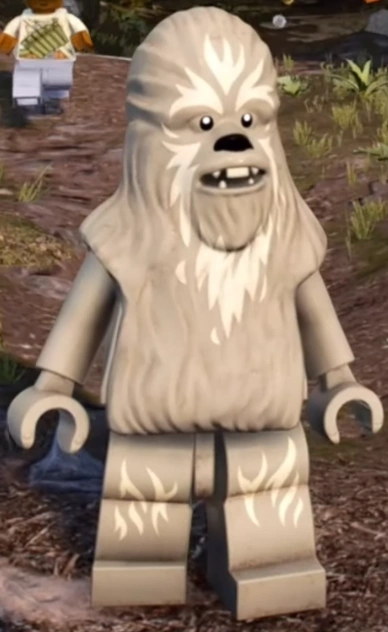
| |
| Watto | Extra | 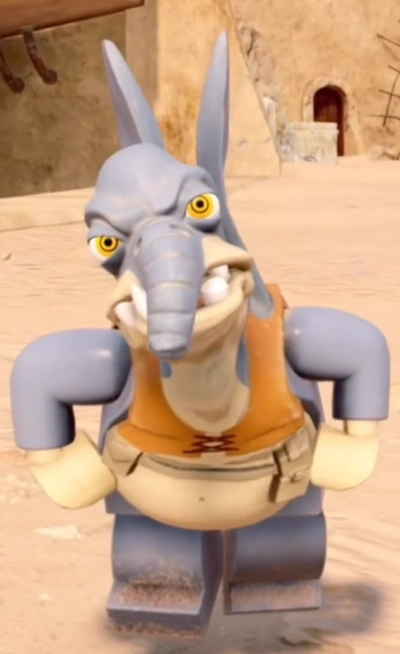
| |
| Wedge Antilles | Hero | 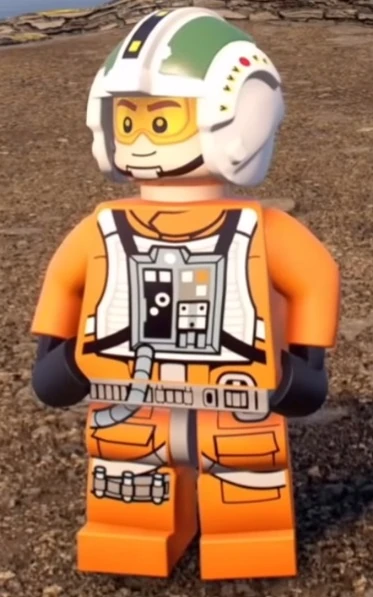 . .
| |
| Weequay | Extra | 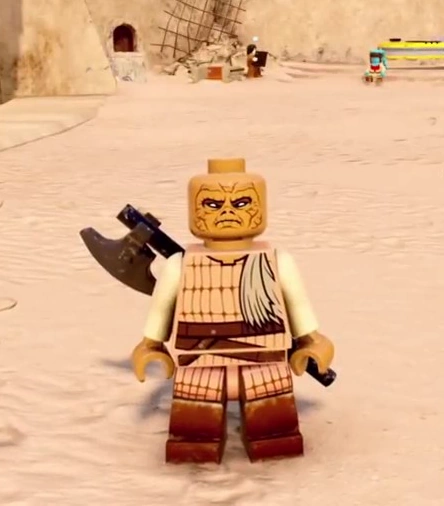
| |
| Wicket | Scavenger | 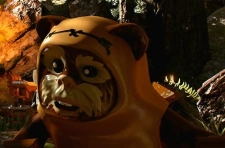
| |
| Willrow Hood | Extra | 
| |
| Wrobie Tyce | Hero | 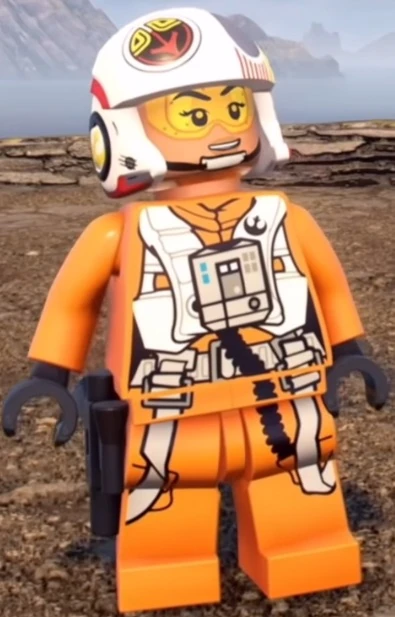
| |
| Yaddle | Jedi | 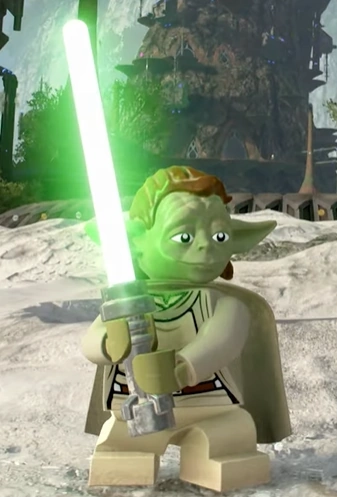
| |
| Yarael Poof | Jedi | 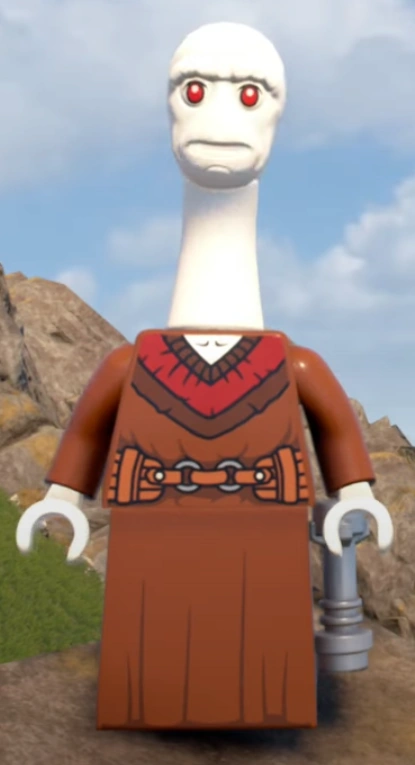
| |
| Yoda | Jedi |
|
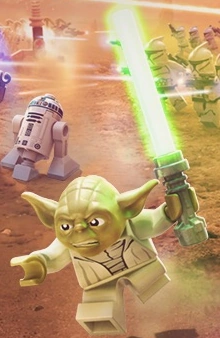
|
| Zam Wesell (Human) | Bounty Hunter | 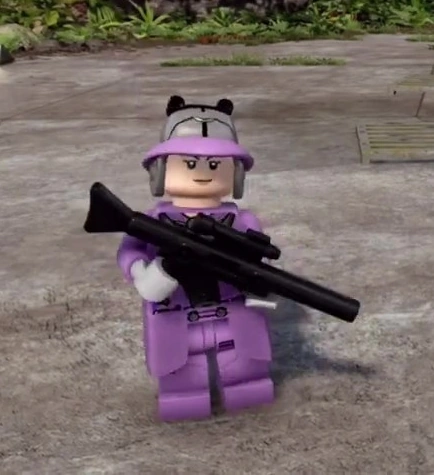
| |
| Zam Wesell (Alien Face) | Bounty Hunter | 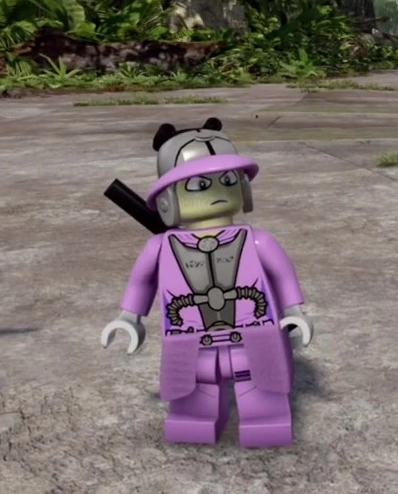
| |
| Zev Senesca (Rogue 2) | Hero | 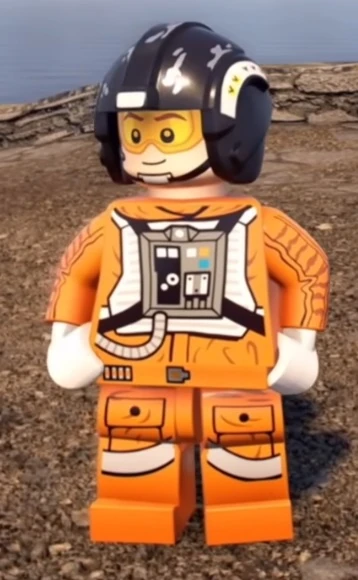
| |
| Zorii Bliss | Scoundrel | 
| |
| Zuckuss | Bounty Hunter | 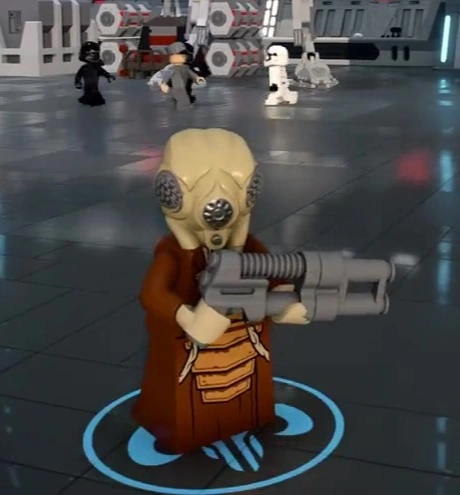
|
DLC Characters
| Character | Class | Abilities | Image |
|---|---|---|---|
| Ahsoka Tano | Jedi | 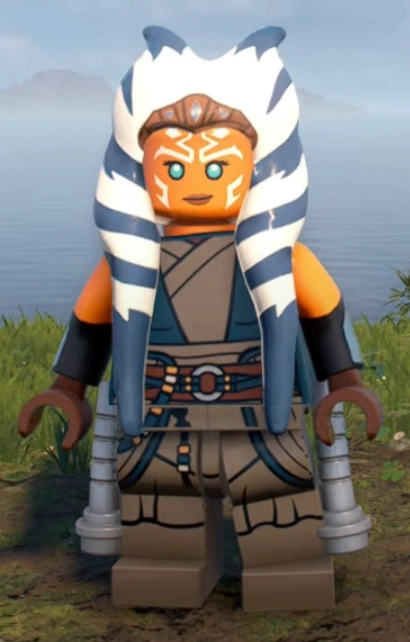
| |
| Baze Malbus | Hero | 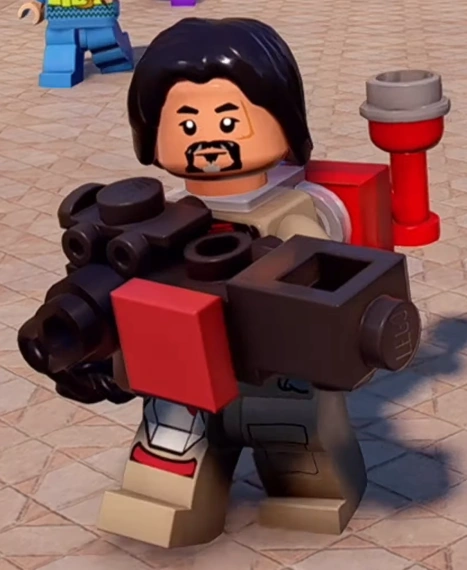
| |
| Bo-Katan Kryze | Hero | 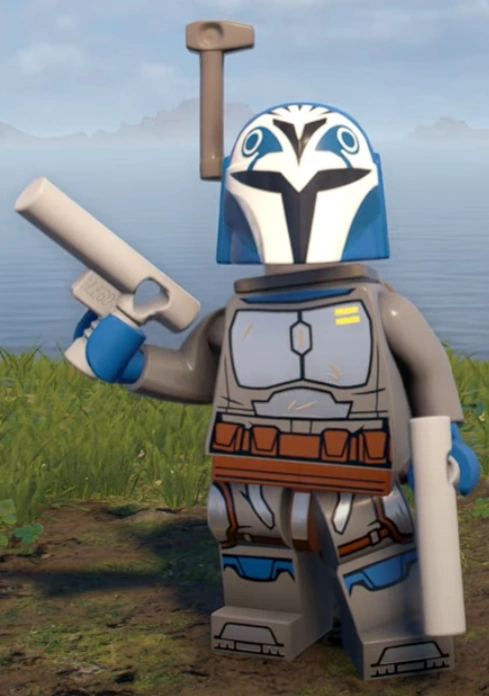
| |
| Boba Fett (Scion of Jango) | Bounty Hunter | 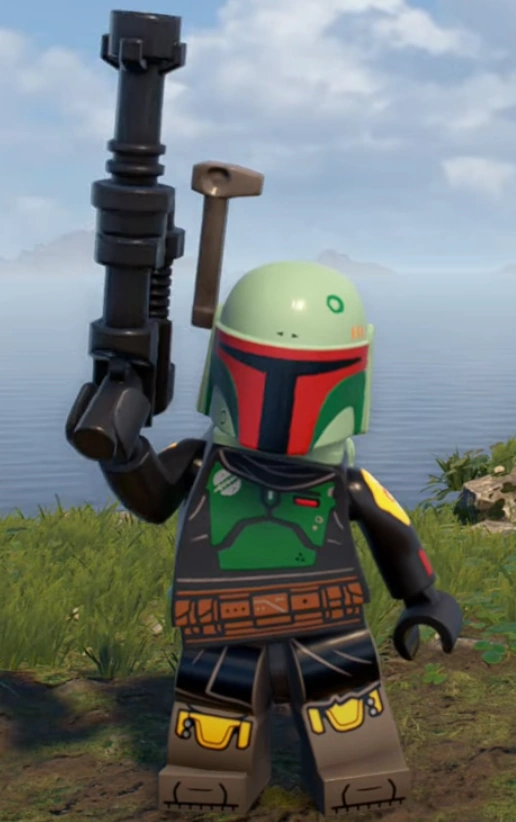
| |
| Bodhi Rook | Hero | 
| |
| Cara Dune | Hero | 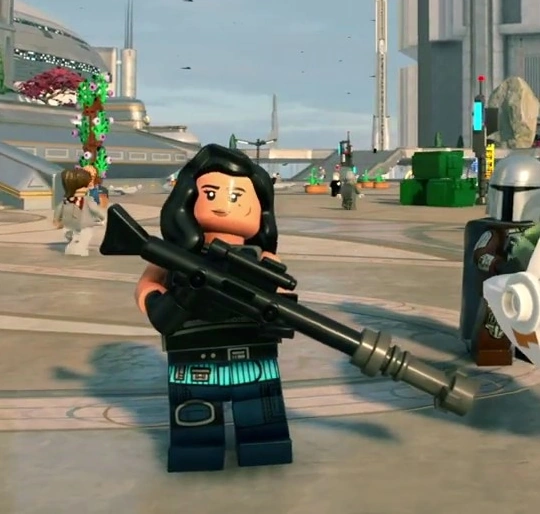
| |
| Cassian Andor | Hero | 
| |
| Chewbacca (Vandor) | Scoundrel | 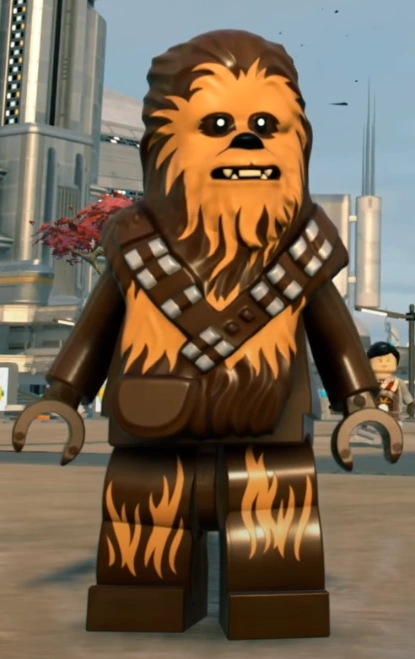
| |
| Chirrut Îmwe | Hero | 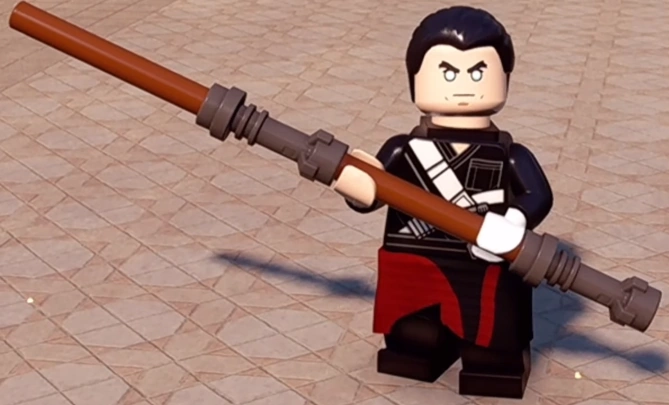
| |
| Crosshair | Villain | 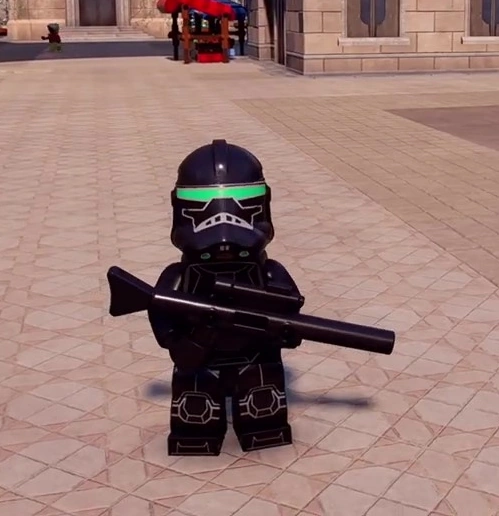
| |
| Darth Vader (Classic) | Dark Side |
|
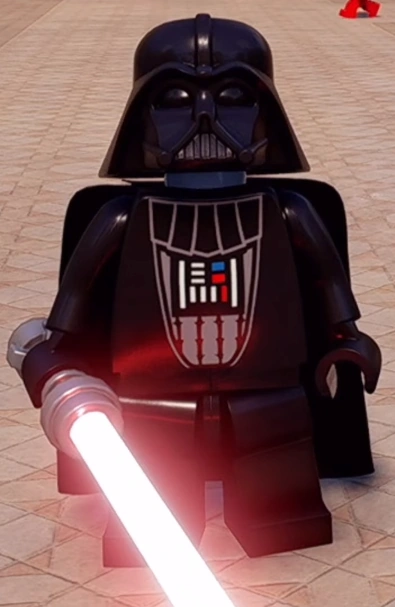
|
| Din Djarin | Bounty Hunter | 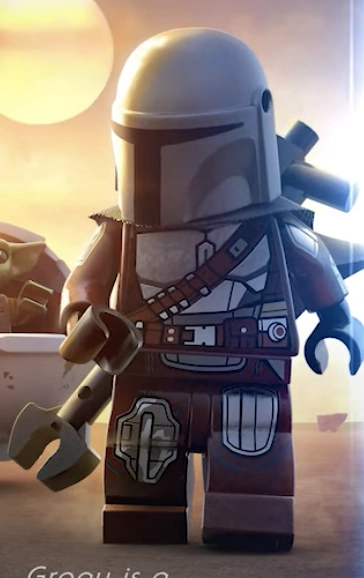
| |
| Director Krennic | Villain | 
| |
| Echo | Hero | 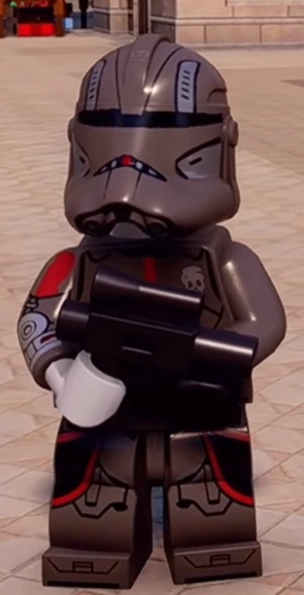
| |
| Enfys Nest | Hero | 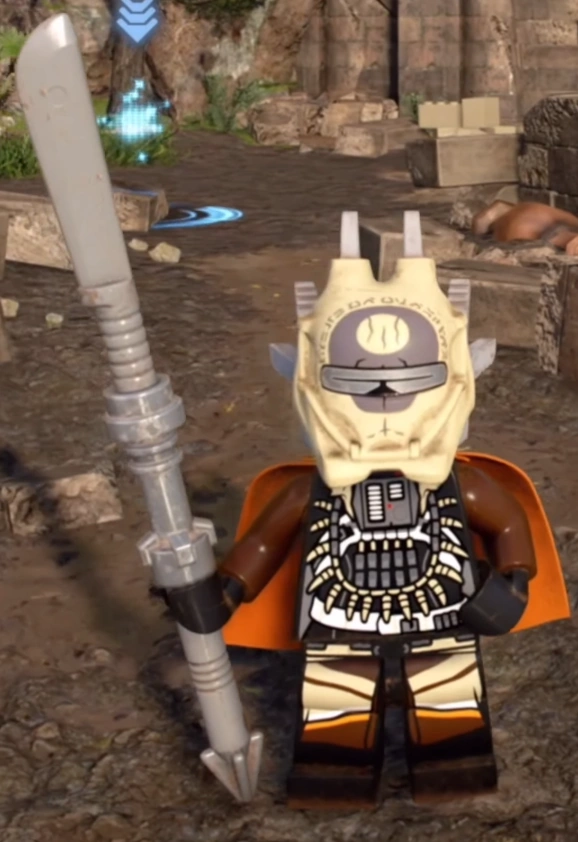
| |
| Fennec Shand | Bounty Hunter | 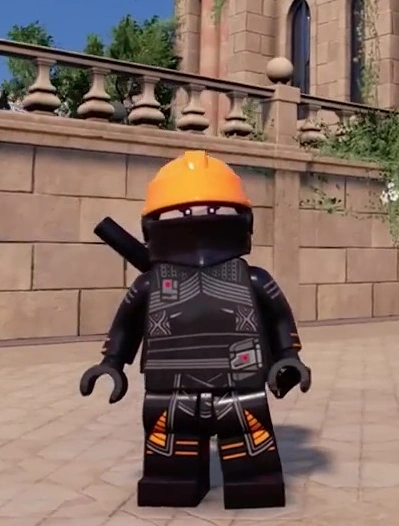
| |
| Greef Karga | Bounty Hunter | 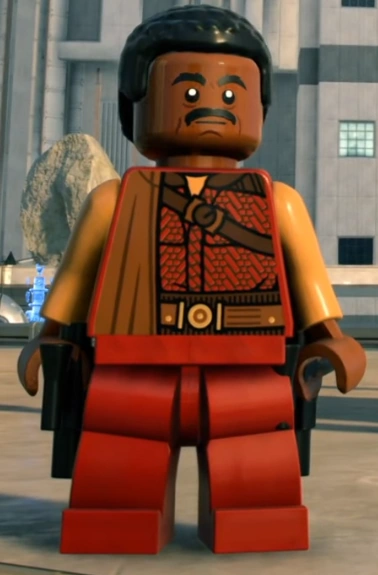
| |
| Grogu (Companion) | Hero | 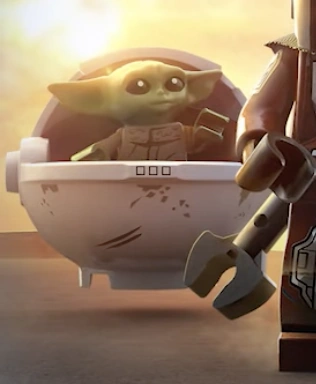
| |
| Han Solo (Classic) | Scoundrel | 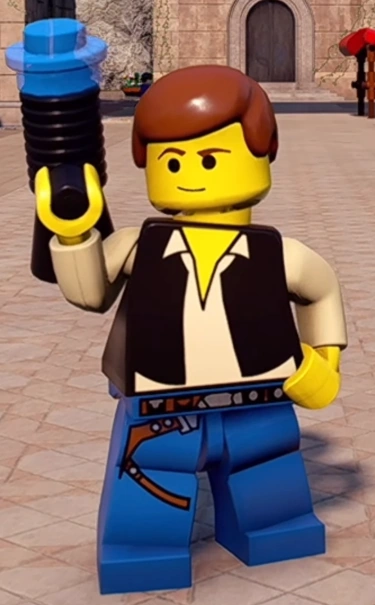
| |
| Han Solo (Young) | Scoundrel | 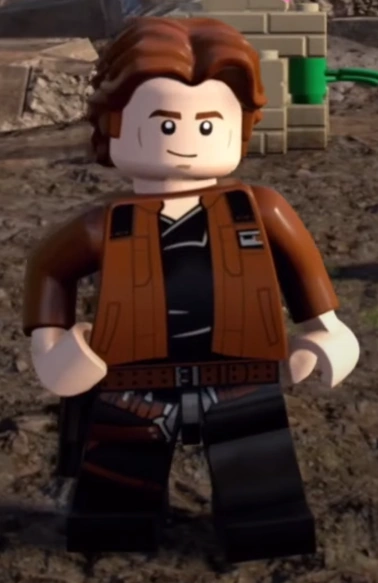
| |
| Hunter | Hero | 
| |
| IG-11 | Bounty Hunter | 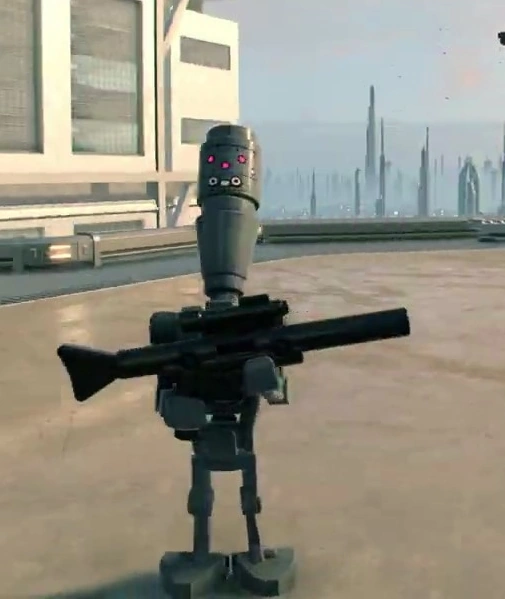
| |
| Death Trooper | Villain | 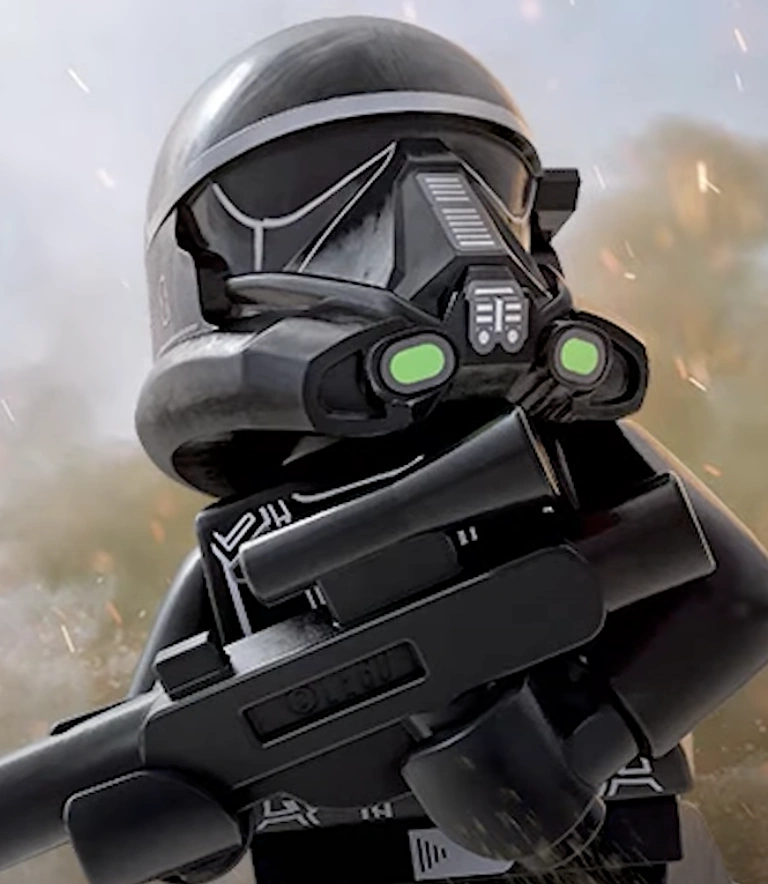
| |
| Shoretrooper | Villain | 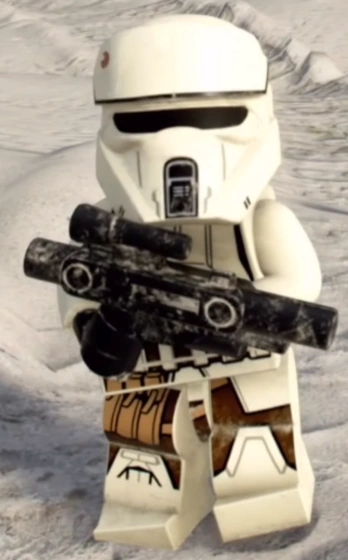
| |
| Incinerator Stormtrooper | Villain | 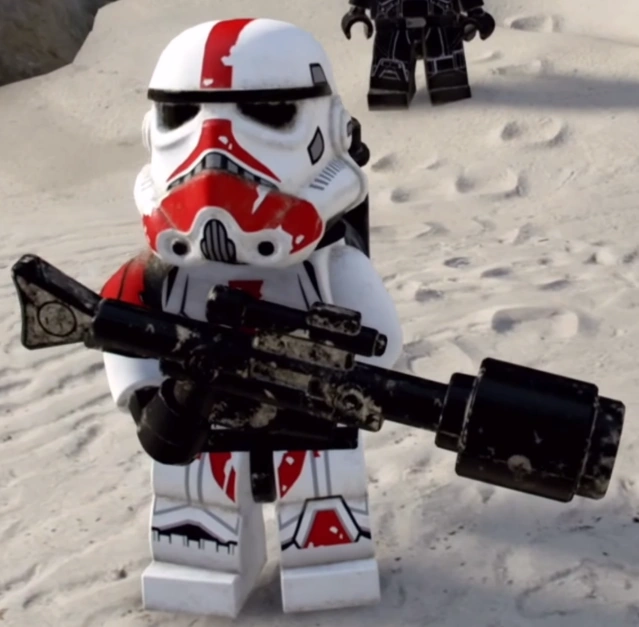
| |
| Jyn Erso | Hero | 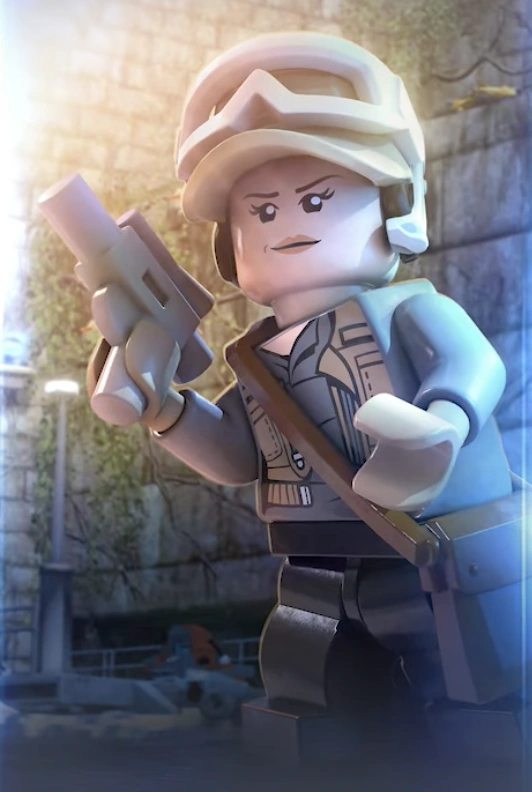
| |
| K-2SO | Extra | 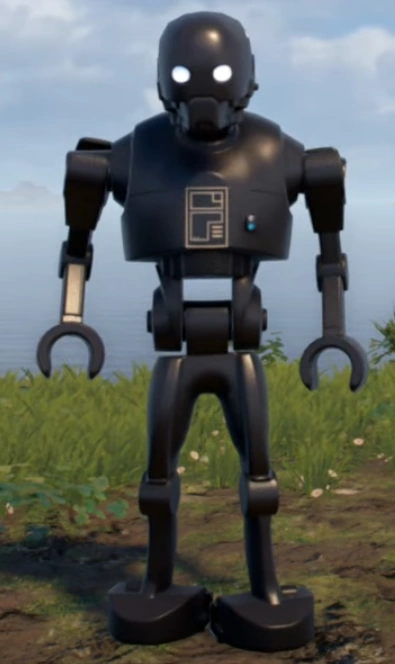
| |
| Kuiil | Hero | 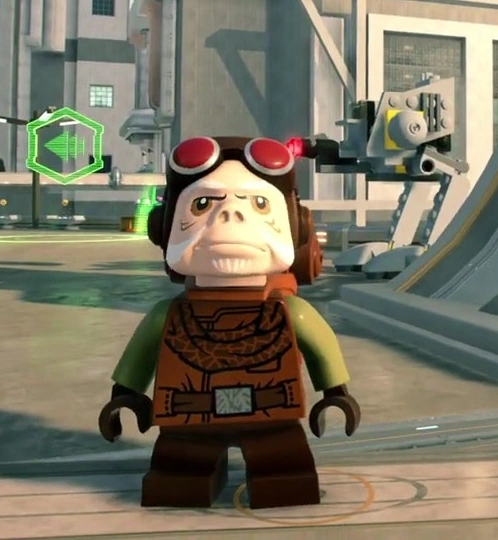
| |
| Lando Calrissian (Classic) | Scoundrel | 
| |
| Lando Calrissian (Young) | Scoundrel | 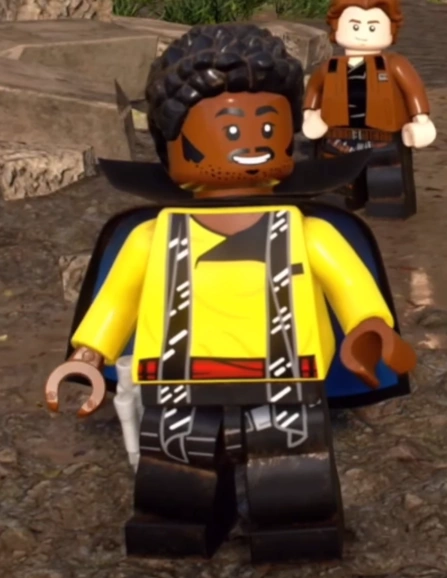
| |
| Luke Skywalker (Classic) | Jedi | 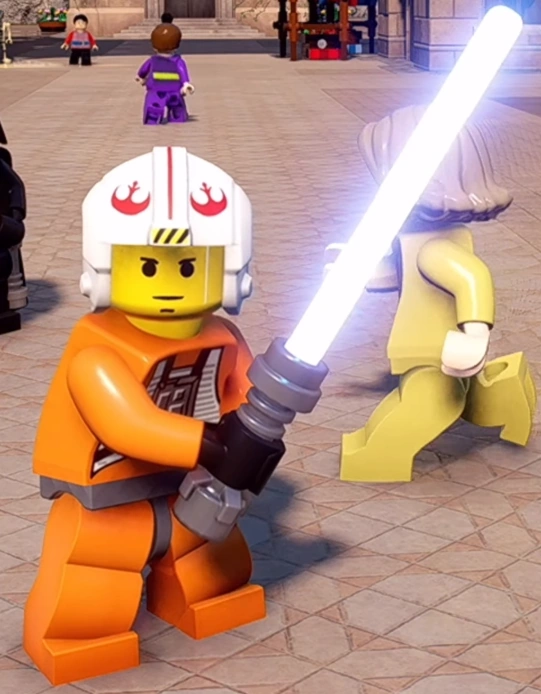
| |
| Mimban Stormtrooper | Villain | 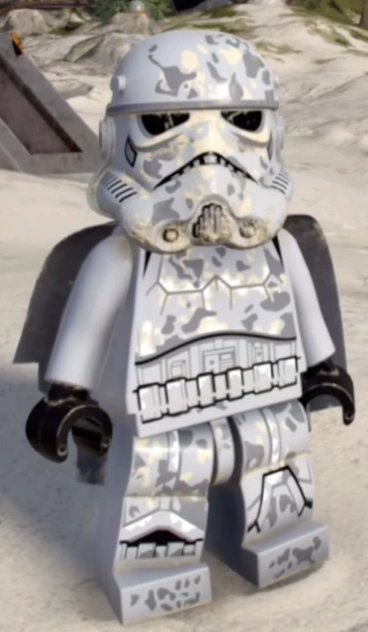
| |
| Moff Gideon | Villain | 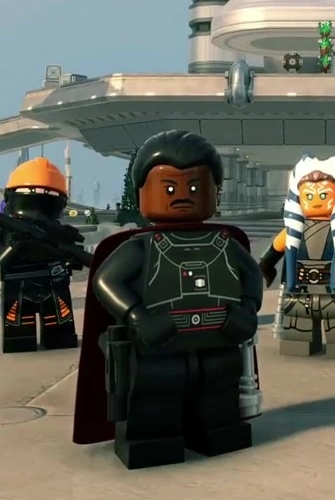
| |
| Obi-Wan Kenobi (Classic) | Jedi |
|

|
| Princess Leia (Classic) | Hero | 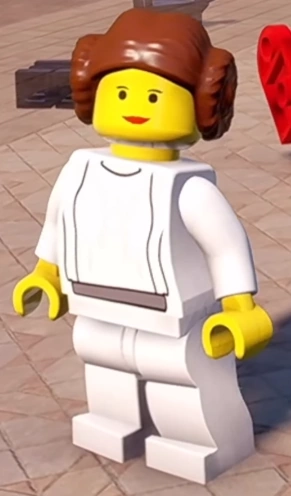
| |
| Qi'ra | Scoundrel | 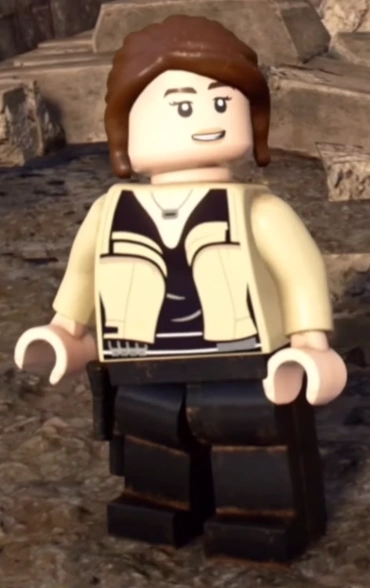
| |
| Range Trooper | Villain | 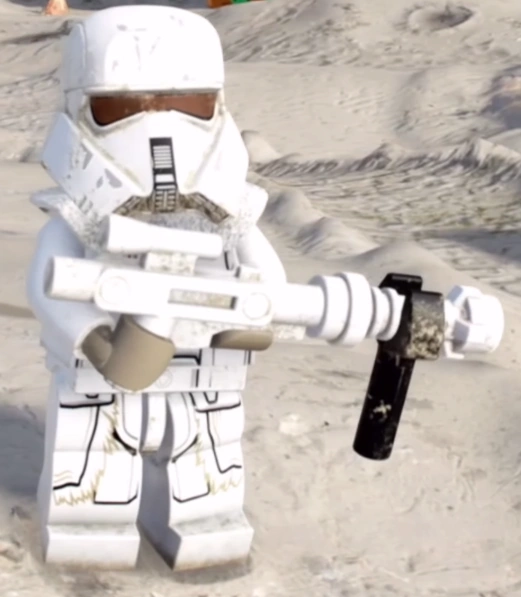
| |
| Tech | Hero | 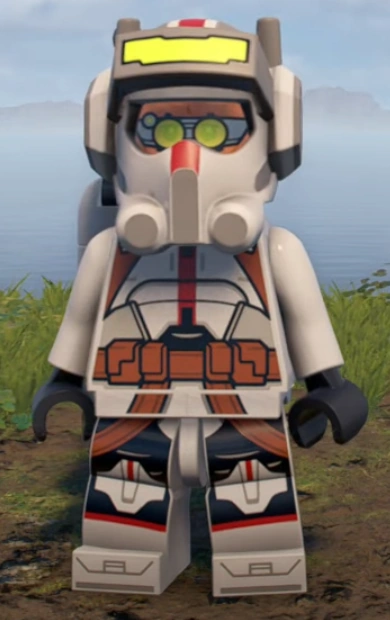
| |
| Tobias Beckett | Scoundrel | 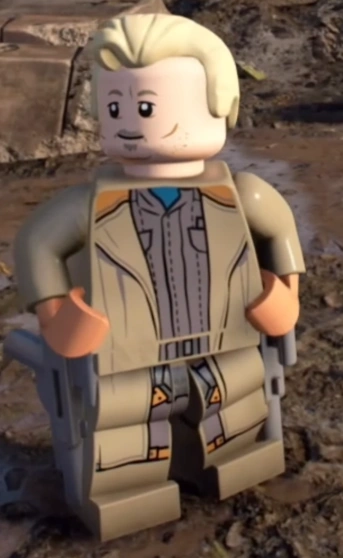
| |
| Wrecker | Hero | 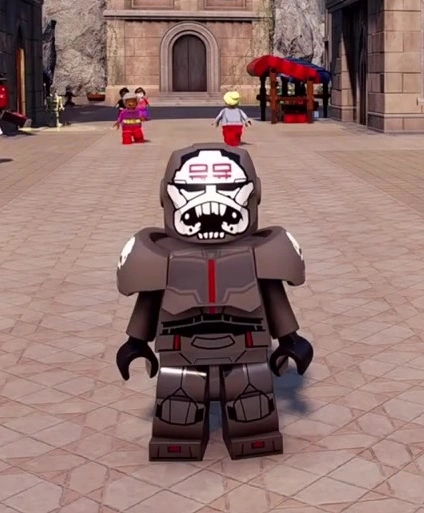
|
★ Indicates an ability is tied to Class Upgrades ♣ Indicates a character only unlockable with a cheat code
Vehicles
| Title | Class | Abilities | Image |
|---|---|---|---|
| AA-9 Freightor | Starship | ||
| ARC-170 Starfighter | Starship | ||
| Atmospheric Assault Lander | Starship | ||
| B-Wing Starfighter | Starship | ||
| BTA-NR2 Y-Wing | Starship | ||
| BTL-A4 Y-Wing | Starship | ||
| Bestoon Legacy | Starship | ||
| Boba Fett's Starship | Starship | ||
| CR90 Corvette (Tantive IV) | Starship | ||
| Count Dooku's Solar Sailer | Starship | ||
| Darth Maul's Scimitar | Starship | ||
| Darth Vader's TIE Advanced x1 | Starship | ||
| Droid Tri Fighter | Starship | ||
| Escape Pod | Starship | ||
| Falcon Escape Pod | Starship | ||
| First Order TIE Fighter | Starship | ||
| Fortitude | Starship | ||
| GNK Power Cruiser | Starship | ||
| General Grievous's Soulless One | Starship | ||
| Ghost | Starship | ||
| H-type Nubian Yacht | Starship | ||
| HMP Droid Gunship | Starship | ||
| IG-2000 | Starship | ||
| Imperial Lambda-Class Shuttle | Starship | ||
| Imperial Sentinel Landing Transport | Starship | ||
| J-type Star Skiff | Starship | ||
| Jango Fett's Starship | Starship | ||
| Jedi Interceptor | Starship | ||
| Jedi Starfighter | Starship | ||
| Kylo Ren's Command Shuttle | Starship | ||
| Kylo Ren's TIE Whisper | Starship | ||
| Libertine | Starship | ||
| Luke Skywalker's T-65 X-wing | Starship | ||
| MG-100 StarFortress SF-17 | Starship | ||
| Meson Martinet | Starship | ||
| Millennium Falcon (Episode IV - VI) | Starship | ||
| Millennium Falcon (Episode IX) | Starship | ||
| Millennium Falcon (Episode VII - VIII) | Starship | ||
| Mist Hunter | Starship | ||
| Naboo Royal Starship | Starship | ||
| Naboo Starfighter | Starship | ||
| Nantex-class Starfighter | Starship | ||
| Night Buzzard | Starship | ||
| Poe Dameron's Black One | Starship | ||
| Quad Jumper | Starship | ||
| RZ-1 A-wing | Starship | ||
| Republic Cruiser | Starship | ||
| Resistance A-wing | Starship | ||
| Resistance I-TS Transport | Starship | ||
| Resistance Transport | Starship | ||
| Resistance Transport Pod | Starship | ||
| Separatist Vulture Droid | Starship | ||
| T-70 X-wing | Starship | ||
| T-70 X-wing (Episode IX) | Starship | ||
| TIE Baron | Starship | ||
| TIE Bomber | Starship | ||
| TIE Bomber (Chrome) | Starship | ||
| TIE Dagger | Starship | ||
| TIE Fighter | Starship | ||
| TIE Interceptor | Starship | ||
| TIE/sf Space Superiority Fighter | Starship | ||
| Tallie Lintra's RZ-2 A-wing | Starship | ||
| The Razor Crest | Starship | ||
| Theta-class T-2c Shuttle | Starship | ||
| Trade Federation Shuttle | Starship | ||
| Trade Federation Vulture Droid | Starship | ||
| U-55 Orbital Loadlifter | Starship | ||
| V-wing Starfighter | Starship | ||
| Wookie Gunship | Starship | ||
| Xi-class Light Shuttle | Starship | ||
| YT-2400 Light Freighter | Starship | ||
| Death Star | Capital Ship | ||
| Death Star II | Capital Ship | ||
| Executor | Capital Ship | ||
| Fulminatrix | Capital Ship | ||
| Home One | Capital Ship | ||
| Invisible Hand | Capital Ship | ||
| Steadfast | Capital Ship | ||
| Venator | Capital Ship | ||
| Trade Federation Battleship | Capital Ship | ||
| Trade Federation Battleship (Micro) | Micro Ship | ||
| Naboo Royal Starship (Micro) | Micro Ship | ||
| Darth Maul's Scimitar (Micro) | Micro Ship | ||
| Trade Federation Landing Craft (Micro) | Micro Ship | ||
| Naboo Starfighter (Micro) | Micro Ship | ||
| Naboo Royal Cruiser (Micro) | Micro Ship | ||
| Jango's Starship (Micro) | Micro Ship | ||
| Jedi Starfighter (Micro) | Micro Ship | ||
| Republic Assault Ship (Micro) | Micro Ship | ||
| Count Dooku's Solar Sailer (Micro) | Micro Ship | ||
| Jedi Interceptor (Micro) | Micro Ship | ||
| Vulture Droid (Micro) | Micro Ship | ||
| ARC-170 Starfighter (Micro) | Micro Ship | ||
| V-wing (Micro) | Micro Ship | ||
| J-Type Star Skiff (Micro) | Micro Ship | ||
| Tantive IV Escape Pod (Micro) | Micro Ship | ||
| Millennium Falcon (Micro) | Micro Ship | ||
| Imperial TIE Fighter (Micro) | Micro Ship | ||
| Y-wing (Micro) | Micro Ship | ||
| Death Star (Micro) | Micro Ship | ||
| GR-75 Medium Transport (Micro) | Micro Ship | ||
| Imperial Star Destroyer (Micro) | Micro Ship | ||
| Imperial TIE Bomber (Micro) | Micro Ship | ||
| Boba Fett's Starship (Micro) | Micro Ship | ||
| Rebel X-wing (Micro) | Micro Ship | ||
| Super Star Destroyer (Micro) | Micro Ship | ||
| Rebel A-wing (Micro) | Micro Ship | ||
| Imperial Lambda-Class Shuttle (Micro) | Micro Ship | ||
| Imperial TIE Interceptor (Micro) | Micro Ship | ||
| Death Star II (Micro) | Micro Ship | ||
| Finalizer (Micro) | Micro Ship | ||
| First Order TIE Fighter (Micro) | Micro Ship | ||
| Eravana (Micro) | Micro Ship | ||
| Starkiller Base (Micro) | Micro Ship | ||
| Resistance X-wing (Micro) | Micro Ship | ||
| Resistance Y-wing (Micro) | Micro Ship | ||
| Libertine (Micro) | Micro Ship | ||
| TIE Silencer (Micro) | Micro Ship | ||
| Supremacy (Micro) | Micro Ship | ||
| Kylo Ren's Shuttle (Micro) | Micro Ship | ||
| Resistence A-Wing (Micro) | Micro Ship | ||
| Bestoon Legacy (Micro) | Micro Ship | ||
| TIE Dagger (Micro) | Micro Ship | ||
| Kylo Ren's TIE Whisper (Micro) | Micro Ship | ||
| Tantive IV (Micro) | Micro Ship |
Planets & Locations
Planets
- Ahch-To
- Ajan Kloss
- Bespin
- Administrator's Palace
- Carbonite Chamber
- Cantonica
- Canto Bight
- Coruscant
- Galactic City
- Grand Republic Medical Facility
- Uscru District
- Crait
- Crait Outpost
- Dagobah
- Yoda's Hut
- D'Qar
- Endor
- Endor Forest
- Bright Tree Village
- Exegol
- Sith Citadel
- Geonosis
- Droid Factory
- Petranaki Arena
- Hoth
- Echo Base
- Jakku
- Kamino
- Kashyyyk
- City of Kachirho
- Kef Bir
- Death Star Ruins
- Kijimi
- Mustafar
- Mining Facility
- Naboo
- Theed
- Theed Palace Hanger
- Theed Power Generator
- Pasaana
- Ilum
- Starkiller Base
- Takodana
- Tatooine
- Lars' Homestead
- Mos Espa
- Mos Eisley
- Jabba's Palace
- Jabba's Sail Barge
- Utapau
- Pau City
- Yavin 4
Non-Planetary Locations
- Death Star I
- Death Star II
- The Supremacy
- Tantive IV
- Saak'ak
- Venator Class Republic Flagship
- Invisible Hand
- Vuutun Palaa
Levels
| Name | Characters | Vehicles | Locations | Enemies | Boss |
|---|---|---|---|---|---|
Episode I: The Phantom Menace
| |||||
| Level 1: A Bigger Fish |
|
||||
| Level 2: The Boonta Eve Classic |
|
|
| ||
| Level 3: Better Call Maul |
|
|
|
| |
| Level 4: Outmanned But Not Out-Gungan-ed |
|
|
|
||
| Level 5: Now This is Podracing |
|
|
|
| |
Episode II: Attack of the Clones
| |||||
| Level 1: A Wrestle with Wesell |
|
|
| ||
| Level 2: The Hunt for Jango |
|
|
| ||
| Level 3: Droid Factory Frenzy |
|
|
|
||
| Level 4: Petranaki Panic |
|
|
|
| |
| Level 5: The Battle of the Jedi |
|
|
| ||
Episode III: Revenge of the Sith
| |||||
| Level 1: Out for the Count |
|
|
| ||
| Level 2: So Uncivilized |
|
|
|
| |
| Level 3: Droid Attack on the Wookiees |
|
|
|
||
| Level 4: Senate Showdown |
|
| |||
| Level 5: The High Ground |
|
|
| ||
Episode IV: A New Hope
| |||||
| Level 1: Boarding Party |
|
||||
| Level 2: Hunk of Junk |
|
|
|||
| Level 3: Best Leia'd Plans |
|
|
|
| |
| Level 4: This is Some Rescue |
|
|
|||
| Level 5: Stay on Target |
|
||||
Episode V: The Empire Strikes Back
| |||||
| Level 1: Hoth and Cold |
|
|
|||
| Level 2: Assault on Echo Base |
|
|
|||
| Level 3: Never Tell Me the Odds |
|
|
|||
| Level 4: Hibernation Station |
|
|
|
| |
| Level 5: Revelations! |
|
|
|
| |
Episode VI: Return of the Jedi
| |||||
| Level 1: A Plan to Save Han |
|
|
| ||
| Level 2: The Copa-Khetanna |
|
|
| ||
| Level 3: Endor the Line |
|
|
|||
| Level 4: The Chewbacca Defence |
|
|
|||
| Level 5: Fulfill your Destiny |
|
|
|
| |
Episode VII: The Force Awakens
| |||||
| Level 1: First Order of Business |
|
|
|||
| Level 2: Low Flying Garbage |
|
|
|||
| Level 3: Reap What You Solo |
|
|
|||
| Level 4: Starkiller Queen |
|
|
|||
| Level 5: Destroying Starkiller |
|
| |||
Episode VIII: The Last Jedi
| |||||
| Level 1: Dameron's Defiance |
|
|
|||
| Level 2: Master Codebreak-Out |
|
|
|||
| Level 3: No Snoke Without Fire |
|
|
| ||
| Level 4: Chrome Dome-Down |
|
|
| ||
| Level 5: Ground A-Salt |
|
|
| ||
Episode IX: The Rise of Skywalker
| |||||
| Level 1: A Skip and a Jump |
|
|
|||
| Level 2: They Fly Now! |
|
|
|||
| Level 3: C-3P-Oh no |
|
|
|||
| Level 4: The Strength to Do It |
|
| |||
| Level 5: Be With Me |
|
| |||
Achievements/Trophies
| Image | Title | Description |
|---|---|---|
|
A long time ago in a galaxy far, far away.... | Collect all achievements |

|
The Phantom Menace | Complete "Episode I - The Phantom Menace" |

|
Attack of the Clones | Complete "Episode II - Attack of the Clones" |

|
Revenge of the Sith | Complete "Episode III - Revenge of the Sith" |

|
A New Hope | Complete "Episode IV - A New Hope" |

|
The Empire Strikes Back | Complete "Episode V - The Empire Strikes Back" |

|
Return of the Jedi | Complete "Episode VI - Return of the Jedi" |

|
The Force Awakens | Complete "Episode VII - The Force Awakens" |

|
The Last Jedi | Complete "Episode VIII - The Last Jedi" |

|
The Rise of Skywalker | Complete "Episode IX - The Rise of Skywalker" |
|
"It's true... all of it" | Complete The Skywalker Saga |

|
The Arkanis Sector | Complete all events on Geonosis and Tatooine |

|
Greater Javin | Complete all events on Bespin, Crait and Hoth |
|
New Territories | Complete all events on Cantonica, Yavin 4 and Ajan Kloss |
|
Rishi Maze | Complete all events on Kamino |
|
The Interior | Complete all events on Coruscant, Jakku and Takodana |

|
The Slice | Complete all events on Kashyyyk and Kijimi |
|
Trailing Sectors | Complete all events on D'Qar, Naboo and Pasaana |
|
Unknown Regions | Complete all events on Ahch-To, Endor, Kef Bir and Exegol |

|
Western Reaches | Complete all events on Dagobah, Mustafar, Utapau |
|
"You think you're some kind of Jedi?" | Achieve True Jedi in a single level |
|
"Now I am the Master" | Achieve True Jedi in every level |
|
"Impressive, most impressive" | Complete all 'Level Challenges' in a single level |
|
"No more training, do you require" | Complete all 'Level Challenges' |
|
"A fine addition to my collection" | Collect all Minikits in a single level |

|
"You needn't worry about your reward" | Collect all Minikits |
|
"Raw, untamed power" | Fully upgrade a character class |
|
"Power! Unlimited power!" | Fully upgrade all of the character classes |
|
"What have you done with those plans?" | Collect every datacard |
|
"You may fire when ready" | Collect 1000 Kyber Bricks |

|
"Hello there!" | Collect all characters |

|
"See you around, kid" | Complete all of the events in the Galaxy |
|
"The fastest hunk of junk in the galaxy" | Complete all races in the Galaxy |

|
"Do or do not. There is no try" | Complete all Galaxy Challenges |

|
"Jedi Business" | Use Jedi Mind Tricks to make 5 people fight simultaneously in the Cantina |

|
"I've never seen a real one!" | Ride all creatures throughout the Galaxy |

|
"You guys got yourself a ship!" | Earn 17,000 studs |

|
"Only one business in the Galaxy..." | Earn 10,000,000,000 studs |
|
"Get the crews to their fighters" | Destroy 100 TIE fighters |

|
"Aggressive Negotiations" | Defeat 3 enemies at the same time with an explosion |
|
"And who gave you permission...?" | Shoot helmets off 50 enemies |
|
"A little short for a Stormtrooper..." | Create 25 disguises as a Hero character |
|
"I don't like you either!" | Achieve a combat multiplier score of 30 |

|
"Hey, what are you trying to push on us?" | Complete all the Jawa's "Faulty Droid" missions on Tatooine |

|
"GONK!" | Complete all the GNK droid escort missions |
|
"I can fly anything" | Complete a flight level without dying |
Pre-order Bonuses
 |  |
| Han Solo Steelbook (Best Buy)[1] | Darth Vader Keyring (WB Shop UK)[2] |
Notes
- Bounty Hunter Missions make their return from LEGO Star Wars: The Complete Saga and LEGO Star Wars III: The Clone Wars.
- The Deluxe Edition includes a special cover featuring Darth Vader (with and without his helmet), the Base Game, The Character Collection Bundle, and an exclusive Luke Skywalker with Blue Milk minifigure.
- The Character Collection Bundle includes 7 DLC Packs: The Mandalorian 1, The Mandalorian 2, Rogue One: A Star Wars Story, Solo: A Star Wars Story, Classic Characters, Star Wars: The Bad Batch, and the Trooper Pack.
- This is the first LEGO game to use the NTT engine, as well as to be the first one released for the PlayStation 5 and Xbox Series X/S, and thus, the 9th generation of consoles.
- This is the first TT developed Lego game since BIONICLE Heroes to lack a customization feature. [3]
- This is the fourth LEGO game to not feature Gold Bricks as the main collectible, after Mithril Bricks in both LEGO The Lord of the Rings: The Video Game and LEGO The Hobbit: The Video Game, and Master Pieces in The LEGO Movie 2 Videogame. Kyber Bricks act as their replacement, however, and fulfill a similar role.
- Like Gold Bricks, they are collected around the game by completing levels, achieving the stud goals, and completing puzzles. Unlike Gold Bricks, however, they are spent on an Upgrades system new to the LEGO game series. As expected, there are exactly the right amount in the game to get all upgrades.
- This is the first Lego game since LEGO Harry Potter: Years 5-7 to lack voice acting, albeit as an optional mode.
- According to former TT Games employees, the NTT engine was controversial within the development team, with some demanding they use Unreal Engine 4 instead, due to its difficulty to use, with some animations taking hours more than they did with the old engine. In addition, the game suffered through crunch, leading to some employees to quit TT Games altogether. [4]
- According to unused strings in the game's files, the game has leftover code from The Complete Saga on PS3.[5]
Gallery
")
")
")
")
")
")
")
")
")
")
")
")
")
")
")
")
")
")
")
")
Videos
")
")
")
")
")
References
- ↑ https://www.brickfanatics.com/lego-star-wars-the-skywalker-saga-steelbook-revealed/
- ↑ https://twitter.com/wbshopuk/status/1280556937898229760?s=21
- ↑ https://twitter.com/TTGames/status/1507018421153673224
- ↑ https://www.polygon.com/features/22891555/lego-star-wars-the-skywalker-saga-has-led-to-extensive-crunch-at-tt-games
- ↑ https://tcrf.net/LEGO_Star_Wars:_The_Skywalker_Saga#PS3_Strings